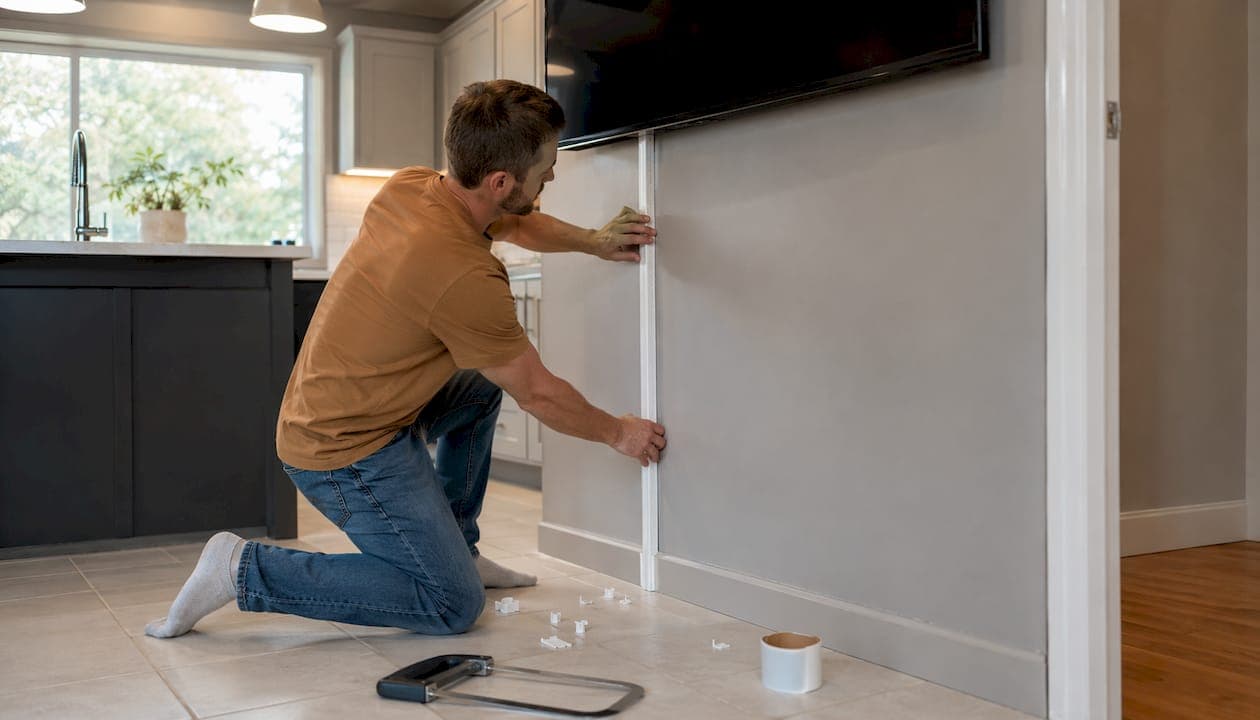
Surface-mounted cable raceways are the industry standard for hiding wires from a mounted TV without cutting into your wall. They are paintable, removable, and cost between $10 and $30, making them the go-to solution for renters and homeowners alike. Furniture placement and adhesive cable clips round out the toolkit, giving you three solid methods that protect your walls and your security deposit. This guide walks you through each approach with step-by-step detail so you get a clean, professional result the first time.
What tools and materials do you need to hide TV wires without cutting walls?
The right materials make the difference between a clean install and a messy one. Gather everything before you start so you are not stopping mid-project.
Cable raceways are the core product. They come in three main types:
- Adhesive raceways attach directly to drywall with peel-and-stick tape. They work on smooth, painted surfaces and remove cleanly when you leave.
- Paintable raceways have a flat white finish that accepts latex paint. They are the best choice when you want the raceway to disappear against the wall.
- Wide-body raceways hold larger cable bundles. Apply the double-capacity rule and choose a raceway at least twice the width of your current cable bundle. That way you have room to add cables later without buying new raceways.
Supporting materials you will need:
- Rubbing alcohol and a clean cloth for wall prep
- A level to keep raceway runs straight
- A hacksaw or utility knife to cut raceways to length
- Adhesive cable clips for individual wire routing
- Fabric cable sleeves for bundling multiple cords together
- Matching latex paint and a small brush if you plan to paint raceways
Safety note: NEC 400.8 requires that power cords and low-voltage cables like HDMI and Ethernet run in separate channels. Never bundle them together in a single enclosed raceway. Use a divided-channel raceway or run two parallel raceways side by side.
| Material | Purpose | Approximate Cost |
|---|---|---|
| Paintable adhesive raceway | Primary wire channel | $10–$30 |
| Rubbing alcohol | Wall surface prep | $2–$5 |
| Adhesive cable clips | Individual wire routing | $5–$10 |
| Fabric cable sleeve | Bundle multiple cords | $8–$15 |
| Small paintbrush and latex paint | Blending raceway to wall | $5–$15 |
How to install paintable cable raceways without cutting walls
This is the most effective method for concealing TV cables without drilling or cutting drywall. Paintable raceways cost $10–$30 and take 30–60 minutes to install. They deliver 90% of the visual result of an in-wall solution at a fraction of the cost and with zero drywall repair.
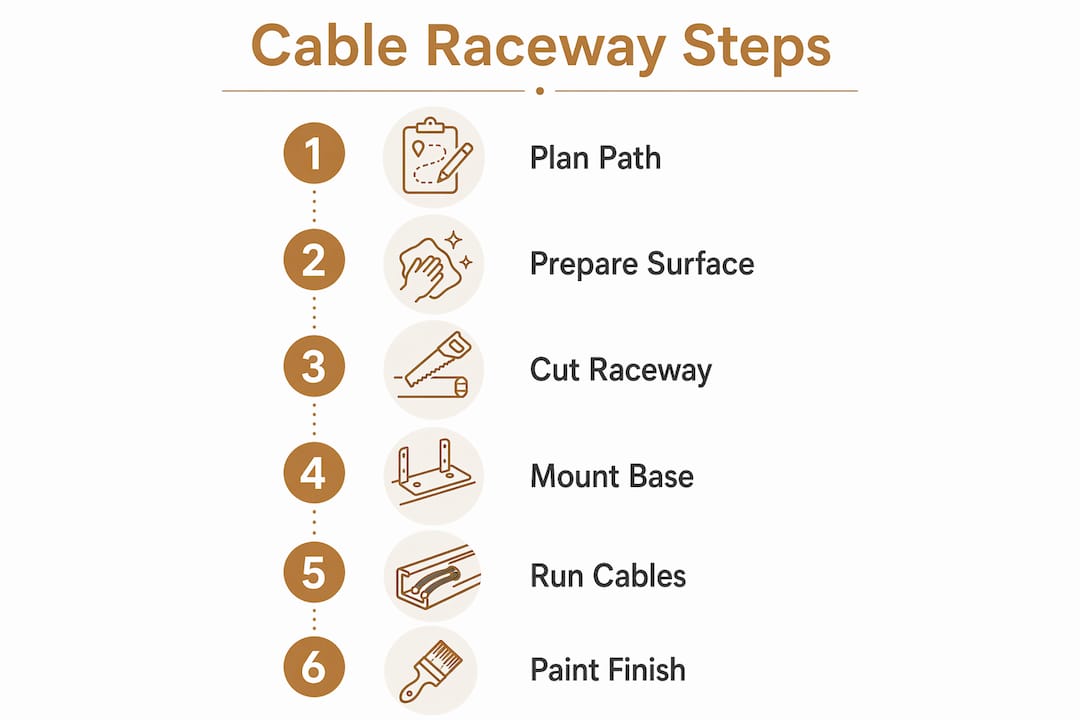
Step 1: Plan your cable path
Map the full route from your TV mount down to your media console or outlet before you touch the wall. Planning the entire cable path before mounting prevents awkward cable drops and misplaced raceways. Run cables vertically down the wall from the TV, then turn horizontally along the baseboard to reach your outlet or equipment. Use corner pieces where the raceway changes direction. Keeping runs close to architectural features like door frames or baseboards makes them far less visible.
Step 2: Prepare the wall surface
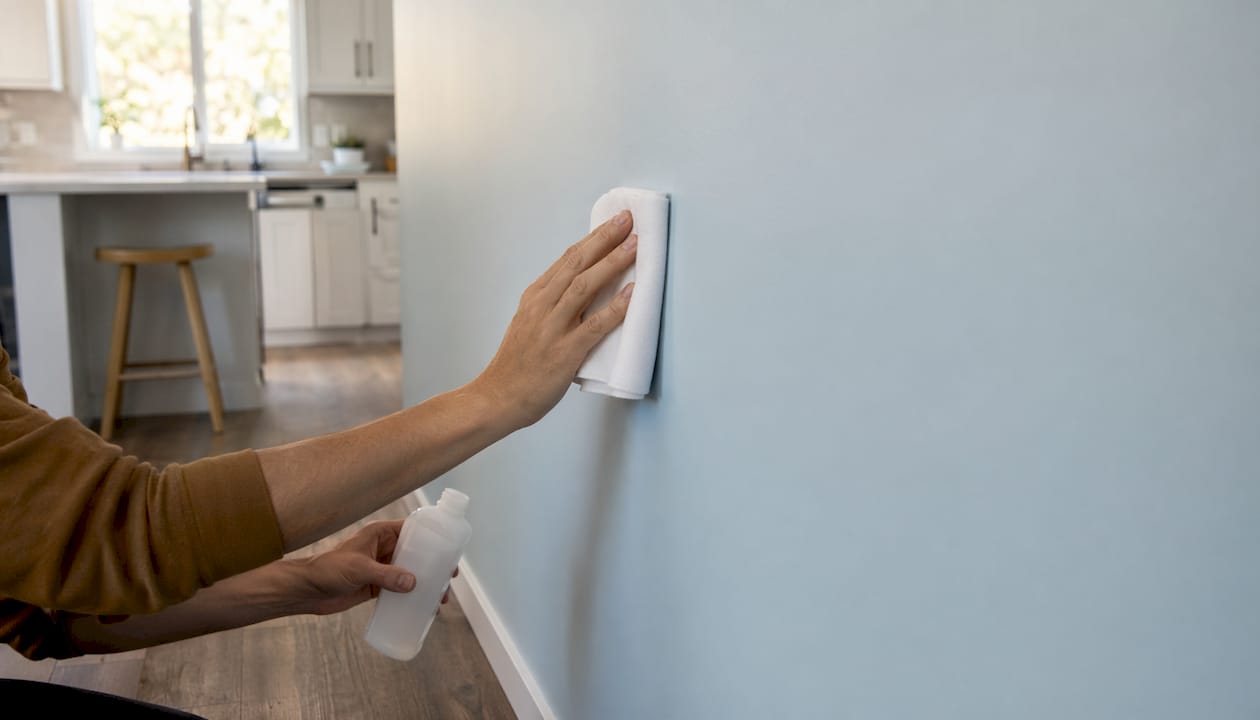
Wipe the wall with rubbing alcohol where the raceway will sit. Let it dry completely before applying any adhesive. Dust, grease, or residue will cause the adhesive to fail within days. This step takes two minutes and prevents the most common installation failure.
Step 3: Cut and fit the raceway
Measure each segment of your planned route and cut the raceway base and cover to length with a hacksaw. Test fit each piece before peeling the adhesive backing. Dry-fitting first lets you catch measurement errors without wasting materials.
Step 4: Mount the raceway base
Peel the adhesive backing and press the raceway base firmly against the wall for 30 seconds per section. Start at the top near the TV mount and work downward. Use a level on vertical runs to keep lines straight. Crooked raceways are the most common visual giveaway that the installation is DIY.
Step 5: Run and organize cables
Lay cables inside the raceway channel with a small amount of slack at each end. Securing cables with proper slack avoids bulging covers and prevents strain on connectors. Do not pull cables tight. Snap the raceway cover over the base once cables are in place.
Pro Tip: Run power and low-voltage cables in separate raceway channels from the start. Retrofitting a divided channel after installation is far more work than doing it right the first time.
Step 6: Paint the raceway
Sand, prime, and apply 2–3 thin coats of matching latex paint for the best result. Painting the raceway before installation produces a cleaner finish because you can coat all sides evenly. Let each coat dry fully before adding the next. When color-matched and viewed from 8 feet or more, painted raceways are often indistinguishable from the surrounding wall.
| Step | Key Action | Common Mistake |
|---|---|---|
| Plan path | Map full route before mounting | Skipping corners, awkward drops |
| Prep wall | Clean with rubbing alcohol | Skipping prep, adhesive fails |
| Cut raceway | Dry-fit before sticking | Cutting too short, gaps at joints |
| Run cables | Leave slack at each end | Pulling cables tight, bulging cover |
| Paint | 2–3 thin coats after priming | One thick coat, visible texture |
How to use furniture and other non-invasive solutions to hide wires
Furniture placement is the fastest zero-contact method for hiding TV cables. Installations using furniture routing complete in under 30 minutes with no wall modifications at all. The approach works best when you have a media console, bookshelf, or tall narrow cabinet positioned directly below the mounted TV.
Furniture placement strategy
Position a tall, narrow piece of furniture directly beneath the TV so its back panel sits close to the wall. Route cables down the back of the TV mount and behind the furniture. The back panel hides the vertical cable drop completely. A floating shelf mounted just below the TV achieves the same result on a smaller scale and keeps the look clean and minimal.
Adhesive cable clips and fabric sleeves
Adhesive cable clips attach to the wall or furniture surface and hold individual wires flat against a surface. They are fully removable and leave no marks on most painted walls. Fabric cable sleeves bundle multiple cords into a single tube, which looks far neater than a cluster of loose wires. Use sleeves for the section of cable that runs from the TV down to the furniture, then transition to clips along the baseboard.
Pro Tip: Match the color of your cable sleeve to your wall or furniture for the least visible result. Black sleeves on a white wall draw the eye. White or gray sleeves on neutral walls nearly disappear.
Key advantages and limitations of furniture-based concealment:
- Advantage: Zero wall contact, no adhesive, no tools required
- Advantage: Fully reversible in under five minutes
- Advantage: Works in any rental without landlord approval
- Limitation: Only effective when furniture is positioned directly below the TV
- Limitation: Does not work for TVs mounted high on the wall with no furniture below
- Limitation: Cables remain exposed if furniture is moved
For cables that run along the floor, flat floor cord covers in wood-grain or neutral finishes sit flush against baseboards and protect cables from foot traffic. They snap open for easy access and require no tools to install.
Troubleshooting common problems when hiding TV cables without drilling
Most problems with surface-mounted cable concealment fall into four categories: adhesive failure, bulging raceways, code violations, and visible cable segments.
Adhesive failure is the most common issue. Testing adhesive on a small inconspicuous area before full installation confirms compatibility with your wall paint. Some flat or matte paints do not hold adhesive well. If the test patch peels the paint, switch to a raceway with a lighter adhesive or use removable mounting strips instead. Proper removal at move-out prevents security deposit deductions.
Bulging raceway covers signal too many cables or too much slack packed into a single channel. Remove the cover, redistribute cables evenly, and fold any excess slack into a flat loop before reseating the cover.
Running power cords and low-voltage cables in the same enclosed raceway violates NEC 400.8 and creates a real electrical hazard. Use divided-channel raceways or run two separate raceways side by side. This is not optional. It is a code requirement that protects your home and your devices.
Visible cable segments usually result from poor path planning. Routing cables horizontally along baseboards with corner pieces keeps them below eye level and far less noticeable than vertical drops in the middle of a wall. If a vertical run is unavoidable, position it at the edge of the TV mount where the mount bracket itself provides visual cover.
Reversibility is the final concern for renters. Remove raceways slowly at a 45-degree angle to minimize paint pull. Warm the adhesive with a hair dryer on low heat for 15–20 seconds before pulling. This softens the adhesive and dramatically reduces the chance of wall damage.
Key Takeaways
Surface-mounted paintable raceways are the most effective, renter-friendly method to conceal TV cables without cutting into drywall, delivering near-invisible results at low cost.
| Point | Details |
|---|---|
| Raceways are the top method | Paintable adhesive raceways cost $10–$30 and match 90% of in-wall aesthetics without drywall work. |
| Prep the wall first | Clean with rubbing alcohol and test adhesive on a small patch before full installation. |
| Separate power and data cables | NEC 400.8 requires power and low-voltage cables to run in separate channels to prevent hazards. |
| Size raceways for the future | Choose a raceway at least twice the width of your current cable bundle to allow for future additions. |
| Furniture works with zero wall contact | Positioning a console or shelf below the TV hides cables in under 30 minutes with no tools. |
Why raceways beat every other no-drill option I have seen
I have looked at a lot of wire concealment setups, and the gap between a well-executed raceway install and everything else is significant. Fabric sleeves and cable clips are useful for short runs, but they do not hold up visually over a longer vertical drop. The cable still moves, sags, and catches the light. A painted raceway sits flat and still.
The part most people skip is the paint. They install the raceway, see it is white, and decide it is close enough. It is not. Two coats of matching paint turn a visible plastic channel into something that reads as part of the wall. That step costs 20 minutes and makes the entire project look intentional rather than improvised.
The other thing worth saying: go wider than you think you need. I have seen installs where someone chose a raceway that fit their current three cables perfectly, then added a soundbar and a streaming device six months later and had nowhere to put the new cords. The double-capacity rule exists for exactly this reason. Buy the wider raceway now. You will not regret it.
For renters, the reversibility question matters more than anything else. A raceway removed carefully with a hair dryer leaves almost no trace. That is a better outcome than drilling, patching, and repainting when you move out. Check out the safe DIY wire hiding guide from Themediawallstore for a deeper look at renter-safe options that go beyond the basics.
— Jake
Complete your media wall with Themediawallstore
A clean cable run is the foundation of a great media wall setup. Once your wires are out of sight, the next step is building a wall that looks like it belongs in a design magazine.

Themediawallstore offers pre-cut, pre-labeled DIY media wall kits that integrate cable management directly into the design. Every kit ships with components sized and labeled for weekend assembly, no contractor required. The media wall accessories range includes cable management add-ons, floating consoles, and decorative panels that work alongside the raceway methods covered in this guide. Over 1,000 homeowners have used these kits to build high-end media setups at a fraction of custom-build prices, with risk-free returns and expert support included.
FAQ
What is the best way to hide TV wires without cutting the wall?
Paintable adhesive cable raceways are the best method. They cost $10–$30, install in 30–60 minutes, and deliver near-invisible results when color-matched to your wall.
Can I hide TV cables in an apartment without losing my deposit?
Yes. Test adhesive on a small wall patch first, then remove raceways slowly at a 45-degree angle with gentle heat from a hair dryer to prevent paint damage and protect your deposit.
Do I need to separate power and HDMI cables in a raceway?
NEC 400.8 requires power cords and low-voltage cables like HDMI and Ethernet to run in separate enclosed channels. Use a divided-channel raceway or two parallel raceways side by side.
How do I hide TV wires without any wall contact at all?
Position a media console or tall narrow shelf directly below the TV and route cables behind the furniture's back panel. This method requires no tools and completes in under 30 minutes.
How wide should a cable raceway be for a wall-mounted TV?
Choose a raceway at least twice the width of your current cable bundle. This leaves room for future cables and prevents the need to replace the raceway when you add new devices.