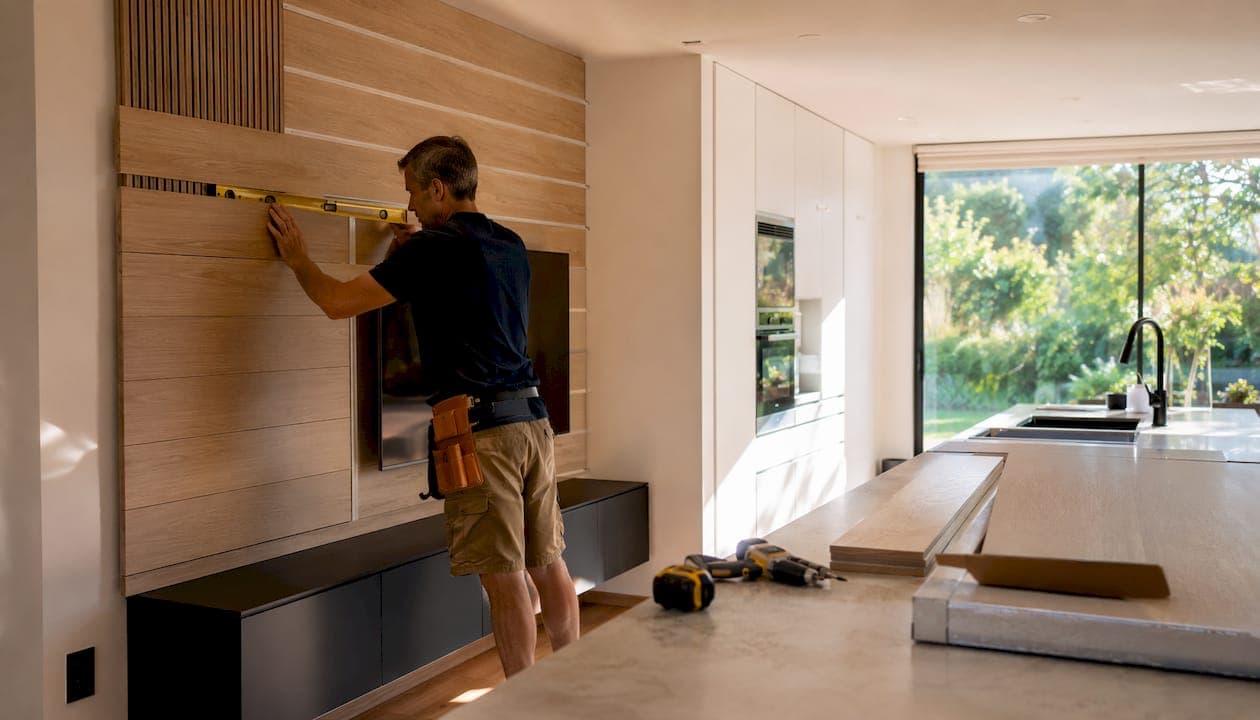
For a luxury DIY media wall, the most effective approach is a pre-cut, pre-labeled wall plank kit with integrated LED lighting, hidden wire management, and floating cabinetry options. These kits deliver custom-build aesthetics at a fraction of the cost and can realistically be installed over a single weekend. The difference between a wall that looks expensive and one that actually holds up comes down to a few non-negotiable specs:
- Class A fire rating with a flame spread index as low as 10
- 3M acrylic adhesive rated for up to 25 years of hold on properly prepped surfaces
- Modular design that supports TV mounting, fireplace integration, and media equipment clearance
- Pre-labeled panels that eliminate guesswork during installation
- Hidden wire channels planned into the kit architecture, not retrofitted
Themediawallstore builds every kit around these criteria. That is why over 1,000 homeowners have used their system to create entertainment spaces that look like they cost twice as much.
Table of Contents
- How do you design wall planks decor that looks truly luxurious?
- What materials and installation steps produce a professional-grade finish?
- Themediawallstore makes luxury media walls genuinely achievable
- Key Takeaways
- FAQ
How do you design wall planks decor that looks truly luxurious?
The single biggest mistake homeowners make is treating decorative wall panels as wallpaper — covering every surface and calling it done. Interior designers consistently push back on this. Expert design guidance frames wall planks as architectural elements that define focal points, not surface treatments applied indiscriminately.
For a media wall specifically, the TV or fireplace should anchor the composition. Planks frame that focal point and extend outward with intention, creating visual weight that draws the eye without competing with the screen. Breaking a large wall into defined zones — say, a plank field flanked by painted drywall — reads far more sophisticated than edge-to-edge coverage.
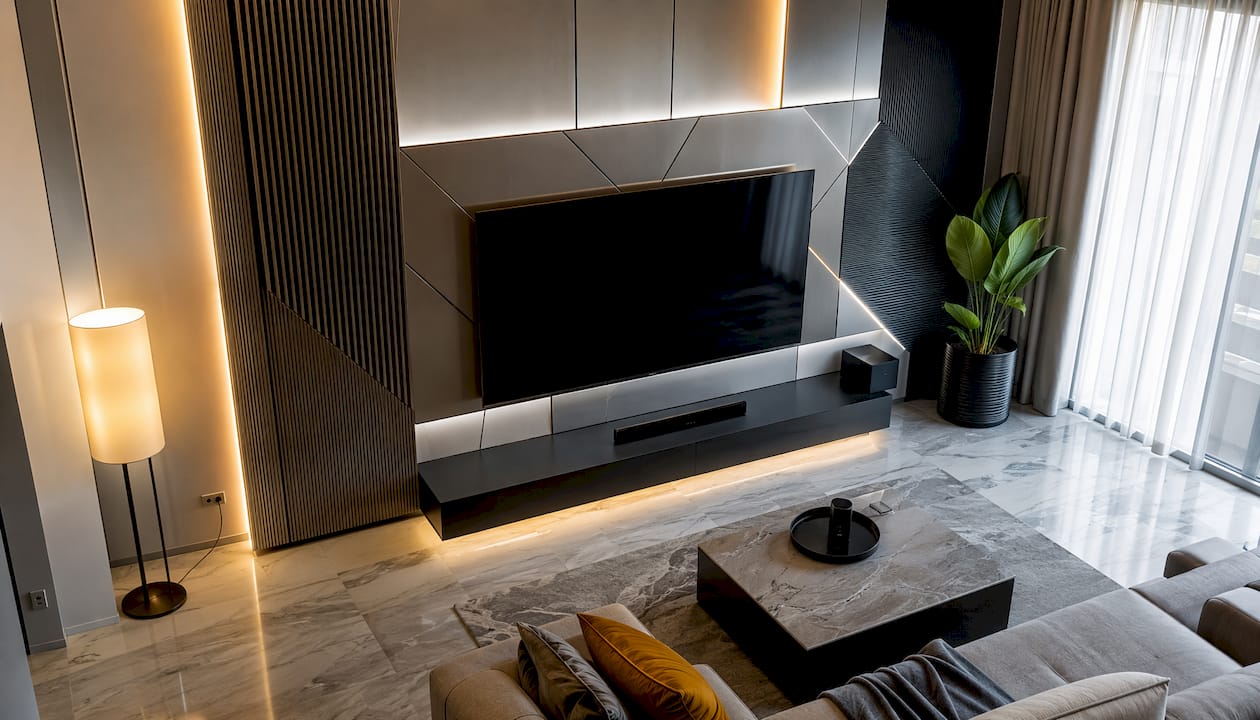
Texture is where luxury really separates itself from basic DIY. 3D relief and mosaic wood patterns add sculptural depth that flat planks simply cannot replicate. Embossed geometric surfaces and handcrafted wood mosaic tiles create a tactile quality that photographs beautifully and feels premium in person. Pair those with slat wall designs and the result reads closer to a designer showroom than a weekend project.
Pro Tip: Use a contrasting finish on the plank field versus surrounding walls. A walnut or smoked oak plank section against matte white drywall creates the kind of contrast that makes a room look professionally designed.
Key design principles for luxury results:
- Frame the TV or fireplace as the primary focal point; let planks support it, not compete with it
- Limit plank coverage to one defined wall or zone per room
- Mix textures: combine flat slat panels with a 3D mosaic accent section for depth
- Match plank tone to existing furniture for a cohesive, intentional feel
- Consider finish options — walnut, smoked oak, and stone-effect laminates each read differently under different lighting conditions
What materials and installation steps produce a professional-grade finish?
Understanding the specs that actually matter
Standard peel-and-stick planks generally have a thin profile, are about several inches wide and long, with each plank covering a moderate area. That slim profile matters more than most homeowners realize: it directly affects mounting bracket depth, conduit pathways, and how flush your TV sits against the finished wall.
| Attribute | Standard Peel-and-Stick | Premium Kit Panel |
|---|---|---|
| Thickness | thin profile | 1/4 in (MDF/3DL) |
| Adhesive | Basic acrylic | 3M acrylic with long-lasting hold |
| Fire rating | Varies | Class A fire rating with superior flame spread performance |
| Wire management | Not included | Integrated channels |
| Installation method | DIY peel-and-stick | Pre-cut, pre-labeled kit |
Surface prep is where most DIY projects fail
Textured drywall surfaces — orange peel finish especially — prevent strong adhesive bonding and cause early peeling. The fix is straightforward: skim coat or apply a thin hardboard backing before installation. Smooth, primed substrates are the baseline requirement, not an optional upgrade.
Wire routing needs to be mapped before the first plank goes up. At 1/8 inch thick, planks influence mounting bracket depth and conduit pathways in ways that become very difficult to correct after the fact.
Installation checklist
- Prep the surface: skim coat or apply hardboard over textured drywall
- Map all wire routes and mark hardware clearance zones before starting
- Snap a laser-leveled plumb line centered on the wall — starting off-center causes cumulative skew that becomes obvious at the edges
- Work outward from center to maintain symmetry around the focal point
- Press each plank firmly for full adhesive contact; use a rubber roller on seams
- Seal exposed edges with matching trim to protect against moisture and impact
- Allow full adhesive cure before mounting any hardware
True luxury finish also comes from professional-grade sealing and mounting hardware — not just the wood species or finish. That last 10% of effort is what separates a wall that looks installed from one that looks designed. Pairing your plank selection with the right interior design choices throughout the room amplifies the overall effect considerably.
Themediawallstore makes luxury media walls genuinely achievable
Custom media walls built from scratch typically run weeks of contractor time and thousands of dollars in labor. Themediawallstore cuts both by delivering pre-cut, pre-labeled DIY kits that arrive ready to assemble — no contractor required, no guesswork on cuts or sequencing.

Every kit includes integrated LED lighting, floating cabinetry options, and hidden wire management built into the panel architecture. The acoustic slat panels in smoked walnut are a standout option for homeowners who want both visual texture and sound absorption in one surface. With over 1,000 satisfied customers, risk-free returns, and direct expert support, Themediawallstore removes the two biggest barriers to a luxury result: cost and complexity. Browse the full kit range at themediawallstore.com/shop to find the configuration that fits your space.
Wall planks decor done right for a media wall comes down to three things: choosing a kit built around integrated features, applying sound design principles to frame your focal point, and executing installation with proper surface prep and alignment. Keep these points close:
- Select a pre-cut kit with Class A fire rating, 3M adhesive, and integrated wire management
- Treat planks as architectural framing for your TV or fireplace, not full-wall coverage
- Prep surfaces to smooth before any adhesive application
- Start from center with a laser plumb line to maintain symmetry
- Use Themediawallstore's kits for a complete, luxury-grade system without contractor costs
Key Takeaways
Wall planks decor for luxury media walls requires Class A fire-rated panels, proper surface preparation, center-anchored installation, and integrated wire management for a finish that holds up and looks designed.
| Point | Details |
|---|---|
| Fire and adhesive specs | Choose panels with a Class A fire rating and 3M acrylic adhesive rated for up to 25 years of hold. |
| Surface preparation | Skim coat or apply hardboard over textured drywall before any peel-and-stick installation. |
| Installation alignment | Snap a laser-leveled plumb line from wall center; off-center starts cause visible skew at edges. |
| Design framing | Use planks to frame the TV or fireplace as a focal point — not to cover the entire wall. |
| Themediawallstore kits | Pre-cut, pre-labeled kits with integrated LED lighting and wire management simplify the full project. |
FAQ
What are wall planks and how do they differ from standard panels?
Wall planks are narrow, elongated boards — typically 6 inches wide and 36 inches long — applied individually to create a linear wood texture. Unlike large sheet panels, planks allow staggered layouts and more precise focal-point framing.
What thickness should wall planks be for a media wall?
Standard peel-and-stick planks run approximately 1/8 inch thick, which affects TV mounting bracket depth and wire conduit planning. Premium kit panels often run 1/4 inch for added rigidity and a more substantial feel.
Do wall planks need a fire rating for residential use?
Class A fire-rated planks with a flame spread index as low as 10 are the standard for safe residential and commercial installation. Always verify the rating before purchasing for a media wall application.
Can you install wall plank decor without a contractor?
Yes. Pre-cut, pre-labeled kits from Themediawallstore are designed for weekend DIY installation, eliminating the need for contractors while delivering a luxury-grade result.
How do you prevent peel-and-stick planks from falling off the wall?
Surface preparation is the key factor. Planks adhere best to smooth, clean, primed walls — textured or unpainted drywall causes early failure. Apply a skim coat or hardboard backing on any rough surface before installation.