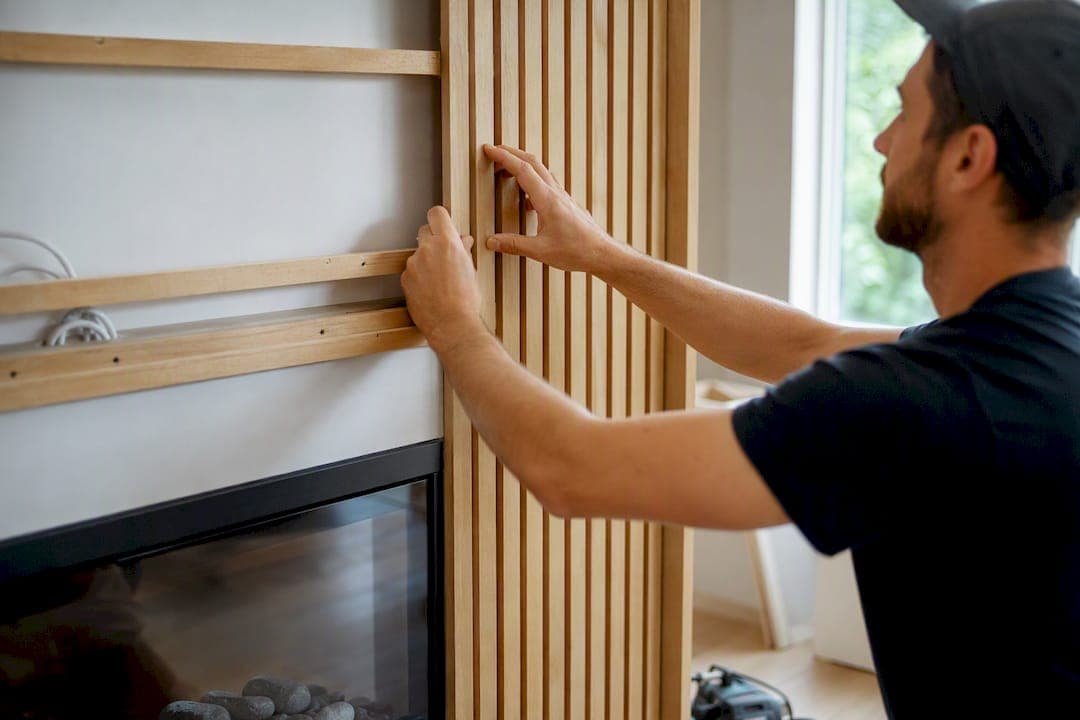
A fireplace media wall is a built-out feature wall that combines your TV, an electric fireplace, and finished cladding into one unified architectural surface. For most homeowners, the fastest way to get one that looks custom without a contractor's price tag is a low-profile linear electric fireplace paired with a pre-cut DIY kit like the ones from Themediawallstore.
You don't need a mason, an HVAC contractor, or six weeks of dust to pull this off. Electric inserts skip the flue and gas line entirely, and modern kits arrive pre-labeled with the framing, wiring channels, and cladding already sorted out.
Here's what this guide covers, in order:
- Design layouts and finish combinations that read as high-end, not homemade
- The exact measurements that keep your TV comfortable to watch
- Framing, electrical, and ventilation planning before you cut anything
- A step-by-step build sequence from design to final trim
- How to solve the classic TV-height-versus-fireplace-height conflict
- Where a pre-cut kit beats a custom build, and where it doesn't
Key Takeaways
A fireplace media wall succeeds when TV height (42 to 60 inches center screen), mantel depth (8 to 10 inches), and electrical rough-in happen before any cladding goes up.
| Point | Details |
|---|---|
| Nail TV height first | Keep the screen's center 42 to 60 inches from the floor for comfortable long-term viewing. |
| Choose linear fireplaces | Low-profile linear inserts keep the firebox short, which frees room to hit that TV height target. |
| Plan wall depth early | Budget 20 to 24 inches of wall depth for recessed inserts, conduit, and cable slack. |
| Frame blocking before drywall | Missing blocking for TV mounts and access panels is the top DIY reason walls get reopened. |
| Consider a pre-cut kit | Themediawallstore's luxury DIY kits arrive pre-cut and pre-labeled with wiring channels engineered in, cutting install time versus a from-scratch custom build. |
Table of Contents
- Fireplace TV Wall Design Ideas That Actually Hold Up
- How High Should Your TV Be Above the Fireplace?
- Choosing Cladding That Looks Custom and Hides Wiring Well
- Building the Wall: A Step-by-Step Sequence
- Solving the TV, Heat, and Sound Puzzle Together
- Should You Build Custom or Buy a Pre-Cut Kit?
- Ventilation and Heat Management for Media Walls With Fireplaces
- Safety Clearances You Cannot Skip
- Why the Measurements Matter More Than the Mood Board
- Get a High-End Fireplace Media Wall Without the Contractor Bill
- Sources
- FAQ
Fireplace TV Wall Design Ideas That Actually Hold Up
Most fireplace media wall failures aren't structural. They're aesthetic choices made before anyone measured anything. Pick your layout first, because it dictates everything from stud spacing to how deep your recess needs to be.
- Centered TV above a linear fireplace. The classic. Works best with a slim-profile insert so the TV doesn't end up mounted eight feet in the air.
- Off-center TV with the fireplace as the visual anchor. Puts art or a mirror above the fire and the TV to one side, often in a built-in bookshelf unit. Solves the "TV feels too high" problem completely.
- Recessed niche for the TV. The screen sits flush or near-flush in a shallow pocket, which makes it read as architecture instead of an appliance bolted to the wall. Design pros increasingly favor this over surface-mounting because concealed wiring and a niche treatment improve long-term satisfaction with how the wall looks day to day.
- TV adjacent to the fireplace in a built-in. Common in living rooms with an existing chimney breast or offset wall, where symmetry isn't possible or desired.
Finish pairings matter as much as layout. Stacked stone or ledger panels around a linear firebox with a floating wood mantel is the single most requested combination, and it photographs well because the texture contrast (rough stone, smooth mantel) reads as intentional. Large-format porcelain tile in a matte finish gives a similar high-end look with a cleaner, more contemporary edge. Vertical wood slats work well when you want warmth without the visual weight of stone, and they double as a way to hide seams. Painted panel wainscoting is the budget-friendly option that still looks tailored, especially in a two-tone scheme.
On scale: your fireplace should occupy roughly a third to half of the wall's total width, with your TV sized to sit comfortably above without overwhelming the mantel line. A 50-inch fireplace under a 65-inch TV on an 8-foot wall looks proportioned. The same setup on a 12-foot wall looks lost.
Budget-wise, expect a basic painted-panel build with a builder-grade insert to run at the low end, mid-range stone-and-tile combinations with a linear insert to land in the middle, and a full stacked-stone or large-format porcelain build with a premium recessed unit and integrated lighting at the top.
How High Should Your TV Be Above the Fireplace?
Center the TV screen 42 to 60 inches from the floor for comfortable, long-term viewing ergonomics, measured to the middle of the display, not the top of the frame. That range assumes typical seating with eye level around 42 inches when seated on a standard sofa.
Statistic Callout: The 42–60 Rule Design consultants use 42 to 60 inches as the standard center-screen height for living-room TVs. Anything higher forces neck strain during long viewing sessions, which is exactly what happens when a fireplace's firebox pushes the TV upward to clear the mantel.
This is where fireplace type becomes an ergonomic decision, not just a style choice. A tall, traditional-profile insert can force your TV up near or past the 60-inch ceiling just to leave room for a mantel and clearance. A low-profile linear electric fireplace solves this because the firebox itself is shorter, which frees up wall space and lets the TV sit lower without crowding the flame.
Before you order anything, work through this checklist:
- Confirm your wall's current depth and whether you need a framed bump-out (most recessed inserts want a 20 to 24 inch overall wall depth to fit the unit, conduit, and cable slack).
- Check the manufacturer's rough opening specs against your framing plan. Every insert brand differs slightly on width, height, and depth tolerances.
- Set mantel depth at 8 to 10 inches. That depth deflects rising heat away from the wall above and gives you display space without crowding the screen.
- Plan a dedicated outlet directly behind the TV location, ideally using a Power Bridge-style in-wall kit to route power without surface cords.
- Locate your electrical service panel and confirm whether the fireplace circuit needs its own dedicated line, which most 1,500-watt units require.
- Map low-voltage conduit runs for HDMI, ethernet, and speaker cable before drywall goes up.
Get these measurements locked before you buy a single stud. Reframing a wall because the rough opening does not fit properly is a common and avoidable DIY headache in this project.
Choosing Cladding That Looks Custom and Hides Wiring Well
Your finish choice needs to do three jobs: look good, survive daily use, and let you route wiring without exposing it. Not every material handles all three equally well.
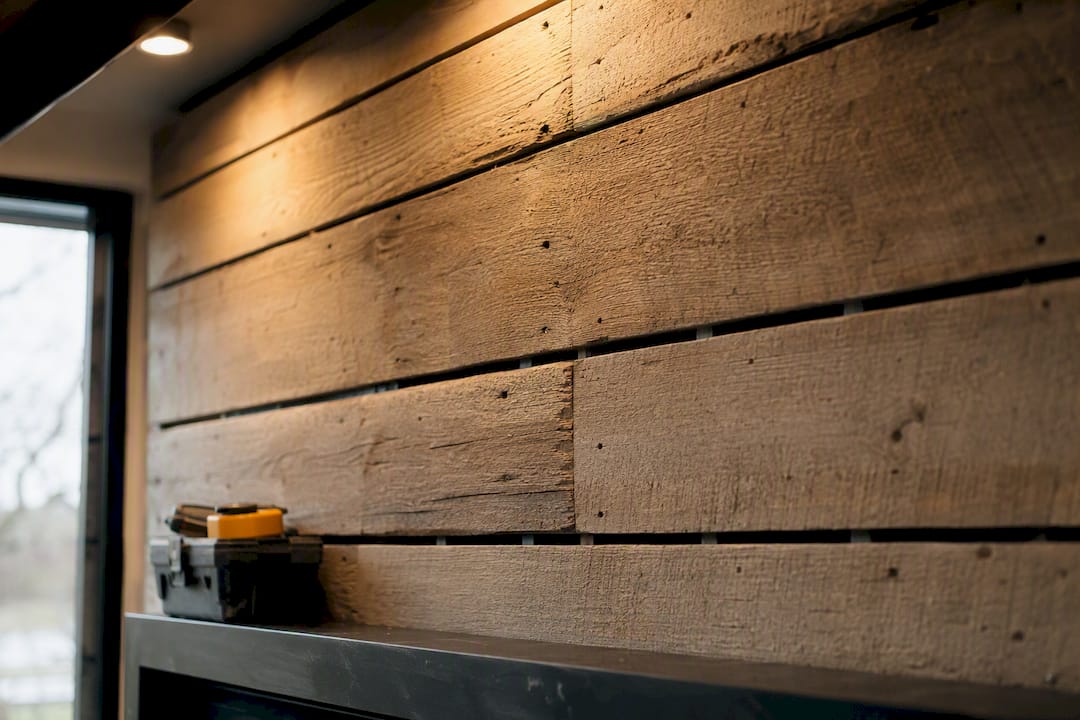
Stacked stone or ledger panels deliver the most dramatic texture and the strongest "custom build" impression. Material runs $8 to $15 per square foot, and installation is labor-intensive since each panel needs individual attention. Wiring has to be planned before the panels go up. Retrofitting a stone wall for a new cable run means chiseling.
Large-format porcelain tile (think 24x48 or larger) gives you a similarly upscale look for less. Pricing often lands under $12 per square foot, and the smooth surface is easier to clean and far more forgiving of minor wall imperfections than natural stone.
Vertical wood slats are the fastest-growing choice for media walls right now. They're forgiving to install, warm without being heavy, and slats naturally create channels you can route wiring behind before the final panel goes on.
Painted MDF panels and board-and-batten are the budget champions. Both go up fast, take paint beautifully, and are easy to cut access panels into later if you need to service wiring or the fireplace unit.
Pro Tip: Avoid busy, high-contrast textures directly behind your TV screen. A wall with dramatic stone veining or a bold pattern competes visually with the picture, and your eye ends up fighting the wall instead of watching the show. Save the boldest texture for the fireplace surround itself and keep the TV zone comparatively calm.
Whatever you choose, decide your finish before framing. Wiring paths, blocking locations, and access panel placement all depend on knowing whether you're cladding in half-inch tile or three-quarter-inch stone.
Building the Wall: A Step-by-Step Sequence
Skipping steps here is how DIYers end up reopening a finished wall. Follow this order and you won't.
- Finalize your design and measurements. Lock TV size, fireplace model, mantel depth, and wall layout before buying materials. Confirm your chosen insert's exact rough opening dimensions against your wall.
- Frame the stud wall or bump-out. Standard 2x4 framing works for surface-mounted units; recessed inserts typically need a framed-out bump-out to hit that 20 to 24 inch depth. Practitioners commonly build a shallow pop-out frame specifically to house the recessed unit and its conduit, which simplifies cable routing and sets a consistent depth for the cladding that follows.
- Install blocking for the TV mount and fireplace access panel. This is the step people forget. Missing blocking is the single most frequent DIY failure on this kind of build, and it forces you to reopen a finished wall to add support later. Put horizontal blocking wherever your TV mount plate or fireplace service panel will land.
- Run conduit and electrical rough-in. Low-voltage conduit for HDMI, ethernet, and speaker wire goes in now, along with the dedicated outlet for your fireplace and the in-wall power kit for your TV. If your fireplace draws more than a standard circuit can handle, or you're hardwiring rather than plugging in, bring in a licensed electrician for the new circuit.
- Install the fireplace rough-in per manufacturer specs. Confirm clearances to combustible materials from the unit's manual. Electric units run cool compared to gas or wood, but every manufacturer publishes its own clearance numbers, and they're not interchangeable across brands.
- Add blocking and mount plate for the TV. Confirm center-screen height lands in that 42 to 60 inch zone before you commit to final stud placement.
- Close up drywall or backer board and finish surfaces. This is where your chosen cladding, stone, tile, slats, or panel, gets installed over the framed structure.
- Install the fireplace unit and TV. Slide the insert into its finished opening, connect power, and mount the TV to its blocked plate.
- Final trim, test, and walkthrough. Run the fireplace through a full heat and remote-control cycle. Check TV mount stability, confirm access panels open cleanly, and verify nothing obstructs the fireplace's air intake or exhaust vents.
A few framing notes worth flagging separately: recessed inserts and wall-mounted units are not interchangeable in terms of framing. A recessed unit demands a true bump-out with a precise rough opening. A surface-mounted linear unit sits on the wall's face and only needs a power source and a mounting bracket, which is a far simpler build if your wall depth doesn't allow for a bump-out.
Solving the TV, Heat, and Sound Puzzle Together
The three things that make a media wall frustrating to live with, an uncomfortable TV height, heat worries, and muddy sound, all have straightforward fixes if you plan for them early.
On TV comfort: if your layout still puts the screen higher than you'd like, a tilting or drop-down mount (the MantelMount style, which pulls the TV down and forward for viewing then retracts flush against the wall) solves the problem after the fact. Off-center placement or a recessed niche avoids the issue from the start.
On heat: electric fireplaces produce negligible ambient wall heat compared to gas or wood-burning units, which is exactly why they've become the standard choice for media walls with a TV mounted nearby. That said, manufacturers still publish specific clearance numbers, and those numbers vary by brand and model. Always check the unit's manual rather than assuming "electric means no clearance needed."
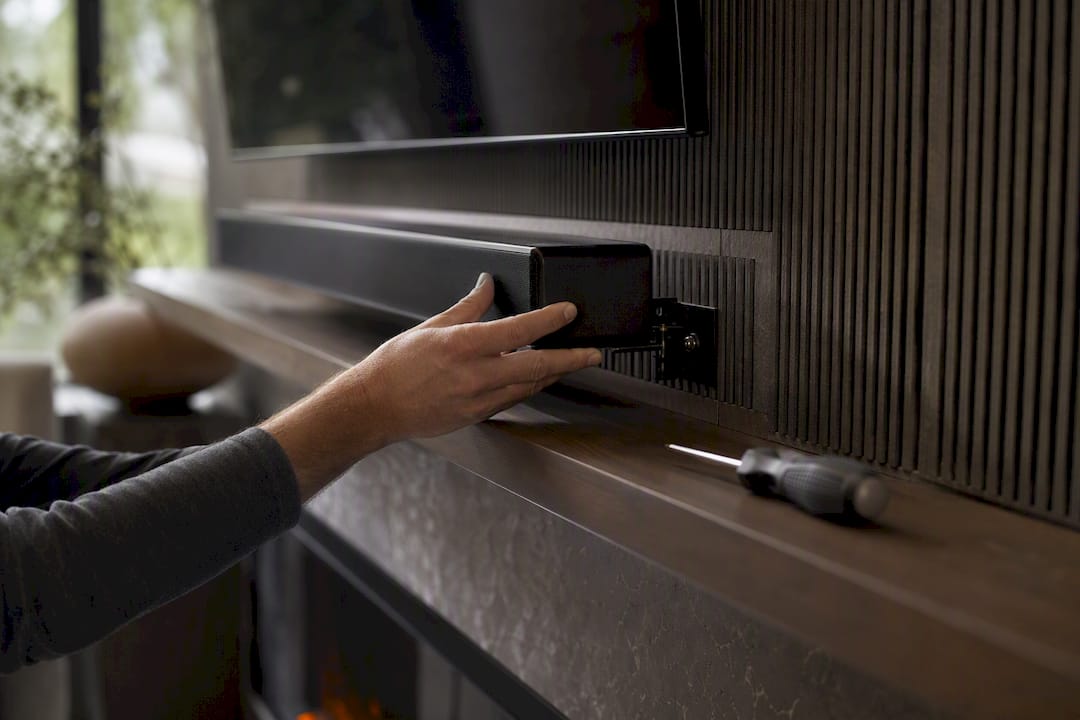
On sound: hiding speakers doesn't have to mean killing your audio quality. A soundbar tucked into a shallow shelf below the TV, or a slim in-wall speaker system with cables routed through the conduit you ran during framing, keeps the wall clean without sacrificing sound. Acoustic slat panels do double duty here, adding texture while softening reflections in a room full of hard surfaces like tile and glass.
On lighting: adjustable recessed lights aimed away from the screen prevent glare, and wall sconces flanking the fireplace add warmth without competing with the TV's brightness. Blackout shades handle daytime glare from windows, which is often the real culprit behind a washed-out picture, not the room's interior lighting at all.
Pro Tip: Test your TV's glare situation at the time of day you actually watch it most, not at noon. Evening glare from a west-facing window behaves completely differently than midday sun, and you'll want your sconce and shade plan to match your real viewing habits.
Should You Build Custom or Buy a Pre-Cut Kit?
A luxury DIY kit from Themediawallstore gets you the stacked-stone-and-linear-fireplace look without hiring a contractor. Panels arrive pre-cut and pre-labeled, with wiring channels and blocking locations already engineered into the design, which is the piece most DIYers get wrong on a scratch build.
A kit makes sense when your wall runs standard dimensions, you're pairing a common TV size with a compatible linear or recessed insert, and you're comfortable with basic tools over a weekend. Custom work still makes sense for irregular wall shapes, non-standard ceiling heights, or a completely bespoke layout that a modular kit can't accommodate.
Before ordering any kit, verify three things:
- The kit's rough opening matches your chosen electric insert's exact dimensions.
- Blocking and wire channels are included for your specific TV mount weight and location.
- Finish options available match the aesthetic you locked in during your design phase.
A wall that photographs like a magazine spread and installs like flat-pack furniture is not a contradiction. It's a design and engineering problem, solved once, then repeated for every customer.
Browse electric fireplace options built for media walls, check out recessed fireplace picks sized for common wall depths, or look at the accessories catalog for mantels and lighting that finish the look.
Ventilation and Heat Management for Media Walls With Fireplaces
Electric fireplaces don't need a flue, chimney, or external vent, which is a major reason they've become the default choice for homes without existing gas or chimney infrastructure. That said, "no venting required" doesn't mean "ignore airflow entirely."
Most electric inserts pull room air across a heating element and push it back out through a front-facing vent, so the space directly in front of the unit needs to stay clear. Blocking that airflow with furniture or a rug pushed too close won't cause a fire, but it will trip the unit's overheat sensor and shut it down, usually right when you want it most.
Inside the wall cavity itself, give the unit's electrical components a little breathing room. Even though wall heat is minimal, a fully sealed, insulated cavity with zero airflow can let heat build up around the wiring and control board over time. Leave the manufacturer's specified clearance around the unit's housing rather than packing insulation tight against it, and skip spray foam directly against the firebox housing unless the manual explicitly says it's rated for that.
If your build includes a service access panel (and it should), that panel doubles as passive ventilation for the cavity. Don't caulk or seal it shut during finishing. A few installers get the aesthetic itch to make the access panel invisible, but a flush, sealed panel that can't be opened defeats its entire purpose. Use a hidden magnetic latch instead so the panel stays flush but remains functional.
Safety Clearances You Cannot Skip
Every electric fireplace manufacturer publishes its own clearance specifications, and those numbers genuinely differ from brand to brand even though all electric units run cooler than gas or wood alternatives. Treat the specific unit's manual as the final word, not a general "electric is always safe" assumption.
At minimum, confirm these before finishing your wall:
- Clearance to combustible materials above and to the sides of the firebox, per that model's manual.
- Clearance between the top of the firebox and your TV or mantel, factoring in both the fireplace's heat spec and the TV manufacturer's own operating temperature range.
- Dedicated circuit requirements. Most inserts in the 1,400 to 1,500 watt range need their own circuit, not a shared line with other high-draw appliances.
- Accessible service panel for both the fireplace's electrical connection and the TV's power and signal wiring.
- Mantel depth relative to the manufacturer's heat deflection guidance. That 8 to 10 inch range mentioned earlier isn't arbitrary; it's tied to how far heat rises before dissipating.
If you're hardwiring the unit rather than using a standard plug, or adding a new dedicated circuit to your panel, that work goes to a licensed electrician. It's not a corner to cut, and in most jurisdictions it's not legal to skip anyway. The same goes for any structural changes to a load-bearing wall. A framed bump-out on a standard interior wall is a reasonable DIY project; altering a wall that's holding up your roof structure is not.
Why the Measurements Matter More Than the Mood Board
Most media wall content online is pure inspiration: gorgeous photos, zero specifics on how the TV ended up at a comfortable height or where the electrician ran the new circuit. That's backwards. The look is the easy part. Getting the ergonomics, the electrical, and the framing sequence right the first time is what actually determines whether you love this wall in five years or resent it.
The conventional advice to "just center the TV over the fireplace" ignores that traditional fireboxes push screens too high for comfortable viewing. That's not a style problem, it's a physics problem, and it's exactly why linear electric inserts have taken over this category. They solve the height conflict at the design stage instead of forcing a compromise later.
If there's one thing to prioritize before anything else, it's locking your rough opening and blocking plan against your actual fireplace and TV model specs. Everything else, finish choice, lighting, sound, is reversible. Reopening a finished wall because you skipped a measurement is not.
— Jake
Get a High-End Fireplace Media Wall Without the Contractor Bill
A custom-built stone-and-linear-fireplace media wall from a contractor typically means weeks of scheduling, a design consultation fee, and a final invoice that reflects all that labor. Themediawallstore's luxury DIY kits get you the same finished look with pre-cut, pre-labeled panels, integrated LED lighting, and hidden wire management already engineered in, installable over a weekend rather than a month.

If you followed the measurement guidance in this guide, a kit is the fastest way to execute it. Every panel is labeled for its exact spot on the wall, blocking and wire channels are already accounted for, and finish options range from stacked-stone looks to clean modern slats. Readers building around a recessed insert should check the Luxe Marble Glow Media Wall Kit for a premium finish with fireplace compatibility built in, or browse the Essential Modern Media Wall design for a cleaner, minimalist take.
Start by browsing the full kit catalog to find a design that matches your wall dimensions and TV size, and reach out for design support if your layout doesn't match a standard configuration.
Sources
- The perfect height for your TV - Vogel's
- Fireplace wall ideas with TV: Solve the layout problem for good - D and G Flooring
- Electric fireplace ideas with TV above - The Spruce
- How to Build a Media Wall with Electric Fireplace - US Fireplace Store
FAQ
What Height Should a TV Be Above a Fireplace?
Center the TV screen between 42 and 60 inches from the floor, per Vogel's mounting guidance. A low-profile linear fireplace makes it easier to hit this range without the screen ending up uncomfortably high.
Do Electric Fireplaces Need Ventilation?
No flue or chimney is required, since electric units don't burn fuel, but keep the front vent area clear of furniture and leave the manufacturer's recommended clearance around the housing inside the wall cavity.
How Deep Does a Media Wall Need to Be for a Recessed Fireplace?
Plan for roughly 20 to 24 inches of overall depth to fit the insert, conduit, and cable slack comfortably, though exact rough opening specs vary by fireplace model.
Is It Safe to Put a TV Above an Electric Fireplace?
Yes, since electric fireplaces generate minimal ambient wall heat compared to gas or wood units, but always confirm the specific model's clearance specs in its manual before finalizing TV placement.
Can I Install a Fireplace Media Wall Myself?
Many homeowners handle framing, cladding, and standard fireplace installation themselves, especially with a pre-cut kit like the ones from Themediawallstore. Hardwiring or adding a new electrical circuit should go to a licensed electrician.
What Mantel Depth Works Best Above an Electric Fireplace?
A mantel 8 to 10 inches deep deflects rising heat and gives you usable display space without crowding the TV or fireplace below it.
Do I Need a Dedicated Electrical Outlet for an Electric Fireplace?
Most inserts in the 1,400 to 1,500 watt range need a dedicated circuit rather than sharing a line with other appliances. Confirm your specific unit's electrical requirements before rough-in.
How Much Does a DIY Media Wall Kit Cost Compared to Custom Building?
A pre-cut kit from Themediawallstore is priced significantly below a fully custom contractor build, since panels arrive pre-cut and pre-labeled, cutting both labor time and design consultation costs.