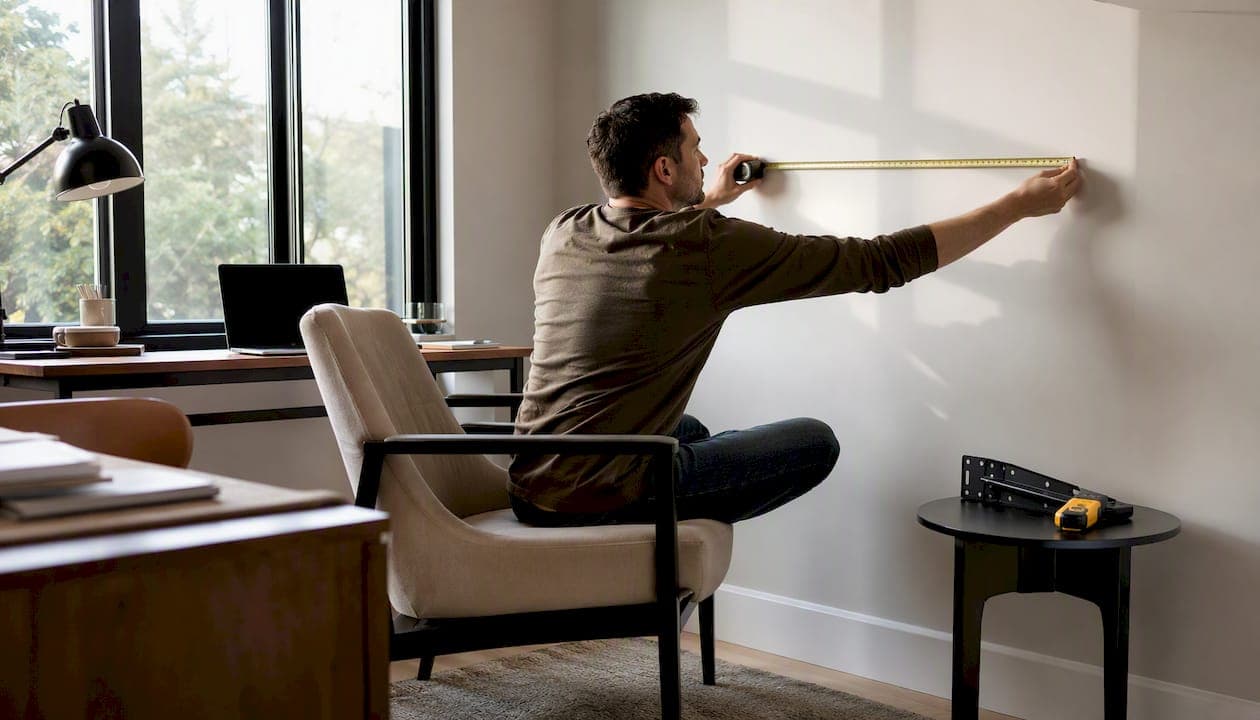
Place the center of your TV screen at your seated eye level. For most adults sitting on a standard sofa, that's roughly 42 inches from the floor — and that single number is where every good TV mount calculation starts. According to TaskRabbit's mounting guide, 42 inches to the center is the widely accepted industry baseline, though your actual eye height may vary by a few inches depending on your couch height and how you sit.
Before you drill anything, here are four quick starting points based on that 42-inch center target:
- 55" TV: bottom edge sits approximately 26–28 inches from the floor
- 65" TV: bottom edge sits approximately 24–26 inches from the floor
- 75" TV: bottom edge sits approximately 22–24 inches from the floor
- 85" TV: bottom edge sits approximately 20–22 inches from the floor
Your one-line action step: sit in your usual seat right now, have someone measure from the floor to your eye level, then use the calculation method below to mark your wall before touching a drill.
Key Takeaways
Mount the center of your TV at your personal seated eye level — the 42-inch baseline is a starting point, not a substitute for measuring your own eye height and running the calculation.
| Point | Details |
|---|---|
| Core rule | Place the TV center at seated eye level; the industry baseline is approximately 42 inches from the floor. |
| Custom calculation | Measure your eye height, divide TV height by two, subtract to find the bottom-edge placement. |
| Size reference | Bottom edge starting points: 55" at 26–28 in, 65" at 24–26 in, 75" at 22–24 in from the floor. |
| Mount type matters | Use a tilting mount for any above-eye-level install, including above fireplaces and in bedrooms. |
| Themediawallstore kits | Pre-cut kits with built-in TV center positions and wire channels reduce measuring errors and speed installation. |
Table of Contents
- How to calculate your TV mounting height
- Quick reference: suggested mounting heights by TV size
- Tricky placements: above fireplaces, in bedrooms, and corners
- How viewing distance affects perceived height and immersion
- Choosing the right mount and safe installation practices
- How to tell if your TV is mounted too high and quick fixes
- Why center-at-eye-level matters: ergonomics and how a media wall kit helps
- The faster path to a correctly mounted TV
- Sources
- FAQ
How to calculate your TV mounting height
The math is simpler than it looks. RoomyLab's mounting guide lays out the exact workflow:
- Measure your seated eye level. Sit in your normal viewing position and measure from the floor to your eyes. Most adults land between 40 and 45 inches.
- Find your TV's physical height. Measure the screen from top to bottom edge (not the diagonal). Divide that number by two to find the center point.
- Calculate the bottom-edge placement. Subtract half the TV height from your eye-level measurement. That result is where the bottom of the TV should sit.
Example: Your eye level is 42 inches. Your 65" TV is 33 inches tall, so half is 16.5 inches. Subtract: 42 minus 16.5 equals 25.5 inches. The bottom edge of the TV goes at 25.5 inches from the floor.
When you're measuring alone or for multiple viewers
If you're working solo, use a piece of painter's tape on the wall at your measured eye height, then step back and sit down to confirm it looks right. A laser level helps here — set it at eye height and project a line across the wall. For households with multiple regular viewers, measure each person's seated eye level and use the average. Kids' eye levels matter less for a shared living room TV; prioritize the adults who watch most often.
Accounting for soundbars, mantels, and trim
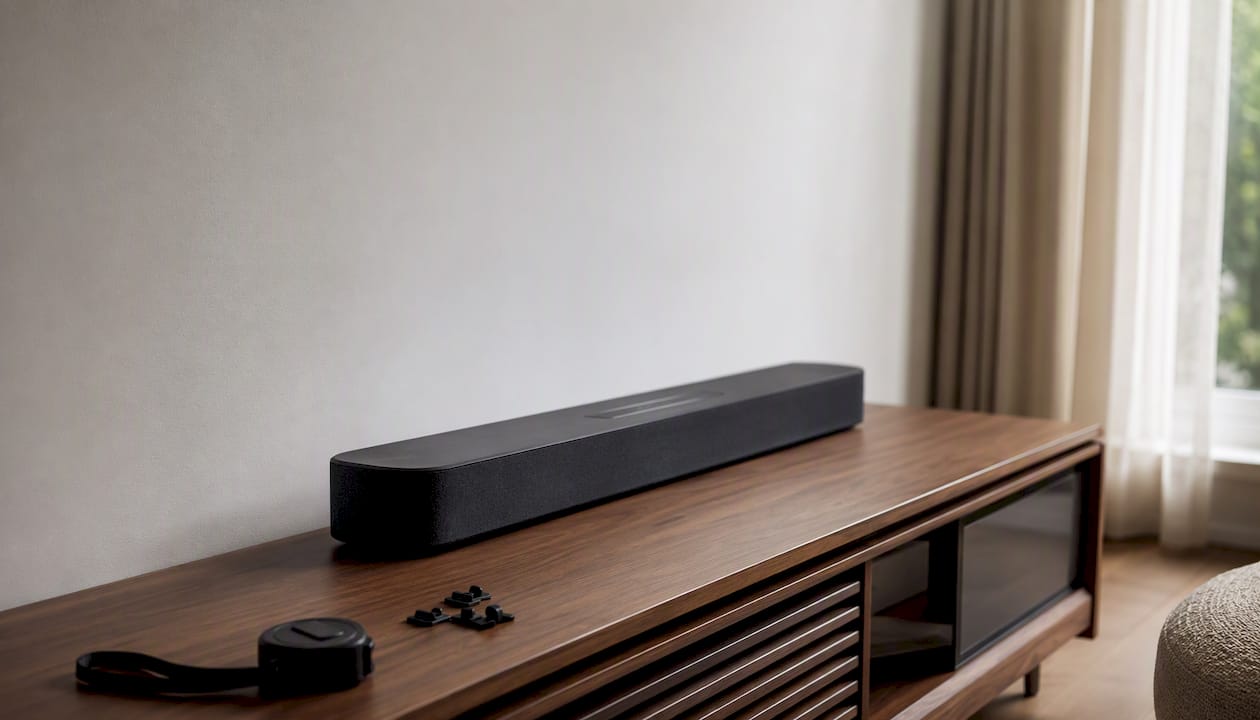
A soundbar sitting below the TV adds height to the overall stack. If your soundbar is 4 inches tall and sits on a console, factor that clearance in so the TV doesn't end up too high. Similarly, if a mantel or trim piece limits where the bottom edge can go, work backward from that constraint and use a tilting mount to compensate (more on that in the fireplace section).
Test before you drill
Cut a piece of cardboard to the exact dimensions of your TV and tape it to the wall at your calculated position. Sit down, watch it for a few minutes, and check whether your neck feels neutral. This five-minute step saves hours of patching and repainting.
Pro Tip: On thin-bezel TVs, measure the physical screen height from the very top of the panel to the bottom, not the outer frame. The bezel is often less than half an inch, but the bracket mounts to the panel back, not the frame edge — so measuring the full panel height gives you the most accurate center calculation.
Quick reference: suggested mounting heights by TV size
The table below assumes a 42-inch seated eye level. Use it as a starting point, then adjust using your personal measurement from the section above.
A few adjustments worth noting:
- Taller sofas or sectionals tend to raise your eye level slightly. Add that difference to the bottom-edge number.
- Lower profile furniture like floor cushions or recliners can lower eye level, meaning the bottom edge can sit somewhat higher than the table suggests.
- Multiple viewer heights: if your household has a wide range of heights, splitting the difference usually works well. A tilting mount lets you fine-tune after installation.
All numbers here assume the center-at-eye-level principle that tools like SANUS's HeightFinder use. If you want a calculator that accounts for your specific TV model and mount offset, SANUS's tool is worth a few minutes of your time.
Tricky placements: above fireplaces, in bedrooms, and corners
Mounting above a fireplace
This is the most common situation where ergonomics and aesthetics fight each other — and ergonomics usually loses. Fireplaces push TVs well above seated eye level, often by 12–20 inches, which forces viewers to crane their necks upward for hours. According to Homebuilding's fireplace guide, experts recommend keeping at least 12 inches of clearance above the mantel and using a tilting or extendable mount to angle the screen downward toward viewers.
Before committing to an above-fireplace install, run through this checklist:
- Heat test: hold your hand at the proposed TV location while the fireplace runs for 15 minutes. If it's uncomfortably warm, the TV will degrade faster and may void its warranty.
- Mantel clearance: maintain at least 12 inches between the top of the mantel and the bottom of the TV.
- Tilt mount: a downward-tilting bracket (typically 5–15 degrees of tilt) partially corrects the viewing angle. A full-motion articulating mount gives you even more flexibility.
- Masonry anchoring: chimney breasts are often brick or stone. Use masonry anchors rated for the TV's weight, and consider hiring a pro if you're not confident drilling into masonry.
- Cable routing: plan wire management before drilling. Exposed cables on a chimney breast are difficult to hide without a conduit or a media wall panel.
For a cleaner solution that handles both the fireplace and the TV in one integrated unit, Themediawallstore's electric fireplace options are worth a look — they're designed so the TV position and fireplace clearance are already accounted for in the kit layout.
Bedroom viewing
Bedroom TVs are usually watched from a reclined or semi-reclined position, which changes the math. Raise the center height by 4–6 inches above your seated eye level to account for the fact that you're leaning back. Test this by lying in your normal watching position and having someone hold a book or tablet at different heights until the angle feels neutral. A tilting mount is almost always the right call in a bedroom — it lets you dial in the angle without repositioning the bracket.
Corner installs
A TV mounted in a corner needs a full-motion articulating mount, full stop. The arm extends the TV away from the corner and swings it toward the main seating position. Calculate the center height the same way as a standard wall mount, but confirm the arm's extension range puts the screen at the right distance from your primary seat once it's swung out.
How viewing distance affects perceived height and immersion
Viewing distance and mounting height are connected more than most people realize. A TV that looks fine from 8 feet away can feel uncomfortably high from 5 feet, because the vertical angle to the top of the screen increases as you move closer.
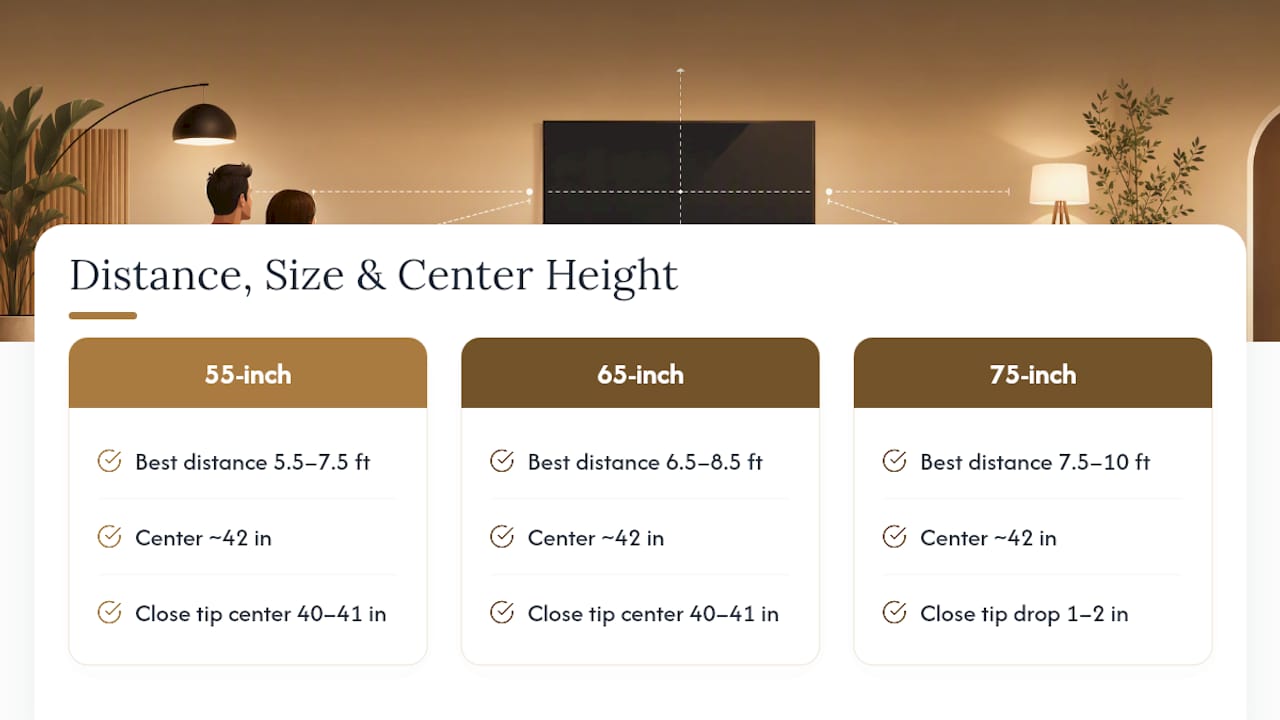
RoomyLab's distance guidance summarizes the practical ranges: a 55" TV works well at 5.5–7.5 feet, a 65" at 6.5–8.5 feet, and a 75" at 7.5–10 feet. These ranges reflect the THX and SMPTE recommendations for field-of-view comfort. At the closer end of those ranges, a slightly lower center height (40–41 inches instead of 42) can reduce the sense that the screen is looming over you.
Pro Tip: For very large screens (75" and above) at shorter viewing distances, try dropping the center height by 1–2 inches from your measured eye level. The bottom of the screen will be closer to your natural line of sight, and the image will feel more immersive without requiring you to look up.
The practical check: sit at your normal distance and hold your hand flat at eye level. The center of the screen should be roughly at that height. If you're looking up more than a few degrees, lower the mount or add tilt.
Choosing the right mount and safe installation practices
Fixed, tilt, or full-motion?
- Fixed mounts sit flush to the wall and work best when the TV is already at or near eye level and the room has one primary seating position. They're the lowest-profile option.
- Tilting mounts angle the screen downward by 5–15 degrees. Use one whenever the TV is above eye level — above a fireplace, in a bedroom, or on a high wall.
- Full-motion (articulating) mounts swing, extend, and tilt. They're the right choice for corner installs, rooms with multiple seating positions, or any setup where you need to adjust the viewing angle regularly.
Installation safety checklist
- Locate wall studs using a stud finder before marking anything. Most TV mounts require two studs, typically 16 inches apart.
- Confirm the mount's weight rating exceeds your TV's weight by a comfortable margin.
- Use lag bolts of the correct length — typically 2.5–3 inches into a wood stud for a secure hold.
- For masonry or brick walls, use masonry anchors rated for the combined weight of the TV and mount.
- Check for in-wall wiring, pipes, or ductwork with a stud finder that includes AC detection before drilling.
- Verify the VESA hole pattern on the back of your TV matches the bracket before purchasing the mount.
The Home Depot's flat-screen mounting guide covers each of these steps in detail and is a solid reference for first-time DIYers.
Tools you'll need
A stud finder, a drill with the right bit for your wall type, a level (a small torpedo level works fine), a tape measure, a pencil, and the hardware that comes with your mount. For masonry, add a hammer drill and masonry bits.
When to hire a pro: if you're mounting a 75–85" TV, drilling into a chimney breast, or working with a wall that has unusual framing, the risk of a structural mistake outweighs the cost of a professional install. A media wall mount guide can help you assess what your specific wall type requires before you start.
How to tell if your TV is mounted too high and quick fixes
Symptoms of a too-high mount
- Neck tilts back after 10–15 minutes of watching
- Colors look washed out or contrast seems lower than expected (a sign you're viewing from below the screen's optimal angle)
- Eye strain or headaches after a normal viewing session
- You find yourself sliding down in your seat to get a better angle
Quick fixes without re-drilling
- Add a tilting bracket. If your current mount is fixed, swapping it for a tilting model is often the fastest fix. The screen comes down visually even if the bracket stays at the same height.
- Use extension plates. Some mount systems allow you to lower the TV on the bracket by a few inches using offset plates, avoiding new holes entirely.
- Cardboard re-evaluation. Before drilling new holes, tape cardboard at the proposed lower position and watch a full episode. Confirm the new height actually solves the problem before committing.
Pro Tip: Watch 10–15 minutes of something you'd normally watch — not a quick clip — before declaring the height wrong. Short tests don't reveal the cumulative neck strain that builds over a real viewing session. If your neck feels fine after 15 minutes at the new position, you've found the right height.
Why center-at-eye-level matters: ergonomics and how a media wall kit helps
The ergonomic case for center-at-eye-level mounting comes down to cervical spine position. Looking upward for extended periods increases the load on the neck and upper back, which accumulates over months of daily viewing. Keeping the screen center at eye level maintains a neutral head position, the same principle physical therapists apply to monitor height at a desk.
That installer principle, Tucson, is why every reputable calculator and guide — including the SANUS HeightFinder — anchors calculations to the screen center rather than the bottom edge.
A pre-cut media wall kit simplifies this considerably. When panels are pre-labeled and the TV cutout is positioned at a predetermined center height, you're not measuring from scratch — the layout does the math for you. Wire channels are built in, so there's no separate cable-hiding step. For readers who want the ergonomic result without the full measurement workflow, Themediawallstore's DIY media wall kits are designed around exactly these principles.
One safety note that applies to any above-fireplace install: test the wall temperature at the proposed TV location after the fireplace has run for at least 20 minutes. If the surface exceeds 100°F, the location is not safe for a TV without additional heat shielding.
Installer and DIY perspective: practical tips from people who mount TVs for a living
The single most common installer mistake is skipping the dry-fit. Mount the bracket to the wall, hang the TV without tightening the final bolts, and sit down to check the height before anything is locked in. It takes two minutes and catches errors that would otherwise mean new holes.
A few other habits worth borrowing:
- Mark the center of the TV location on the wall with a small pencil cross, not just the bottom edge. The center mark is your reference for everything else.
- Use a torpedo level on the bracket before tightening. A TV that's one degree off looks noticeably crooked on a wide wall.
- Check your VESA plate offset. The bracket's mounting point is often an inch or two behind the screen face, which shifts the effective center height slightly. Account for that offset in your wall mark.
- Route cables before the TV goes up. It's far easier to thread a cable through a wall channel or conduit with the TV off the bracket.
- After the dry-fit, watch 10 minutes of content before the final tighten. Height feels different with actual content on screen than with a blank panel.
The goal is incremental confirmation, not one-shot precision. Every experienced installer re-checks at least twice before the final bolt-up.
The faster path to a correctly mounted TV
Getting the height right is one part of the equation. Getting the wires hidden, the panels aligned, and the whole wall looking intentional is the part that takes most homeowners a full weekend of trial and error.

Themediawallstore's DIY media wall kits are pre-cut and pre-labeled, with the TV center position already built into the panel layout. You're not measuring from a blank wall — you're assembling a system where the ergonomic height, wire channels, and panel alignment are already resolved. The kits install in a weekend without contractors, and the price is a fraction of a custom build. For readers who want a bespoke design or need help mapping their room's measurements to a finished wall, Themediawallstore also offers custom design support. Browse the full kit range or get in touch with the team at themediawallstore.com/shop to find the right layout for your room.
Sources
- How High to Mount TV for the Ideal Placement - Taskrabbit
- How High Should You Mount Your TV? (The Exact Math) | RoomyLab
- HeightFinder | SANUS
- Can you mount a TV above a fireplace — Homebuilding
- How to mount a flat-screen TV on a wall | The Home Depot
FAQ
What is the perfect height to mount a TV?
The center of the screen should sit at your seated eye level, which is approximately 42 inches from the floor for most adults on a standard sofa. Measure your own eye height while seated to confirm the right number for your room.
What height should a 55-inch TV be mounted?
With a 42-inch center target, the bottom edge of a 55" TV sits roughly 26–28 inches from the floor. Measure your seated eye level first and adjust that number up or down accordingly.
How high off the floor should a 75-inch TV be mounted?
At a 42-inch center height, the bottom edge of a 75" TV sits approximately 22–24 inches from the floor. Because the screen is tall, the bottom edge ends up lower than you might expect — that's correct and keeps the center at eye level.
How high is too high for a 65-inch TV?
If the center of a 65" TV is more than 4–5 inches above your seated eye level, you'll likely feel neck strain within a single viewing session. Mounting the TV significantly above the 42-inch center height commonly recommended for a standard sofa usually leads to discomfort during long-term viewing.