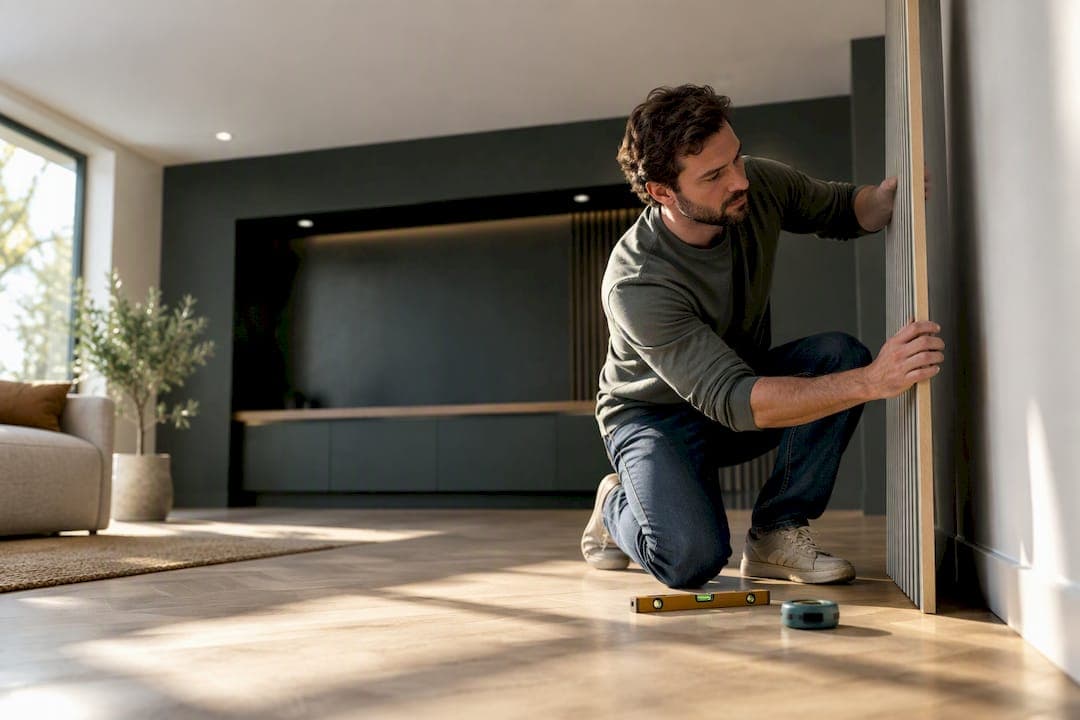
A media wall is a custom-built feature wall that houses your TV and gear while hiding wires, adding storage, and often integrating a fireplace and layered lighting. It replaces the old entertainment center with something built into the room itself. Homeowners choose one for a cleaner look, a stronger focal point in the living room, and smarter storage. This guide covers the design options, real costs, safety rules, and a weekend-friendly build plan.
TL;DR:
- DIY kits with pre-cut panels can be completed in two to three days, while fully bespoke installations may take several weeks and cost significantly more.
- The most impactful factors for a high-end look are proper proportion and strategic lighting, rather than expensive materials like stone or full-height walls.
- Fireplace installation is the most complex aspect, requiring fire-blocking, proper ventilation, and professional help when integrating vented or gas units.
- A well-planned media wall should prioritize TV mounting height, hidden wiring, and appropriate material choices based on room size and style.
- For safety and code compliance, in-wall wiring and fireplace venting should follow local regulations, with professional installation recommended for complex systems.
Table of Contents
- What Goes Into a Media Wall?
- Which Media Wall Style Fits Your Room?
- How Much Does a Media Wall Cost?
- Should You DIY It or Hire a Pro?
- Fireplace, Ventilation, and Electrical Safety
- Choosing Materials, Finishes, and Lighting
- Your Weekend Media Wall Build Plan
- Why Homeowners Actually Choose Media Walls
- Get Your Media Wall Built Without the Custom Price Tag
- Sources
- FAQ
What Goes Into a Media Wall?
A media wall is really a stack of small decisions that add up to one clean result. Get the TV niche wrong and everything else feels off, so start there: mounting height should put the screen's center at roughly seated eye level, and most TVs today follow VESA mounting standards, which dictate the bolt pattern on the back of the panel and the bracket you buy.
From there, the build comes together around a handful of core features:
- Cable and AV concealment, running power and HDMI behind the finished surface instead of down the wall
- Equipment shelving, tucked to the side or in a lower cabinet for a receiver, streaming box, or game console
- Storage, open shelving for display versus closed cabinetry for a tidier look
- Fireplace integration, usually centered below or beside the screen
- Layered lighting, which does more to make the wall feel finished than almost anything else
Plan these five elements before you touch a saw, and the rest of the project moves fast.
Which Media Wall Style Fits Your Room?
Room proportions and existing trim should drive the style choice more than Pinterest inspiration does. A slat wood or slat-wall panel adds texture and pairs beautifully with warm LED strip lighting tucked behind each slat, and it tends to suit rooms with lower ceilings since the vertical lines add height without adding bulk.

Stone or tile panels lean into a hearth and read as more luxurious, but they add weight, both visually and literally, so they work best against a full-height wall with solid backing. Minimal floating cabinetry keeps visual weight low and suits smaller or more contemporary rooms where a heavy stone surround would overwhelm the space.
A few practical pairings show up again and again in design galleries:
- TV centered above a recessed electric fireplace, flanked by narrow open shelving
- TV with full-height slat paneling and hidden ambient lighting along the ceiling line
- Floating cabinetry with a linear fireplace insert, no visible hardware
Design professionals consistently point to proportion and lighting as bigger factors than expensive materials in whether a media wall looks high-end. A well-lit, well-proportioned wall in mid-range materials often reads better than an expensive stone slab with flat, single-source lighting.
Full-height walls create more drama and hide more wiring runs, but partial-height walls cost less and suit rooms where the ceiling already has crown molding or a lower drop you don't want to fight.
How Much Does a Media Wall Cost?
Budget depends almost entirely on how much you build yourself versus how much you hand off. A weekend DIY kit with pre-cut, pre-labeled panels sits at the low end of the spectrum. A local carpenter building a comparable wall from scratch costs more once you add labor hours and material waste. Fully bespoke joinery, custom stone, integrated smart lighting, and a professional fireplace install push costs highest.
The biggest cost drivers tend to be:
- Materials: MDF and veneer run cheaper than solid wood or natural stone
- Fireplace unit and its electrical hookup
- Any rewiring or new circuits for lighting and AV equipment
- Custom finishes like book-matched veneer or hand-laid tile
Timeline follows the same pattern. A kit-based weekend build can go from empty wall to finished install in two to three days, since the cuts and labels remove most of the guesswork. A custom project with electrical work, drywall finishing, and paint drying time often runs several weeks. Structural changes, new wiring runs, or a building permit for the fireplace push both cost and timeline up fast.
Should You DIY It or Hire a Pro?
Honest self-assessment saves more money than any material choice. If you're comfortable with basic carpentry, know how to hang and finish drywall, and have mounted a TV before, a media wall kit is well within reach. Basic electrical competency, running a new outlet or switching a light circuit, helps but isn't always required if your AV layout uses existing outlets.
Hire a professional when the project involves:
- Masonry work or structural changes to the wall
- A gas fireplace or any fireplace requiring venting changes
- Complex in-wall wiring for multiple zones or smart lighting
- Ventilation changes near a fireplace enclosure
If you do hire someone, come with a short list of questions: Do they pull permits where required? Do they use fire-blocking around fireplace penetrations? Are in-wall cables rated for the application? Is the installation itself warrantied?
Pre-cut, pre-labeled kits change this calculus more than people expect. When panels arrive already sized and marked, the skill bar drops from "carpenter" to "someone who can follow labeled instructions," which is exactly why kit-based builds have become the more approachable option for first-time DIYers.

Pro Tip: Dry-fit every panel before you apply adhesive or drive a single screw. A ten-minute dry run catches sizing mistakes while they're still free to fix.
Fireplace, Ventilation, and Electrical Safety
Building a fireplace into your media wall introduces the one part of this project where mistakes get expensive or dangerous. Air-barrier continuity matters: seams around a fireplace enclosure need proper fire-blocking and only approved high-temperature sealants, according to Building America guidance from the Department of Energy, which also recommends insulating any chimney on an exterior wall full height to maintain proper draft.
Natural-draft fireplaces need their own combustion air supply, and it's worth testing that other exhaust fans in the house won't backdraft the unit.
Direct-vent or sealed-combustion fireplaces avoid the backdrafting risk that natural-draft units face when a kitchen or bathroom fan pulls too much air from the house, according to federal energy guidance on HVAC and fireplace ventilation.
On the electrical side, use in-wall rated, fire-resistant cable for any HDMI or AV runs, and follow local electrical code for new circuits. Mounting a TV above a fireplace adds one more variable: heat rises, and Consumer Reports notes that mounting over a fireplace or onto masonry often calls for a professional install rather than a standard consumer bracket, since standard mounts rarely account for sustained heat exposure.
Choosing Materials, Finishes, and Lighting
Material choice is really a tradeoff between budget, durability, and how much texture you want. MDF is the cheapest and easiest to cut but dents easily and needs paint or veneer to look finished. Real veneer adds a warmer, more natural look at a moderate price bump. Solid wood costs more but ages well and takes repairs better than MDF. Stone-look porcelain gives you the visual weight of stone without the actual weight or cost, though it needs a flatter, more stable substrate to install cleanly.
Lighting does more heavy lifting than most homeowners expect. A three-layer approach, ambient room lighting, task or accent lighting around shelving, and a glow around the screen or fireplace, is what separates a flat-looking wall from one that feels designed. Warm white LEDs in the 2700K to 3000K range read as cozy rather than clinical, which matters most in living rooms.
- Choose durable, wipeable finishes near seating areas where hands and remotes make contact
- Add acoustic backing foam or fabric panels behind slats for a noticeable sound improvement without a full acoustic renovation
- Test LED color temperature before committing. Photos under showroom lighting often look different at home
Pro Tip: Buy one extra LED strip length beyond your measurement. Corner transitions eat more cable than the math suggests.
Your Weekend Media Wall Build Plan
Confirm your TV size and seating distance before designing anything else. This single decision, recommended repeatedly by designers, sets every proportion that follows.
- Measure and mark. Confirm TV size, mounting height, and outlet locations on the wall.
- Electrical and AV first-fix. Mark cable routes and lighting circuits, then run in-wall-rated cable before anything gets covered.
- Frame it. Build the stud frame, add fire-blocking around any fireplace cutout, and rough in wiring.
- Board and finish. Add drywall or panel material, apply trim or veneer, and paint or seal as needed.
- Mount and test. Install the TV, fireplace, and lighting, then test every system before calling it done.
| Stage | What happens | Watch for |
|---|---|---|
| Planning | Measure TV, mark outlets and cable runs | TV size and seating distance |
| First-fix | Run AV cable, rough in wiring | In-wall-rated cable only |
| Framing | Build frame, add fire-blocking | Draft-stopping around fireplace |
| Finishing | Board, trim, paint | Clean seams, secure fixings |
| Final check | Mount TV, test lighting and AV | Clearances, strain relief, ventilation |
Why Homeowners Actually Choose Media Walls
Most homeowners come to this project chasing the same thing: a living room that doesn't look like a tangle of cables behind a rented TV stand. The mistakes I see most often trace back to skipping the measuring step. People pick a TV size after the wall design is already set, or they forget to plan wiring before the drywall goes up, and then live with a "wiring regret" for years.
A well-proportioned wall in modest materials beats an expensive one with poor scale every time. Get the basics right before chasing the fanciest finish.
— Jake
Get Your Media Wall Built Without the Custom Price Tag
A custom joiner can take weeks and charge premium labor rates for a media wall that a pre-cut kit accomplishes in a weekend. Themediawallstore builds its Media Wall Kits with panels that arrive pre-cut and pre-labeled, so you skip the complex measuring and cutting that usually requires a contractor, and you get a high-end result at a fraction of what bespoke joinery costs.

Browse finished examples like the Modern Floating Slat Wall Kit or the Luxe Marble Glow Media Wall Kit to see how the styles from this guide translate into real products. If you'd rather not build anything yourself, White-Glove Installation is available for local Bay Area customers through the media wall kits page.
Not sure which layout fits your room? A Single Concept Design starts at $99, or step up to 3 Concepts + Revision for $199 if you want options to compare. Visit the shop to start your design today.
Sources
- Which Home Features Add the Most Value | NAHB
- How to wall-mount your TV | Consumer Reports
- Air barriers—tub, shower and fireplace enclosures | Building America (DOE)
- HVAC: Proper ventilation, fireplaces and stoves | BSEC
FAQ
What Is the Purpose of a Media Wall?
A media wall's main purpose is to house your TV and AV equipment in one built-in feature while hiding cables and adding storage or a fireplace. It creates a single focal point in the room instead of a freestanding TV stand and a mess of visible wires.
What Are the Disadvantages of Media Walls?
The main downsides are cost and permanence: a custom build takes real budget and, once installed, it's not easy to reconfigure if you rearrange the room later. Fireplace integration also adds electrical and ventilation requirements that raise both cost and complexity compared to a simple TV-only wall.
Do Media Walls Add Value to a House?
Media walls themselves aren't separately tracked in home value data, but the fireplaces they often integrate are. NAHB analysis found that adding a fireplace can increase home value by about 10 to 11 percent, which is part of why so many media walls are built around one.
Can I Build a Media Wall Myself?
Yes, especially with a kit that arrives pre-cut and pre-labeled, which removes most of the complex measuring and cutting a custom build requires. Fireplace masonry, gas venting, or complex in-wall wiring are the parts most worth hiring a professional for.
How Much Does a Media Wall Kit Cost?
Pricing depends on size, finish, and whether you add a fireplace or lighting package, so current prices are best checked directly on the Themediawallstore shop. Design services start at $99 for a Single Concept Design if you want professional input before you buy.