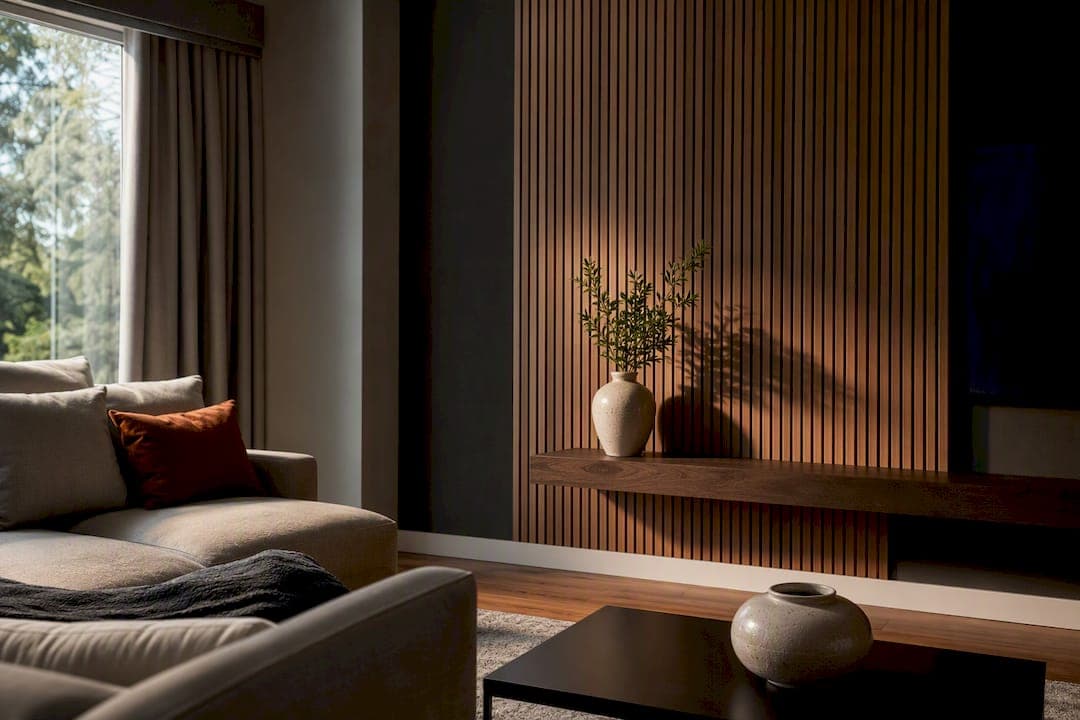
Make the wall the focal point by designing around the TV so the wall, not the black screen, becomes the room's anchor. That means integrating the television into a composed backdrop instead of treating it as an appliance stuck on drywall. Accent paneling, a built-in with flanking storage, or a framed gallery treatment around the screen all accomplish this at different price points and skill levels.
TL;DR:
- The most effective TV wall focal points incorporate wall treatments that balance the size of the screen and seating height, with an ideal mounting height of about 42 inches from the floor.
- Budget-friendly options like painted accent walls and gallery framing can achieve a strong visual impact in under a weekend and for less than $200.
- Combining two methods, such as slat paneling with LED backlighting or a painted wall with asymmetrical shelves, enhances visual interest without clutter.
- Proper cable management, acoustic treatment, and integration of sound systems are essential to maintain a clean aesthetic and optimal sound quality.
- DIY media wall kits offer a quick, cost-effective way to create a high-end look with pre-measured components, avoiding long contractor timelines.
Table of Contents
- What Makes a TV Wall a True Focal Point?
- Which TV Wall Focal Point Ideas Actually Work?
- How Do You Plan and Install a TV Wall Focal Point?
- Styling and Finishing Touches That Make It Look Intentional
- When a DIY Media Wall Kit Beats a Custom Build
- How Should Room Layout Shape Your TV Placement?
- How Do You Balance the TV With the Rest of the Room?
- How Do You Integrate Sound Systems Without Ruining the Look?
- What Wall Materials Work Best for Mounting a TV?
- How Do You Keep the TV Wall Interesting Without Clutter?
- Practical Advice, Not Perfection
- Get the Built-In Look Without the Contractor Timeline
- Sources
- FAQ
What Makes a TV Wall a True Focal Point?
A focal point wall, sometimes called a feature wall or accent wall, is the architectural or decorative element that pulls the eye first and organizes everything else in the room around it, famously including interior doors as focal points which can shape a room's visual hierarchy. A living room can have a secondary focal point too, like a window with a nice view, but interior designers agree that a dominant one is necessary. Without it, the eye bounces around and the room reads as visual noise.
The mistake most homeowners make is picking the focal point after the furniture is already arranged. Designers do it the other way around. They look at the architecture and the light first, then decide what the room should orbit around, and only then place the sofa and chairs to reinforce it. If your living room has a fireplace competing with your TV for attention, you generally want to pick one as the primary anchor and let the other play a supporting role, especially in open floor plans where the wall needs to read clearly from multiple seating angles.
Once you know the TV is the anchor, a few measurable rules keep the composition from looking accidental:
- Mount the display center around seated eye level, approximately the mid-height of a typical seated person.
- Avoid mounting the TV too high, as elevated placements can cause neck strain during long viewing sessions.
- Leave moderate breathing room around the TV to avoid crowding it against shelving or trim.
- Match the wall treatment's scale to the size of your TV and wall; a large screen requires a proportionally sized wall treatment to look balanced.
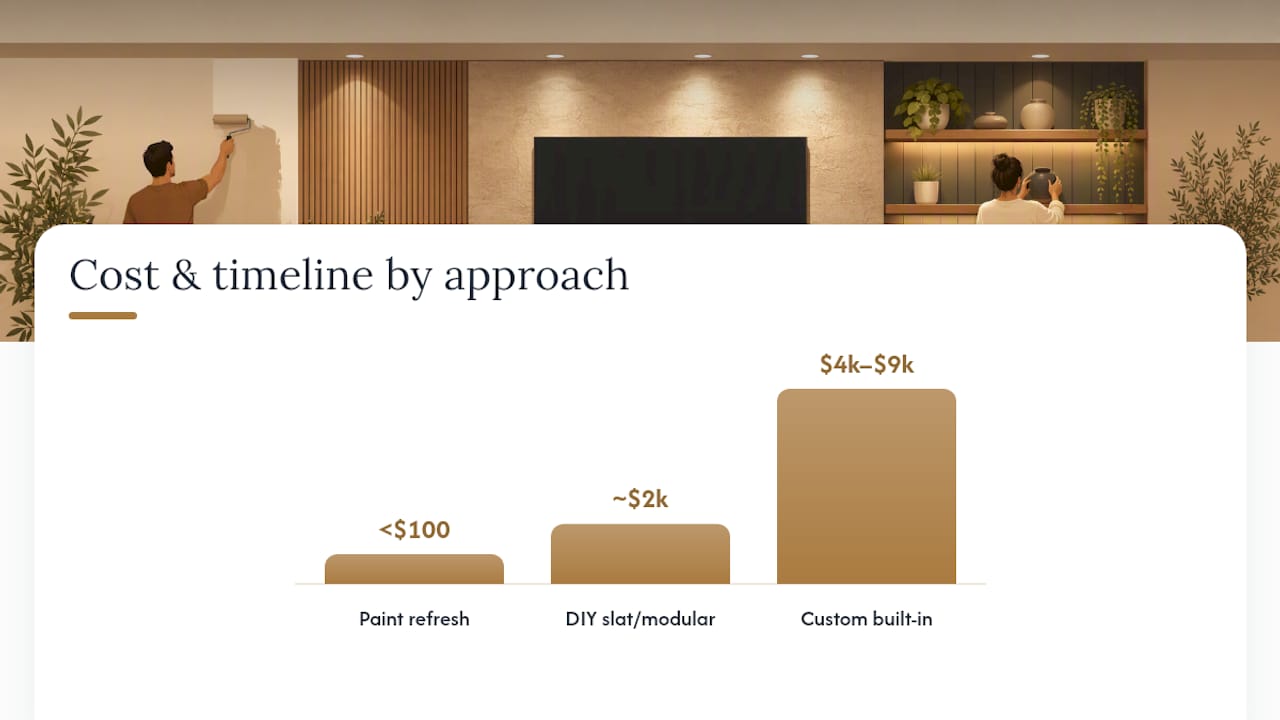
Budget shifts the conversation fast. A painted accent wall runs as little as $90, while a fully built-in media wall with custom joinery lands anywhere from $1,200 for an IKEA hack approach up to $4,000 to $9,000 for bespoke cabinetry. Most homeowners land somewhere in between, which is exactly where slat paneling and modular kits tend to sit.
Which TV Wall Focal Point Ideas Actually Work?
Some of these directions take an afternoon. Others take a weekend and a miter saw. Here's how they stack up.
- Gallery wall framing. Surround the TV with framed art and photos at varying sizes so the screen becomes just one more "frame" in the arrangement. Cheap, renter-friendly, and it's the easiest option to undo if you move.
- Painted accent or moody color. A deep charcoal, forest green, or navy wall behind the TV creates instant contrast and makes the screen recede visually when it's off. Fastest impact for the lowest cost, and a weekend project even for a first-timer.
- Wood slat or slatted paneling. Vertical wood slats have become one of the most requested TV wall treatments because they add warmth and texture without competing with the screen. Mid-range cost, moderate DIY skill required.
- Floating shelves with asymmetrical styling. Shelves flanking the TV give you storage and display space at once. Keep the arrangement uneven rather than mirrored for a more current look.
- Recessed niche and built-in cabinetry. A niche sized about 2 inches larger than the screen on each side, with roughly 4 inches of depth, lets the TV sit flush and looks intentional rather than mounted as an afterthought. High impact, higher cost, usually a contractor job.
- Stone or marble veneer. Dramatic and textural, this reads as a genuine architectural feature. It's also the priciest option on this list and the least forgiving of mistakes.
- Frame TV or art-swap treatments. For homeowners who care as much about how the wall looks with the TV off as on, a frame-style display or rotating art option keeps the aesthetic intact around the clock.
- Ambient LED backlighting. Warm white LEDs in the 2700K to 3000K range behind or around the panel create a cozy, cinematic glow rather than the harsh blue-white light some strips default to. This pairs well with almost any option above and costs very little to add.
Most homeowners end up combining two of these: slat paneling plus LED backlighting, or a painted wall plus asymmetrical shelves. The combination usually reads better than any single idea on its own.
How Do You Plan and Install a TV Wall Focal Point?
Start with a tape measure, not a shopping cart. Find the horizontal center of the wall, then check whether that also lines up with the room's natural seating sightline. The "middle third" of the wall is usually the safest zone for the TV, since it keeps sofas and chairs from having to angle awkwardly toward one edge.
For mounting height, the seated-eye rule holds up in almost every living room: center the screen about 42 inches from the floor. If you're building a recessed niche, size it 2 inches wider and taller than the TV on each side, with about 4 inches of depth for a flush-mount look that still allows airflow behind the panel.
Cable management makes or breaks the finished look. Your options, roughly in order of cost:
- A cord cover channel painted to match the wall, the cheapest fix.
- An in-wall cable kit that routes wires behind drywall to a hidden outlet.
- A recessed power outlet installed directly behind the TV mount, which typically requires an electrician.
Pro Tip: If you want power moved inside the wall itself rather than just the cables, that work needs to meet National Electrical Code requirements and almost always calls for a licensed electrician. Don't treat in-wall electrical as a DIY shortcut.
Timelines and budgets vary widely by approach. A paint refresh is a single weekend and under $100 in materials. DIY slat paneling or a modular kit typically runs one to two weekends and lands in the low thousands depending on wall size and finish. A fully custom built-in with electrical work and cabinetry can take several weeks and stretch into the $4,000 to $9,000 range once labor is factored in.
Styling and Finishing Touches That Make It Look Intentional
The 3-5-7 rule is the fastest way to avoid a shelf that looks like a showroom display. Group decor items in odd numbers and vary their heights and textures to create visual interest. A ceramic vase, a stack of books, and a small framed print reads far more natural than three identical candles lined up in a row.
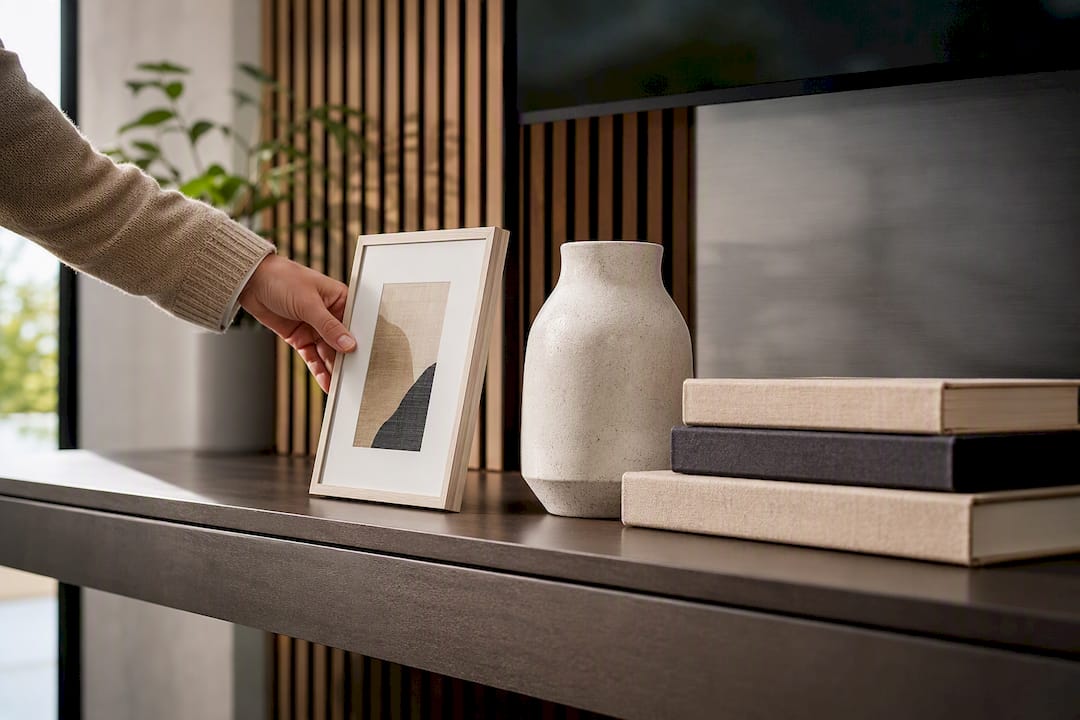
Keep some breathing room around the TV and avoid perfectly symmetrical arrangements for a more natural look. Asymmetrical shelf groupings consistently look more current than mirrored, matched arrangements.
For lighting, stick with warm white LEDs in the 2700K to 3000K range for a cozy, cinematic feel rather than a cold, showroom glow. Picture lights work better over framed art or gallery walls, while LED strips suit slat paneling or recessed niches where you want a soft wash of light rather than a spotlight.
- Choose matte or textured finishes over high-gloss for busy family rooms. They hide fingerprints and dust far better.
- Wood slat panels and painted MDF both wipe clean easily and hold up well near seating areas.
Pro Tip: Swap out one or two shelf items seasonally instead of restyling the whole wall. It keeps the space feeling fresh without turning into a redecorating project every few months.
When a DIY Media Wall Kit Beats a Custom Build
A custom build makes sense when you want total control over materials and have the budget and time for a contractor. A kit makes more sense when you want a finished, high-end look on a weekend timeline without hiring anyone.
DIY media wall kits are built around that second scenario. Panels arrive pre-cut and pre-labeled to simplify installation, and many homeowners complete the installation over a single weekend. Kits often come with expert support options if customers need assistance, plus some providers offer a return policy if the finished look isn't right.
Before ordering, a few practical steps:
- Measure your wall width and ceiling height so you order the right size kit.
- Pick a finish that matches your existing trim or flooring tone.
- Decide upfront whether you want add-ons like LED lighting or a fireplace insert, since those are easier to plan for than retrofit later.
How Should Room Layout Shape Your TV Placement?
Sightlines matter more than most homeowners realize until they've lived with a poorly placed TV for a few months. The screen should sit roughly perpendicular to the main seating, with minimal glare from windows directly across from it. If your living room has windows on the same wall as your intended seating, consider whether afternoon glare will wash out the screen at the times you actually watch TV.
Open floor plans add a layer of complexity. A wall that reads well from the kitchen island might feel too far or too small from a reading nook on the other side of the room. In these layouts, choosing a wall treatment with some visual weight, slats, a painted color, a stone veneer, helps the TV wall register as the room's anchor from multiple vantage points rather than getting lost in the open space.
Traffic flow also factors in. If people regularly walk between the TV and the seating area to reach a kitchen or hallway, that path will pull focus every time someone crosses it during a movie. Where possible, route walking paths behind the seating rather than through the direct sightline to the screen.
For narrow or long living rooms, the TV wall usually works best on the shorter wall, which lets seating spread out along the length of the room without anyone sitting at an awkward angle. Corner placements can work too, but they demand more careful furniture arrangement to keep every seat within a reasonable viewing cone.
How Do You Balance the TV With the Rest of the Room?
The TV wall shouldn't fight your other furniture for attention, and it shouldn't be so quiet that the room feels unfinished. The balance comes from giving the wall enough visual weight to hold its own without letting it dominate every other design decision in the room.
Furniture placement is the first lever. A sofa and chairs arranged in a tight conversational grouping facing the TV wall signal that this is the anchor, while pieces scattered loosely around the room without a clear orientation undercut that message no matter how nice the wall itself looks.
Color and material repetition help too. If your TV wall uses warm wood slats, echoing that wood tone in a coffee table or console elsewhere in the room ties the space together instead of making the wall feel like an isolated feature. The same goes for a painted accent color, pulling that shade into a throw pillow or piece of art elsewhere keeps the room cohesive rather than making the TV wall look like it belongs to a different house.
Scale matters as much as color. A massive built-in on one wall paired with tiny, delicate furniture elsewhere in the room reads as mismatched. Heavier furniture pieces, a substantial sectional or a solid wood dining table nearby, help balance a bold or dramatic TV wall treatment.
Rugs, curtains, and lighting fixtures elsewhere in the room should support the TV wall rather than compete with it in scale or intensity. A general rule: if a design element is loud enough to pull the eye away from the wall you've designated as the anchor, it needs to be toned down or moved.
How Do You Integrate Sound Systems Without Ruining the Look?
Speakers and acoustics rarely get the same planning attention as the visual side of a TV wall, and that's usually a mistake. A soundbar mounted directly below the screen is still the most common setup, and it works well when the wall treatment includes a shelf or ledge sized to hold it without crowding the display.
For homeowners who want a fuller surround sound setup, in-wall or in-ceiling speakers keep the visual composition clean since there's no visible speaker cabinet competing with your slat paneling or gallery wall. This requires planning during the build phase, since running speaker wire after the wall is finished means either exposed cable runs or reopening drywall.
Acoustic treatment is the piece most people skip entirely. Hard surfaces like glass, stone veneer, or large uninterrupted expanses of drywall bounce sound and can make dialogue harder to follow in an otherwise well-designed room. Textured materials, wood slats, upholstered panels, even a well-stocked bookshelf, absorb some of that reflected sound naturally.
Acoustic slat panels solve both problems at once: they bring the warm, textured look homeowners want on a feature wall while doing double duty as sound diffusion, an option worth considering if your living room has hard floors and high ceilings that tend to amplify echo. If you're building shelving into the design anyway, leaving room for a subwoofer or center channel speaker on the lowest shelf keeps the electronics visible only as much as you want them to be, tucked in rather than stacked awkwardly on the floor nearby.
What Wall Materials Work Best for Mounting a TV?
Not every wall handles a TV mount the same way. Standard drywall over wood studs is the most common and generally the easiest to work with, but the mount itself needs to anchor into the studs rather than the drywall alone. Drywall anchors are not rated for the sustained weight of a TV and mount bracket over years of use.
Brick, stone, and concrete walls require masonry anchors and a hammer drill, and they're far less forgiving of mistakes since patching a misplaced hole is more involved than in drywall. If you're planning a stone veneer accent wall with the TV mounted through it, install the mounting bracket and backing plate before the veneer goes up, not after, so the anchor points land in solid material.
Wood slat paneling and similar accent treatments usually get built over a plywood backing layer specifically so the mount has something solid to grip. This is one of the practical advantages of a planned build over a purely decorative one: the structure meant to hold the wall's visual finish can double as the mounting substrate.
Fireplace walls need extra caution. Heat rising from an operating fireplace can affect both the TV's electronics and any adhesives or veneer materials nearby, so manufacturers typically specify a minimum clearance above the firebox. Always check the specific clearance requirements for your fireplace insert before finalizing TV height on a combined fireplace and media wall design, an approach covered in more detail in this guide to fireplace media walls.
How Do You Keep the TV Wall Interesting Without Clutter?
A TV wall that never changes starts to feel stale, but one that gets fully restyled every season usually ends up cluttered instead of refreshed. The fix is picking a few elements that rotate and leaving the rest of the composition alone.
Shelf styling is the easiest place to make small seasonal swaps. Following the 3-5-7 rule, swap out one or two of the three to seven grouped items rather than the whole arrangement, a stack of holiday-themed books in December, a vase of dried branches in fall, without disturbing the anchor pieces that stay put year-round.
Textiles offer another low-effort refresh point. A throw blanket draped over a nearby chair or a seasonal runner on a console below the TV changes the room's feel without touching the wall treatment itself.
For homeowners with a frame-style TV or an art-swap display, rotating the displayed image seasonally keeps the screen-off aesthetic from feeling static, arguably the single biggest advantage of that approach over a standard mounted panel.
Avoid the temptation to add decorative objects faster than you remove them. A wall that gained a small item every few months without ever losing one eventually reads as cluttered no matter how nice each individual piece is. If you're adding something new, retire something else from the same shelf. For more ideas on rotating decor without overcrowding a finished wall, see this roundup of TV wall decor upgrades.
Practical Advice, Not Perfection
Most guides on this topic sell an all-or-nothing choice: gut the wall for a custom built-in or settle for a bare TV on drywall. That framing does homeowners a disservice. The research backs a middle path, and it's the one most people actually take. A painted accent wall or a set of asymmetrically styled shelves solves the visual problem for under $200 and a weekend, and it solves it well.
Where conventional advice falls short is the assumption that a "real" focal point wall requires custom carpentry and a contractor's schedule. It doesn't. The measurements that matter, 42 inches to center, 6 to 8 inches of breathing room, odd-numbered shelf groupings, apply just as well to a $90 paint job as they do to a $9,000 built-in.
If you're prioritizing one thing first, prioritize the measurements over the material. A gorgeous stone veneer wall with the TV mounted too high still gives you neck strain every movie night. A modest wood slat panel installed at the right height, with the right breathing room, will outperform it in daily use. That's also where a kit-based approach earns its place: it gives you the built-in look with the measurements already solved for you, without the custom-build price tag or timeline.
— Jake
Get the Built-In Look Without the Contractor Timeline
DIY media wall kits can offer homeowners a built-in, high-end look without long contractor wait times or custom-carpentry costs. Kits that ship pre-cut and pre-labeled handle measurement and cutting decisions in advance.
This means mounting height, breathing room, and niche sizing are incorporated in the design, removing the need for on-site calculations. Many customers finish installation in a single weekend. Some companies back completed projects with expert support and return policies if the finish or fit isn't satisfactory.
If you're ready to move from planning to building, start by measuring your wall and browsing the full kit lineup to find a finish and size that fits your space. Add LED lighting or a fireplace insert from the accessories page if you want the ambient glow covered earlier in this guide, or check kits available by region to see what's ready to ship near you.
Sources
- What is a living room focal point in interior design? — Nordic Design Blog
- TV wall ideas — FloorDi
- TV Accent Wall: Complete Guide for Homeowners - D and G Flooring
- TV Wall Decor Ideas: 15 Stylish Designs for Modern Living Rooms — Decoratoradvice
FAQ
What Is a Focal Point Wall Called?
It's most commonly called a focal point wall, feature wall, or accent wall. All three terms describe the same thing: the primary architectural or decorative element that anchors the room and organizes furniture placement around it.
What Is the 3-5-7 Rule in Decorating?
The 3-5-7 rule means grouping decor items in odd numbers, three, five, or seven pieces, at varied heights and textures rather than symmetrical pairs. Designers use it on shelves and consoles to create a layered look instead of a dated, matched arrangement.
What Are the Rules for Mounting a TV on the Wall?
Center the display around 42 inches from the floor to match typical seated eye level, and avoid mounting above 50 inches since it often causes neck strain over time. If you're building a recessed niche, size it about 2 inches wider and taller than the screen on each side with roughly 4 inches of depth.
How Do You Make a Wall a Focal Point?
Choose the focal point from the room's architecture before arranging furniture, then integrate the TV into that composition using accent materials, flanking storage, or warm LED backlighting in the 2700K to 3000K range. A pre-cut media wall kit from Themediawallstore builds these proportions in automatically, which is one reliable shortcut if you'd rather skip the measuring and cutting yourself.
Does the TV Have to Be the Room's Main Focal Point?
No. If your living room has a fireplace or a striking window view, either can serve as the primary anchor while the TV wall plays a supporting role, especially in open floor plans viewed from multiple angles.