
A decorative wall treatment is any technique, material, or finish applied to interior walls to add texture, color, pattern, or dimension beyond standard flat paint. The right treatment turns a blank wall into the most memorable feature in a room. Options range from wood slat panels and limewash plaster to peel-and-stick wallpaper and curated gallery walls. Whether you own your home or rent an apartment, there is a wall treatment that fits your budget, your style, and your lease agreement. This guide covers the most popular choices in 2026, what they cost, and how to apply them without making expensive mistakes.
What are the most popular decorative wall treatment options?
The flat painted accent wall is fading fast. Textured architectural features like wood slats, limewash plaster, and stone cladding have replaced it as the dominant trend in 2026. Each option delivers a different look, price point, and installation challenge.
Wood slat accent walls
Wood slat walls are the most requested accent wall treatment right now. DIY slat kits start at about $150, while professional custom installations range from $800 to $2,500. The gap between those two numbers is significant. A weekend DIY install with a pre-cut kit can produce results that look custom without the custom price tag. Themediawallstore offers pre-labeled slat wall kits built for exactly this kind of weekend project.
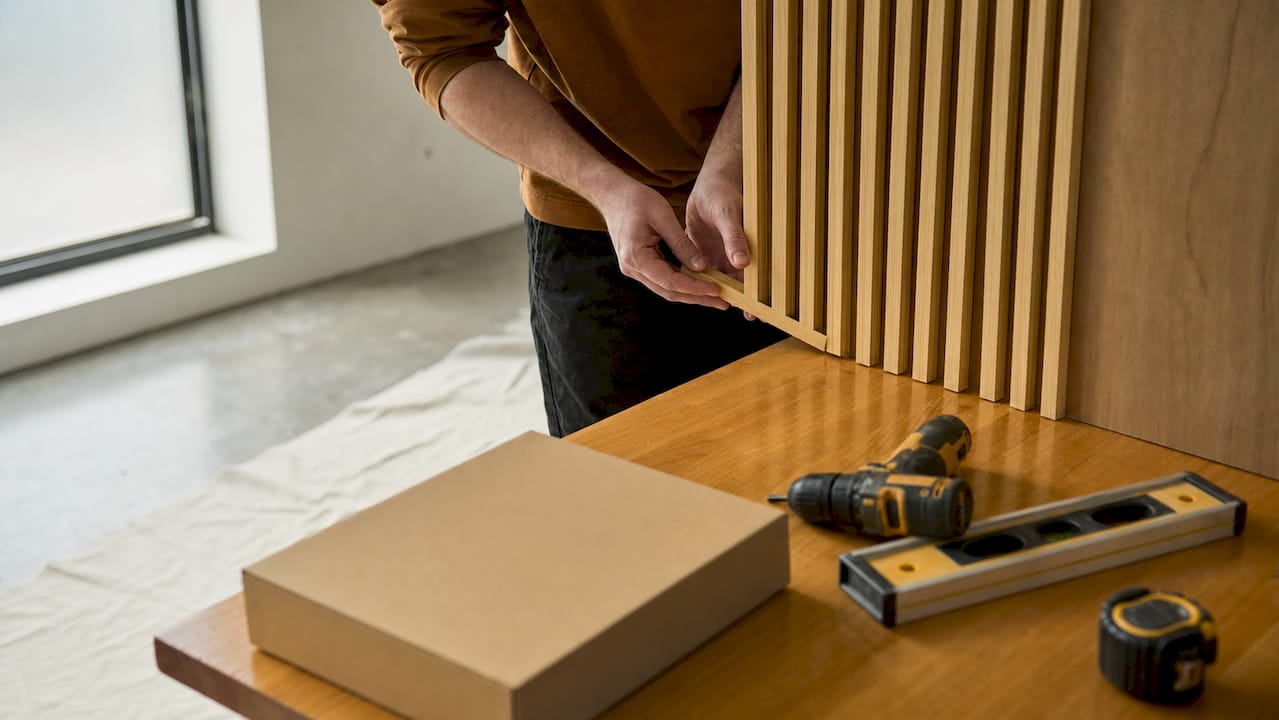
Pro Tip: Level your wall before mounting any slat kit. Uneven surfaces make the finished installation look warped, and fixing it after the fact costs more time than the prep work.
Limewash plaster
Limewash is a water-based paint technique that creates a soft, aged, organic finish. Limewash paint costs $80 to $120 per gallon and covers approximately 300 square feet. That makes it one of the most cost-effective textured finishes available. The look works especially well in living rooms, bedrooms, and dining spaces where you want warmth without heavy pattern.
Stone veneer and cladding
Stone veneer panels add real architectural weight to a room. Costs vary by material and region, but stone cladding generally runs higher per square foot than wood or paint-based options. The payoff is a finish that reads as permanent and high-end. Stone works best on fireplace surrounds, entryway feature walls, and media wall backdrops.
Peel-and-stick wallpaper and removable panels
Peel-and-stick wallpaper and removable panels cost between $30 and $120 per wall and remove cleanly without damaging paint. That price range makes them the go-to choice for renters and anyone who wants to refresh a room without a long-term commitment. Modern adhesive products rival traditional wallpaper in pattern quality and durability.
Textured paint techniques
Knockdown, skip trowel, and orange peel are the three most common textured paint finishes applied to drywall. Each creates a different surface depth. Knockdown is the most forgiving for beginners and suits modern interiors well. Orange peel is common in rentals and on ceilings. Skip trowel requires more skill but delivers a refined, artisan result.
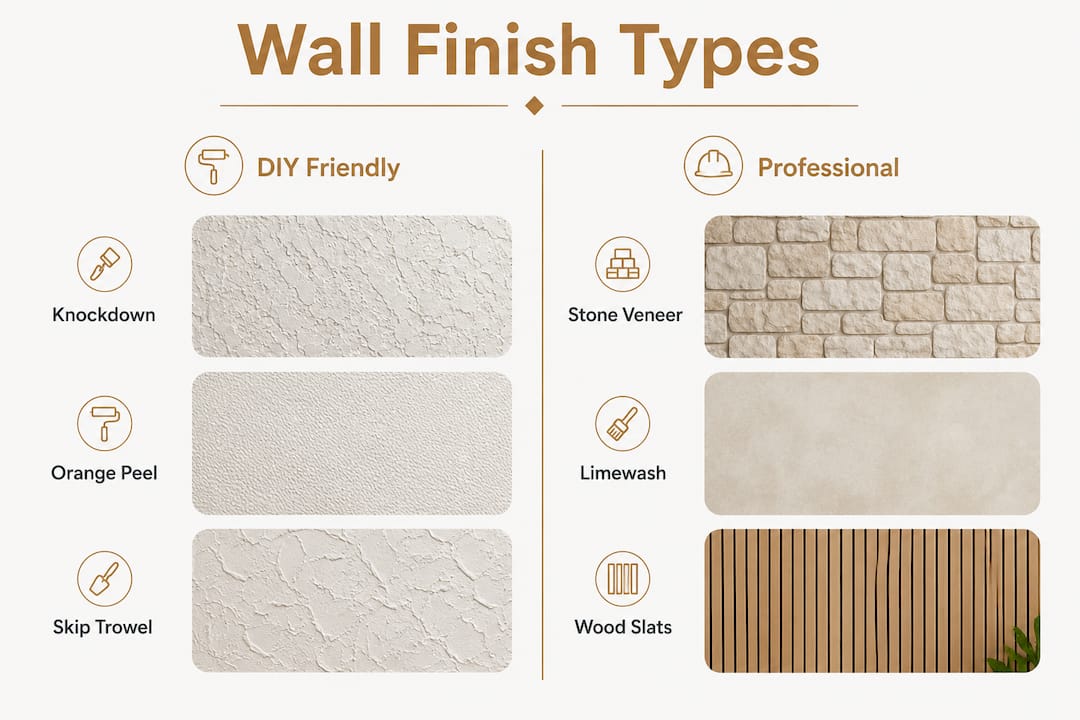
How do textured wall finishes compare for DIY vs. professional installation?
Choosing a finish means weighing visual impact against your actual skill level and available time. Modern drywall textures favor subtle, refined patterns like knockdown and skip trowel over older styles like popcorn and slap brush. That shift matters because subtle textures are less forgiving of uneven application.
| Finish | DIY difficulty | Typical cost | Best rooms | Durability |
|---|---|---|---|---|
| Knockdown | Easy | Low | Living room, hallway | High |
| Orange peel | Easy | Low | Bedroom, rental | High |
| Skip trowel | Moderate | Low to medium | Dining room, bedroom | High |
| Limewash | Moderate | Medium | Living room, bedroom | Medium |
| Wood slats | Moderate | $150–$2,500 | Living room, media wall | High |
| Stone veneer | Hard | High | Fireplace, entryway | Very high |
The two most common DIY failures are skipping wall prep before mounting wood slat kits and recoating limewash before the first layer dries fully. Uneven walls cause slat installations to appear flawed, and no amount of finishing work corrects that after the fact. With limewash, premature recoating spoils the organic effect that makes the finish worth choosing in the first place.
Professional installation makes sense for stone veneer, skip trowel on large surfaces, and any project where wall prep reveals structural issues. For wood slats and limewash, a confident beginner with a pre-cut kit and a free weekend can achieve professional-looking results.
Pro Tip: Always apply a test patch of limewash on a spare board or hidden corner before committing to a full wall. Limewash shifts color as it dries, and the wet tone rarely matches the final result.
What design principles should guide your wall treatment choices?
The right wall treatment in the wrong location still looks wrong. Choosing which wall to treat matters as much as choosing the treatment itself.
Pick a wall that is uninterrupted by doors, windows, or built-ins. The wall you see first when entering a room is almost always the best candidate. Good natural or artificial lighting amplifies texture and makes the treatment worth the investment.
Scale is the most overlooked factor in wall decor. Oversized art works best at two-thirds the width of the furniture below it. That rule applies to panels and gallery arrangements too. A treatment that is too small for its wall reads as an afterthought rather than a design decision.
Color coordination follows a simple logic. Dark walls need light furniture to avoid a closed-in feeling. Busy wallpaper patterns need simple, solid furnishings to avoid visual conflict. Textured finishes like limewash and wood slats are naturally neutral, which makes them easier to coordinate with existing furniture.
Gallery walls land harder when they mix personal photos with 3D objects like small shelves, woven pieces, or sculptural items. The "Identity Decor" approach of 2026 favors walls that tell a specific story rather than displaying generic prints. A gallery wall built around a theme, a trip, or a family moment creates a focal point that no store-bought panel can replicate.
- Choose an uninterrupted wall with good lighting as your feature wall.
- Apply the two-thirds width rule to art, panels, and gallery arrangements.
- Match texture complexity to furniture simplicity.
- Layer personal photos with 3D objects for gallery walls that feel intentional.
- For renters, stick to reversible treatments on feature walls and save permanent finishes for owned spaces.
For more inspiration on living room accent walls, the Themediawallstore blog covers proportion and placement in detail.
What are budget-friendly wall treatment ideas for renters?
Renters have more options than most people realize. The key is choosing treatments that create real visual impact without touching the paint or drywall permanently.
Command strips, picture ledges, removable wallpaper, and leaning art are the four most practical tools for renter-friendly wall decorating. Command strips handle lightweight frames well. For anything heavier, picture ledges mounted with minimal hardware let you display large collections without drilling multiple holes.
- Peel-and-stick wallpaper: $30–$120 per wall, removes without residue, and comes in hundreds of patterns.
- Removable panels: Lightweight foam or PVC panels that press-fit or use minimal adhesive.
- Fabric wall hangings: No hardware needed for lighter pieces; a single nail or adhesive hook works.
- Magnetic boards: Paint-over magnetic primer or hang a magnetic board panel for a functional feature wall.
- Oversized mirrors: Lean against the wall or hang with a single anchor point to add depth and light.
- Color drenching: Painting walls, trim, and ceiling the same color creates an immersive effect with just paint and a roller.
Larger frames need proper hanging hardware beyond adhesive strips. A single anchor screw with a wall anchor causes far less damage than a fallen frame. Patch the hole when you move out and most landlords will not charge for it.
The most budget-conscious approach combines one peel-and-stick feature wall with a curated ledge display. Total cost can stay under $150 while delivering a room that looks intentionally designed. For a deeper look at panel options, the decorative wall panels guide on the Themediawallstore blog covers materials, costs, and installation in full.
Key Takeaways
The most effective decorative wall treatment combines the right material for your budget, a well-chosen feature wall, and proper surface preparation before any installation begins.
| Point | Details |
|---|---|
| Cost range is wide | Wood slat kits start at $150; professional stone cladding runs significantly higher per square foot. |
| Prep work determines quality | Leveling walls before slat installation and letting limewash dry fully between coats prevents the most common DIY failures. |
| Scale rules apply | Art and panels look best at two-thirds the width of the furniture below them. |
| Renters have real options | Peel-and-stick wallpaper and removable panels cost $30–$120 per wall and remove without damaging paint. |
| Personal storytelling wins | Gallery walls built around specific themes and 3D objects create more impact than generic prints. |
Why texture beats paint every time now
Flat accent walls had a good run. I spent years recommending a bold paint color as the fastest way to create a focal point, and it worked well enough. But the results always felt temporary, like a placeholder rather than a real design decision.
What changed my thinking was seeing how a wood slat wall or a limewash finish holds up over time. Paint fades and chips. Texture ages well. A limewash wall looks better after two years than it did on day one. A slat wall adds architectural depth that no color can replicate.
The mistake I see most often is homeowners treating wall decor as the last step rather than the first. You pick furniture, rugs, and lighting, then try to find a wall treatment that fits what is already there. That approach almost always produces a room that looks assembled rather than designed. Start with the wall. Let the texture or material set the tone, then build the room around it.
For renters, the peel-and-stick category has genuinely improved. The products available now are not the flimsy decals from five years ago. Some of the current removable wallpaper options are indistinguishable from traditional wallpaper at normal viewing distance. There is no reason to live with bare walls just because you do not own the space.
The one thing I would push back on is the idea that DIY always saves money. It does, if you prepare properly. It does not, if you skip the prep and have to redo the work. Buy the right primer. Level the wall. Let things dry. Those three steps are responsible for most of the difference between a DIY project that looks professional and one that looks like a DIY project.
— Jake
Themediawallstore makes the build easier
Ready to put a wood slat feature wall in your living room without hiring a contractor? Themediawallstore builds pre-cut, pre-labeled DIY media wall kits that go up in a weekend. Every kit arrives with the materials and instructions needed to get from bare wall to finished feature without guesswork or custom fabrication costs.

The kits cover a range of styles, from clean minimalist slat designs to full media wall configurations with floating consoles and display towers. Over 1,000 homeowners have already installed them. Browse the full range at the Themediawallstore shop and find the kit that fits your wall, your room, and your budget. If you want to add finishing touches, the wall accessories collection covers lighting, cable management, and display add-ons that complete the look.
FAQ
What is a decorative wall treatment?
A decorative wall treatment is any material, finish, or technique applied to interior walls to add texture, color, pattern, or dimension beyond flat paint. Common examples include wood slat panels, limewash plaster, stone veneer, and peel-and-stick wallpaper.
How much does a decorative wall treatment cost?
Costs range widely by material. Peel-and-stick wallpaper runs $30–$120 per wall, DIY wood slat kits start at about $150, and professional custom installations can reach $2,500 or more.
What wall treatments work best for renters?
Renters get the best results from peel-and-stick wallpaper, removable panels, command strips, picture ledges, and leaning art. These options create strong visual impact and remove cleanly without damaging paint.
Is limewash paint hard to apply yourself?
Limewash is moderate in difficulty. The most common mistake is applying a second coat before the first dries fully, which ruins the organic, layered effect that makes the finish distinctive.
What is the best wall to choose for a feature treatment?
Choose an uninterrupted wall with good lighting that you see immediately when entering the room. Avoid walls broken up by doors, windows, or large built-ins, as interruptions reduce the visual impact of any treatment.