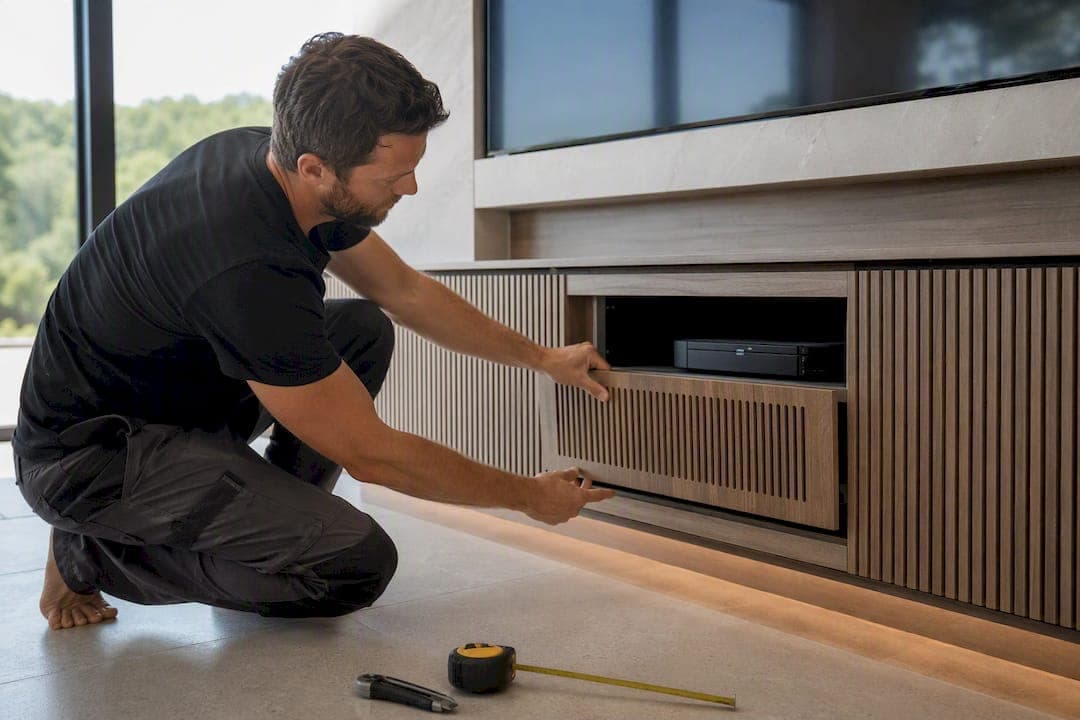
The most reliable ways to hide a cable box are mounting it behind the TV with a VESA or adhesive mount, tucking it into a ventilated cabinet or drawer, running a surface raceway or plug-through concealer kit, or boxing it in a decorative cord cover. Whichever you choose, plan for two problems up front: infrared remotes can't see through solid doors, and boxes overheat fast in tight, sealed spaces.
TL;DR:
- Mounting options depend on TV-to-wall clearance, with adhesive mounts suited for lightweight boxes under 5 pounds, and vented shelves better for heavier or ventilated units.
- Using a ventilated cabinet or open shelving is crucial to prevent overheating and ensure easy remote access, especially with sealed or fully closed setups.
- Surface raceways or plug-through concealer kits are ideal for renters or temporary setups, as they are inexpensive and do not require wall modification.
- Building custom cabinetry or a full wall unit provides the best integration, ventilation, and concealed wiring, but involves more installation effort and time.
- Always verify remote functionality and proper ventilation before sealing or finalizing the installation to prevent remote signal loss and overheating issues.
Table of Contents
- How Do You Hide a Cable Box Behind the TV?
- Mounting the Cable Box Behind the TV (VESA, Adhesive, Velcro)
- Using Furniture or Cabinets to Hide the Box
- Cable Concealer Kits, Raceways, and In-Wall Wiring
- Cable Management Boxes and Decorative Covers
- Remote Signal, Ventilation, and a Quick Safety Check
- A Design-First Option: Building the Box Into the Wall
- Hide the Box, but Design for Access First
- Get the Look Without the Guesswork
- Sources
- FAQ
How Do You Hide a Cable Box Behind the TV?
The right method depends on your setup, your lease, and how permanent you want the fix to be. Here's a fast way to match your situation to the right approach.
- Renting or don't want to touch the wall: A surface raceway or plug-through concealer kit. Cost is usually under $40, install time is 20 to 30 minutes, no tools beyond a screwdriver.
- Thin TV with a low-profile box (streaming stick, small satellite receiver): A behind-TV mount using VESA holes or adhesive strips. Budget $15 to $30 for the mount itself.
- Bulky cable box with a fan and multiple ports: Open shelving or a vented cabinet, not a sealed mount. Airflow matters more than concealment here.
- Planning a remodel or new TV wall: This is when an integrated media wall with built-in component housing pays off. It solves hiding, wiring, and ventilation in one build, typically over a weekend, and it's the point where hiring help (an installer or a kit with guided instructions) saves more time than it costs.
Mounting the Cable Box Behind the TV (VESA, Adhesive, Velcro)
Before buying anything, measure your cable box: depth, width, and weight. A box deeper than 2 inches often won't clear the wall once the TV is mounted flush, so check the gap between your TV's back panel and the wall first. If there's less than an inch of clearance, a behind-TV mount won't work and you need a side or cabinet solution instead.
For boxes under about 5 pounds, installers commonly recommend industrial-strength hook-and-loop or adhesive mounting strips rather than a hardware mount, since there's less to install and nothing to unscrew later. Heavier boxes or ones with a fan do better on a small vented shelf or a purpose-built mount, like the HIDEit Uni-SW, which lists compatible weight and dimension ranges for small streaming and cable devices.
- Measure the box and check TV-to-wall clearance.
- Choose adhesive strips for light boxes, a vented mount or shelf for heavier ones.
- Mark and secure the mount, using a stud when possible rather than drywall anchors alone.
- Attach the box, then test every remote before buttoning up the cables.
- Bundle the cords with a strain-relief clip so nothing pulls loose when the TV tilts.
Pro Tip: Test the remote from your actual couch distance and angle before you tighten the last screw. A signal that works standing two feet away can fail completely from across the room.
Using Furniture or Cabinets to Hide the Box
A media console or drawer unit is often the easiest fix, especially if you already own one. The trick is picking furniture that doesn't trap heat.
- Choose a cabinet with back panel cutouts or drilled vent holes, not a fully sealed box.
- If the cabinet is solid, add a pass-through grommet and a few ventilation holes with a hole saw.
- Use open cube bins or woven baskets on shelving to visually soften the box without blocking airflow at all.
- Route power and AV cables to the nearest outlet and keep them on one labeled power strip, so unplugging for a reset doesn't turn into a hunt.
This is also the cheapest option if you already have the furniture. It just takes 15 minutes with a drill.
Cable Concealer Kits, Raceways, and In-Wall Wiring
A painted raceway is the right call when you're hiding a TV's power and AV cords along a wall and want something removable and paintable to match. Retail wall cable concealer kits that bundle a raceway with a small cable management box are built for exactly this, and they're the best renter-friendly option because nothing is permanently altered.
- A plug-through concealer kit routes your existing plug through a small in-wall box, so you don't need a new outlet behind the TV.
- Install steps: mount the two boxes at outlet and TV height, feed the cord through the internal channel, snap the covers on.
- Skip DIY in-wall power runs entirely. Standard power cords aren't rated to run inside walls, and doing so violates electrical code. If you want a real in-wall outlet behind the TV, hire an electrician to install a UL-listed in-wall power kit.
Cable Management Boxes and Decorative Covers
A simple cord box on the floor or a shelf works well for power strips and excess slack, separate from any behind-TV mounting.
- Small boxes (roughly 10 to 14 inches) fit one power strip and a few cords; larger ones handle a router, modem, and cable box together.
- Coil excess cord loosely inside rather than folding it tight, and leave the box's vent slots uncovered.
- Weight the box slightly or anchor it with removable adhesive strips if it sits somewhere it could get bumped or tipped.
- Pick a finish (wood grain, matte fabric, brushed metal) that matches nearby furniture so it reads as a design piece, not a hidden problem.
Remote Signal, Ventilation, and a Quick Safety Check
If your cable box sits behind a closed door or a solid-fronted mount, your remote will likely stop working, since infrared signals need a clear line of sight. An inexpensive IR extender, usually around $15, fixes this by placing a small receiver on the visible front of the TV or cabinet and running the emitter to the hidden box's IR window.
- Confirm you need an IR extender by testing the remote through the closed cabinet or cover first.
- Leave at least an inch or two of clearance around any vents on the box itself.
- Check the box after a few hours of use. It should be warm, not hot to the touch.
- Keep the power strip accessible for quick resets without dismantling the whole setup.
Obstructed vents are the most common cause of premature box failure in enclosed setups, more so than any wiring issue. That single detail is worth checking before you seal anything up permanently.
A Design-First Option: Building the Box Into the Wall
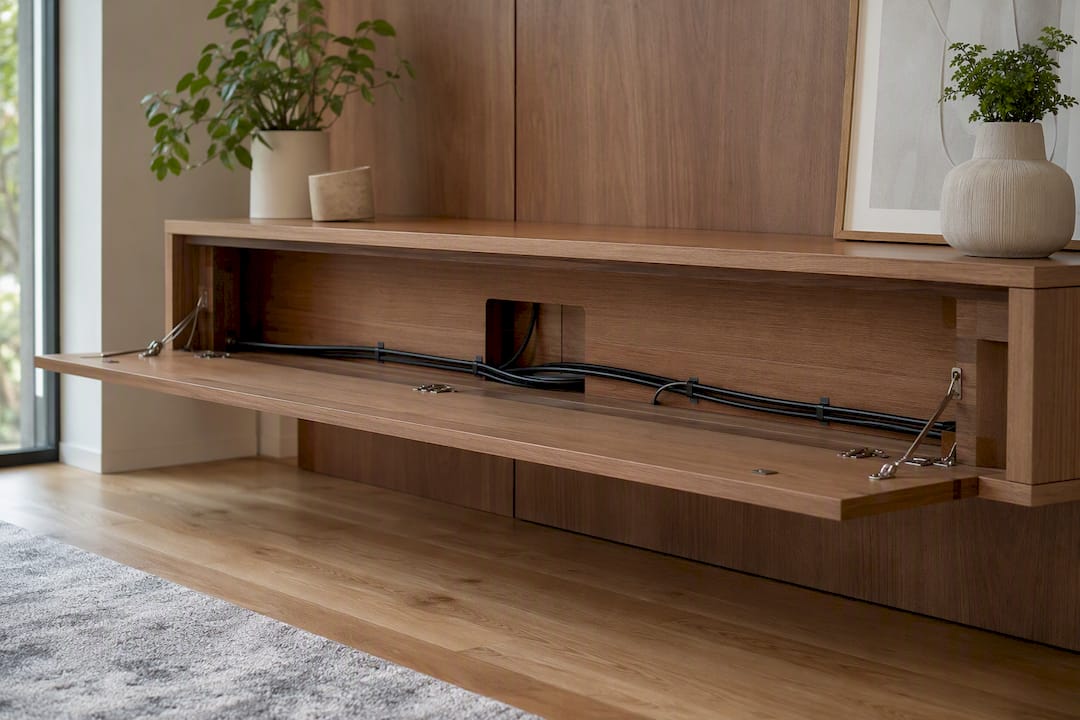
Hiding a cable box after the fact always involves some compromise between looks and access. Building a home around a designed component space skips that trade-off entirely. Custom cabinetry and media-wall builds integrate equipment directly into the wall, with dedicated, ventilated housing and hidden channels for every cable, so there's no visible box or dangling cord to manage in the first place.
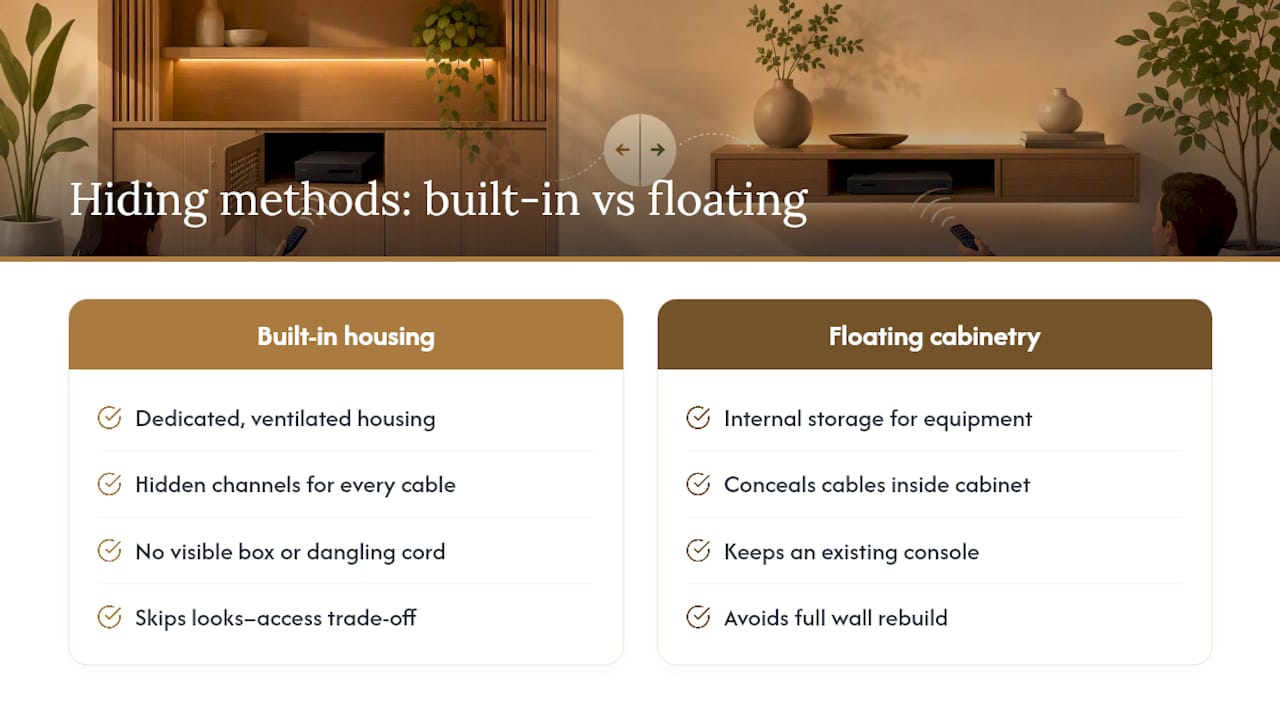
Themediawallstore's DIY media wall kits come pre-cut and pre-labeled with that housing built in, and most go up over a single weekend. If you'd rather keep an existing console, floating cabinetry with internal storage does much of the same job without a full wall rebuild.
Hide the Box, but Design for Access First
Most people hide a cable box the way they'd hide clutter: shove it somewhere out of sight and hope it keeps working. That's backward. Prioritize ventilated, serviceable housing first, then worry about how it looks. Test the remote and check for heat before you call any install finished, not after.
— Jake
Get the Look Without the Guesswork
There's a real gap between taping a raceway to the wall and building housing that's actually designed for your equipment. Themediawallstore closes that gap: its kits include dedicated component housing and hidden wire channels built into the panel layout, so the cable box, router, and power strip all have a ventilated, accessible spot instead of a jury-rigged one.

Every kit ships pre-cut and pre-labeled, so a weekend is usually enough to get from boxes on the floor to a finished wall, no contractor required. If a full kit is more than you need right now, the accessories line covers cabinetry and concealment add-ons for retrofitting an existing setup. Browse the shop to see which kit fits your TV and room, and start planning your install this week.
Sources
- Concealing wires with ease: a comprehensive 3-step guide to hide wires on a wall-mounted TV
- Where do I put my cable box with a wall mounted TV? - Wall Mounted Reviews
- 7 Ideas to Hide Your Cable Box — Bustling Nest
- Wall Cable Concealer Kit with Power and Cable Management Box - The Home Depot
FAQ
How can I hide my cable box behind my TV?
Use an adhesive or hook-and-loop mount for a light box, or a small vented shelf for a heavier one, and confirm at least an inch of wall-to-TV clearance before you start.
What is a good box to hide cables in?
A vented cable management box sized for a single power strip works for most setups; choose one with open slots so it doesn't trap heat, and anchor it if it sits somewhere it could tip.
How do I hide a cable box in an outdoor or backyard setup?
Use a weatherproof, ventilated equipment enclosure rated for outdoor use rather than a standard indoor cord box, and route power through a GFCI-protected outlet.
Are cord-hiding boxes safe?
Yes, as long as ventilation slots stay uncovered and you never route standard power cords inside a wall; use a UL-listed in-wall kit or an electrician for any in-wall power work.
Will hiding my cable box affect my remote or Wi-Fi signal?
A closed cabinet or mount can block infrared remotes, which an IR extender fixes for around $15, and can weaken Wi-Fi if the box also serves as your router; keep routers on open shelving when possible.