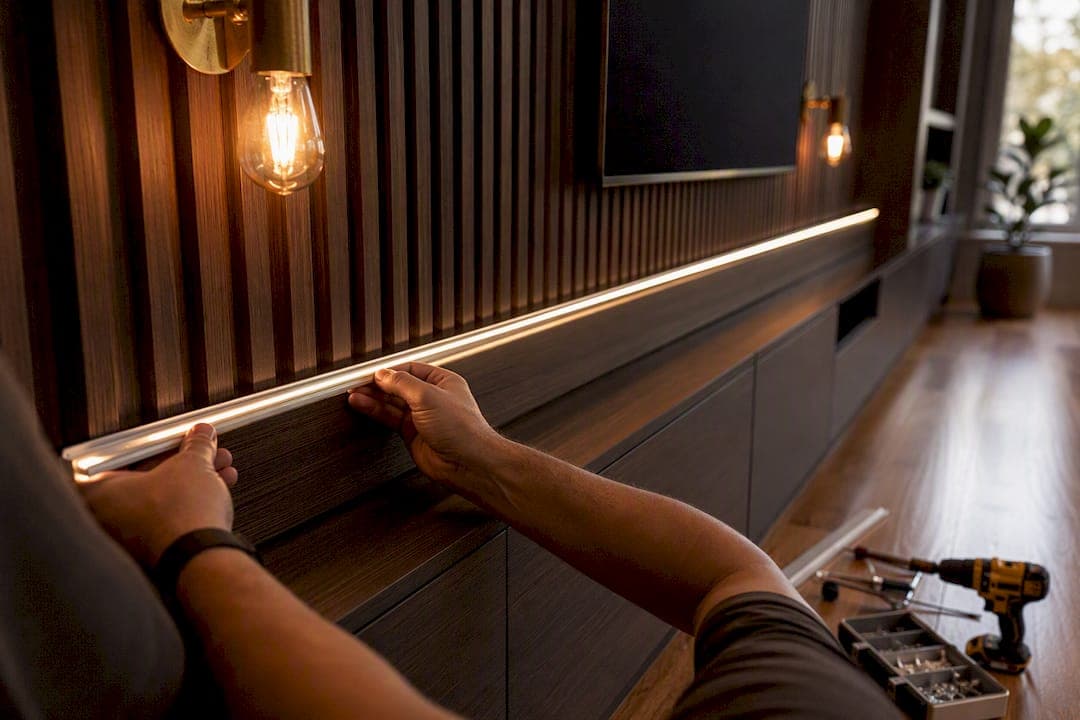
The best approach for most media walls is indirect, diffused LED backlighting paired with layered accent lighting: a soft halo behind the TV, plus one or two secondary sources that shape the rest of the wall. Skip bare, exposed LED strips wherever you can see the individual diodes. Start with LED strips housed in aluminum profiles with a frosted diffuser, add under-shelf strips for a floating effect, and use recessed puck lights if your wall has deeper millwork or stone cladding.
Here's where to begin depending on what you're working with:
- TV backlight: a diffused LED strip in an aluminum channel, mounted a few inches behind the screen's edge
- Floating shelves or consoles: under-shelf LED strips for a "hovering" look
- Slat or paneled walls: vertical LED channels between slats for texture and depth
- Stone, marble, or fireplace surrounds: recessed puck lights or a perimeter halo strip
If wiring, cutting, and mounting sound like more trouble than you want on a Saturday, a pre-cut, pre-labeled kit with integrated LED provisions saves the guesswork and the extra trip to the hardware store.
Key Takeaways
Diffused LED backlighting placed a few inches behind the screen, paired with layered accent lighting matched to your wall's material, delivers the best combination of comfort and visual impact.
| Point | Details |
|---|---|
| Backlight reduces eye strain | Placing a dimmer LED strip behind the TV narrows the contrast between screen and dark room. |
| Diffusers prevent visible dots | Aluminum profiles with frosted lenses give an even glow instead of a string of pinpoints. |
| Power sizing prevents flicker | Calculate total wattage and choose a driver rated about 20% above that figure. |
| Match style to material | Warm vertical channels suit slat wood; perimeter halos suit marble and stone panels. |
| Kits simplify the process | Themediawallstore's pre-cut kits, including Oslo Lux LED and Monaco Noir, arrive with matched lighting provisions built in. |
Table of Contents
- What Types of LED Lighting Work Best for a Media Wall, and Where Should They Go?
- How Do Media Wall Lighting Ideas Change by Material and Style?
- What Do You Need to Know Before Installing LED Strips on a Media Wall?
- Which LED Products and Controls Actually Matter?
- When Does a Pre-Cut Kit Beat Sourcing Parts Yourself?
- What Are the Most Common Media Wall Lighting Mistakes?
- How Much Electricity Does Media Wall Lighting Actually Use?
- How Long Do Media Wall LED Lights Last, and What Maintenance Do They Need?
- How Does Media Wall Lighting Affect Eye Comfort and the Viewing Experience?
- Why Most Media Wall Lighting Advice Skips the Part That Matters
- Get a Media Wall With the Lighting Already Built In
- Sources
- FAQ
What Types of LED Lighting Work Best for a Media Wall, and Where Should They Go?
Bias lighting, sometimes called backlighting, is a strip of LEDs placed behind the TV facing the wall rather than the viewer. It fills the dark space around a bright screen, and that fill reduces the contrast your eyes have to keep adjusting for, which is a documented source of eye strain during long viewing sessions. It's the single highest-impact, lowest-effort upgrade you can make to a media wall.
Placement matters more than most people assume. Mount the strip roughly two to four inches behind the TV's outer edge so the glow reads as a halo rather than a visible line. Keep the light dimmer than the screen itself. If your bias light is brighter than the movie you're watching, you've built a distraction, not ambiance.
- Choose a profile, not a bare strip. Aluminum channels with a diffuser lens spread the light evenly and hide the individual LED chips. Bare strips look fine in a drawer and terrible on a wall.
- Match diffuser opacity to brightness. A frosted lens softens a high-output strip; a clear lens only works with very low-density, low-lumen strips.
- Set under-shelf lighting flush with the shelf's front lip, angled slightly downward, so the light washes the wall below instead of hitting your eyes when you stand up.
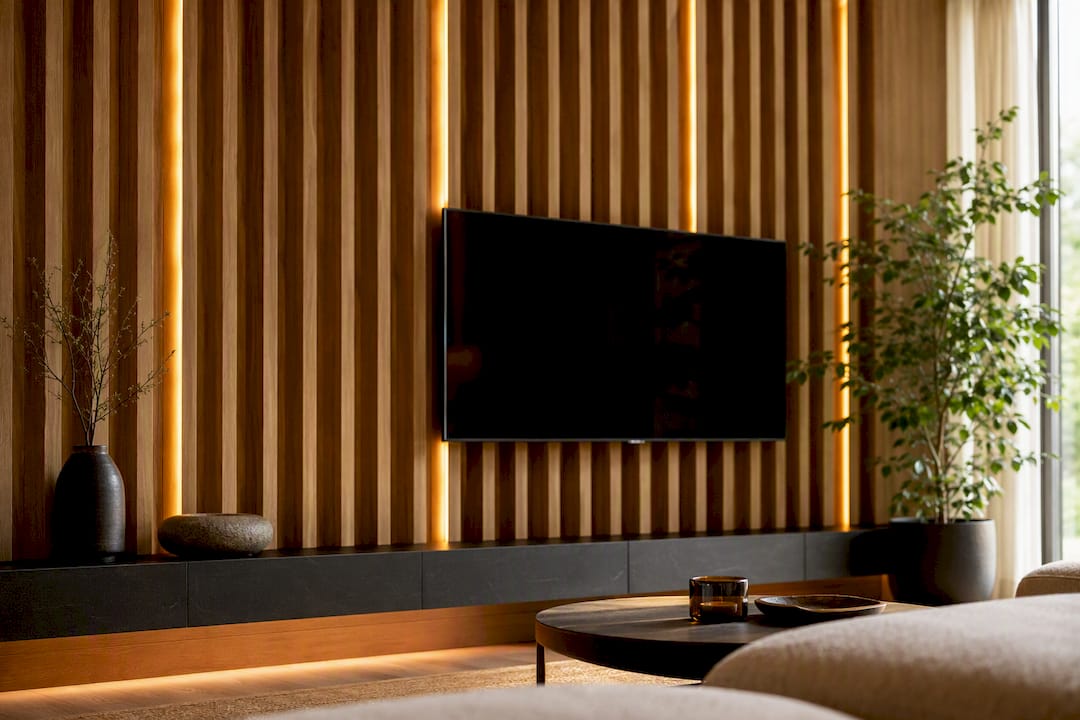
- Space vertical slat channels every one or two slats, running close to the full height of the panel, and aim for a soft wash rather than a spotlight effect.
- Keep downlights and sconces angled away from the TV screen. Any fixture that can reflect off the glass at your seating position needs to move or get a shade.
Pro Tip: If you're not sure where glare will land, sit in your usual spot at night with a flashlight and walk it along the wall. Wherever the beam bounces back into your eyes is exactly where a fixture shouldn't go.
Aluminum profiles and diffusers aren't just cosmetic. Simple Lighting's installation guidance points out that higher-density strips paired with a proper diffuser are what separates a media wall that looks designed from one that looks like a garage project with extra steps.
How Do Media Wall Lighting Ideas Change by Material and Style?
Lighting choices should follow the material, not fight it. Designers increasingly treat the light itself as architecture rather than decoration, which means the fixture placement and profile choice carry as much visual weight as the panel material underneath.
Slat wood walls look best with vertical LED channels tucked between the slats, run at a warm color temperature to bring out the wood grain. The light grazes across the ridges and shadows, which is what gives slat walls their signature depth. A cool white here flattens the texture instead of highlighting it.
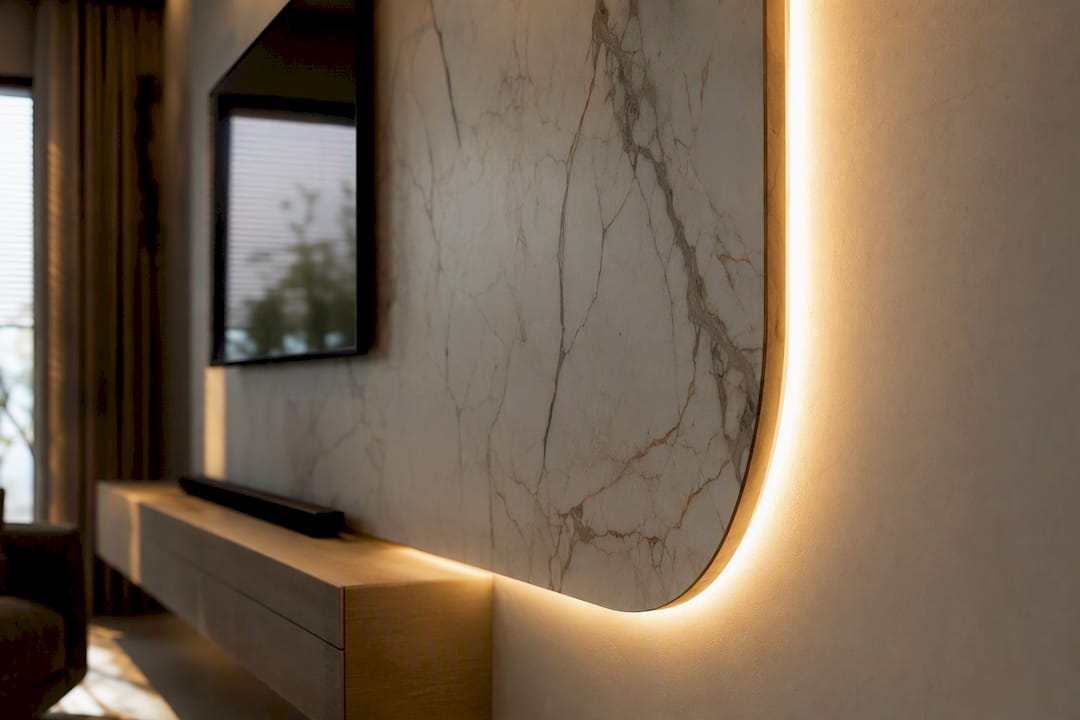
Marble or marble-look panels respond well to a perimeter halo, a thin LED strip run around the panel's inside edge so light bleeds outward along the veining. It's a technique borrowed straight from hotel lobbies and high-end retail displays, and it works because a halo lifting a stone or marble surface creates outsized visual impact for a relatively small install. If you're building around a marble-effect panel, that halo is often the difference between a wall that looks flat and one that looks lit from within.
Dark stone walls need a two-layer approach. Pair a warm underglow along the base or shelving with a cooler halo directly around the TV. Dark surfaces absorb light aggressively, so a single light source usually leaves half the wall looking like a shadow box. Two temperature zones balance that out.
Minimalist walls want restraint above all else. Hide the strip entirely inside a recessed channel, keep it at a low, warm output, and resist the urge to add a second accent color. The goal is a wall that looks lit, not a wall that looks like a light fixture.
Home theater and gaming walls are the one place where RGBW strips and sync-capable controllers genuinely earn their keep. Ambient lighting that shifts color with on-screen action, or syncs to a game's palette, adds a layer of immersion that a static white strip can't match.
A few things worth remembering as you plan:
- Perimeter halos and vertical channels are the two most-repeated techniques across media wall design examples, for a reason: they're forgiving to install and hard to get visibly wrong.
- Warm and cool zones can coexist on one wall if they're separated by material or by distance.
- RGBW is a style commitment, not a neutral upgrade. Reserve it for rooms built around movies and games, not a living room shared for everyday use.
Statistic Callout: Backlighting doesn't just look good on camera. It works because it narrows the brightness gap between screen and surroundings, which is the same mechanism The Spruce cites for reduced eye fatigue during long viewing sessions.
What Do You Need to Know Before Installing LED Strips on a Media Wall?
Good installs start with the profile, not the strip. An aluminum channel with a diffuser lens is what prevents the "string of dots" look that plagues bare LED tape, and it's the single upgrade Simple Lighting recommends most often for a clean finish. Buy the profile before you buy the strip, and make sure the strip width actually fits the channel you've picked.
Power sizing comes next, and it's where most DIY installs go wrong. Add up the wattage per foot across your total run length, then choose a power supply rated at least 20% above that number. A driver running at its exact limit runs hot, ages faster, and tends to dim over time. Overspec it and forget about it.
- Calculate total wattage. Multiply the strip's watts-per-foot by your total run length across every channel you're lighting.
- Pick your voltage. 12V strips are cheaper and fine for runs under roughly ten feet. For longer continuous runs, 24V strips resist voltage drop better, which means less brightness falloff at the far end of the run.
- Cut only at the marked cut lines, and use solderless connectors for quick joins or solder for permanent, flicker-free corners.
- Route cable inside the wall cavity or behind the panel wherever possible, using the same channel the TV's own cables travel through.
- Call an electrician if you're hardwiring a driver into a junction box or running power through a wall with existing wiring you're not confident about. LED strip work is DIY-friendly; house wiring often isn't.
Pro Tip: Buy your power supply after you've measured the full run, not before. It's the one component people guess on, and an underpowered driver is the number one reason a media wall looks dim within the first six months.
Corner runs are the detail that separates amateur installs from clean ones. Use corner connectors rated for your strip's width rather than bending the strip itself past its rated radius, which cracks the copper traces over time and creates dead spots that show up months later. If you're mounting a TV to a concrete or masonry wall as part of the same project, a dedicated mounting guide will save you from the specific headaches that substrate creates.
Which LED Products and Controls Actually Matter?
Three LED types cover almost every media wall scenario. RGB strips shift color but can't do a clean, neutral white, which makes them a poor choice for anywhere you want the light itself to disappear. RGBW adds a dedicated white diode alongside the color chips, giving you both moody color scenes and a usable daily white. Tunable white strips skip color entirely and instead let you dial the white point from warm to cool, which is the right pick for anyone who wants one flexible, understated light source.
Color temperature should follow the room's purpose. Warm white in the 2700K to 3000K range suits cozy living rooms and evening-heavy viewing. Neutral white around 3500K to 4000K works as a general-purpose middle ground. Cool white at 5000K and above reads as contemporary and crisp, and LEDCO's lighting guidance recommends it specifically for spaces built around a sharp, modern look rather than a relaxed one.
If you're lighting open shelving where finishes and objects need to look true to color, look for a CRI of 90 or higher. Anything lower and wood tones, fabric, and skin tones under that light start to look slightly off, even if you can't immediately say why.
Statistic Callout: Color rendering and temperature aren't cosmetic footnotes. LEDCO's category guidance treats CRI and color temperature as core selection criteria precisely because they change how every material on the wall actually reads.
For controls, match the tool to how much you'll actually use it:
- RF remotes are the simplest option and work well if you just want on, off, and a brightness slider.
- Wi-Fi app controllers add scheduling, scenes, and voice integration through Alexa or Google Assistant.
- Sync-capable controllers react to music or on-screen content, which is worth the extra cost only in dedicated theater or gaming rooms.
- Plug-and-play kits bundle a controller, driver, and connectors together, which removes a lot of the compatibility guesswork, though buyers should still check voltage and run-length limits before assuming a kit fits their wall.
If your media wall includes a fireplace insert, check the IP rating on anything mounted nearby. Standard indoor strips aren't built for the heat a fireplace surround generates, and that's one spec worth double-checking before you commit to a layout around an electric fireplace feature.
When Does a Pre-Cut Kit Beat Sourcing Parts Yourself?
Once you've settled on a lighting concept, the next decision is whether to source every profile, driver, and connector separately or start from a kit built to fit together. For most homeowners without electrical experience, a kit wins on time alone. Themediawallstore's pre-cut, pre-labeled kits are designed so panels, shelving, and LED provisions arrive matched to each other, which eliminates the wiring mismatches that turn a weekend project into a two-week one.
The kit lineup maps directly onto the lighting styles covered above. The Oslo Lux LED floating shelf comes with built-in LED lighting already integrated into the shelf body, which solves the under-shelf placement problem before you've picked up a drill. The Monaco Noir luxury media wall kit pairs floating console construction with diffused panel options, the same combination this guide recommends for a hotel-like halo effect.
A few situations where a kit is the clear practical choice:
- You want the marble halo or slat vertical-channel look without sourcing profiles, diffusers, and drivers from three different suppliers.
- You're working on a weekend timeline and can't afford a mid-project trip back to the hardware store for a missing connector.
- You'd rather skip calculating wattage and voltage drop yourself and use pre-matched components instead.
Themediawallstore has supported more than 1,000 completed installs, backed by expert support and a risk-free return policy if a kit doesn't fit your space. Before you order, measure your TV's width and mounting height, decide on a finish, pick your integrated lighting option, and plan where the power outlet needs to sit relative to the panel.
| Point | Details |
|---|---|
| Start with diffused strips | Aluminum profile plus diffuser beats bare strip lighting for an even, professional glow. |
| Match temperature to material | Warm white for wood and stone, cooler white for contemporary or marble-look panels. |
| Size the power supply correctly | Calculate total wattage across the run and choose a driver rated about 20% above it. |
| Consider a pre-cut kit | Themediawallstore's kits like Oslo Lux LED and Monaco Noir arrive with matched, integrated lighting provisions. |
What Are the Most Common Media Wall Lighting Mistakes?
Most lighting complaints trace back to one of five fixable errors.
- Strips mounted too close to the TV cause a harsh, distracting line instead of a soft halo. Move the strip back an inch or two, or recess it deeper into the profile.
- Underpowered drivers cause dimming, flickering, or premature failure from heat buildup. Recalculate total wattage and step up to a driver with 20% headroom.
- Visible LED dots mean your strip density is too low for the diffuser you're using. Switch to a higher-density strip or a stronger diffuser lens.
- Flickering with a dimmer switch almost always means the dimmer type doesn't match the LED driver's dimming protocol. Check compatibility before blaming the strip.
- Smart controllers losing pairing is usually a receiver placement issue. Reset to factory settings and move the receiver away from metal panels or dense wall cavities that block the signal.
How Much Electricity Does Media Wall Lighting Actually Use?
LED strips draw dramatically less power than the old rope lighting and halogen puck lights they replaced, and that gap only matters more the longer your lights stay on. A typical media wall lighting setup, a TV backlight plus one or two accent runs, usually pulls somewhere in the range of a standard LED desk lamp per hour, not a space heater's worth.
The bigger efficiency lever isn't the LEDs themselves. It's the controller. A smart dimmer or app-based schedule that turns accent lighting off during the day, or dims it automatically once a show ends, cuts run time far more than switching to a slightly more efficient strip would. Voice-controlled setups make this effortless: tell your assistant to kill the lights when you leave the room instead of relying on a wall switch you'll forget half the time.
Driver efficiency matters too. A correctly sized power supply, not one straining at its rated limit, runs cooler and wastes less energy as heat.
If you're weighing RGBW against tunable white purely on power draw, the difference is small enough not to be the deciding factor. Pick based on the look you want, and control run time with a schedule instead.
How Long Do Media Wall LED Lights Last, and What Maintenance Do They Need?
Quality LED strips run for years before noticeable dimming, often outlasting the TV they're installed behind. The lifespan that matters most in practice isn't the LED chip itself. It's the driver, the connectors, and how well heat gets away from the strip.
A profile with proper ventilation extends strip life because LEDs degrade faster when they run hot inside a sealed channel. That's part of why aluminum profiles aren't just a cosmetic upgrade. They act as a heat sink, pulling warmth away from the diodes.
Maintenance itself is minimal. Dust the diffuser lens occasionally, since a layer of dust dulls the glow more than people expect. Check connector joints once a year if the wall is somewhere humidity fluctuates, like a basement media room, since solderless connectors can loosen slightly over time. If a section dims unevenly, it's almost always a connection issue rather than the LEDs failing outright, and it's a five-minute fix rather than a full strip replacement.
Smart controllers and drivers are the components most likely to need replacing before the strip does. Buying a driver from a reputable source with a warranty, rather than the cheapest option available, saves a future headache.
How Does Media Wall Lighting Affect Eye Comfort and the Viewing Experience?
The core comfort problem with a TV in a dark room is contrast. Your eyes constantly adjust between the bright screen and the black void surrounding it, and that adjustment cycle is what leaves people rubbing their eyes after a long movie night. Backlighting fixes this by filling that void with a soft, secondary light source, which is exactly why The Spruce identifies bias lighting as a genuine comfort feature, not just a design flourish.
Brightness balance is the detail that makes or breaks this. A backlight that's too bright competes with the screen and becomes its own distraction; one that's too dim does nothing for contrast. The sweet spot sits noticeably dimmer than the TV's own output, just bright enough to soften the room without pulling focus from the screen.
Placement affects comfort just as much as brightness. Any fixture positioned where it can reflect off the TV's glass panel, a sconce across the room, a downlight aimed slightly wrong, creates a glare spot that's more distracting than sitting in total darkness. That's the entire reason placement rules matter as much as fixture choice. A beautifully chosen LED strip in the wrong spot causes the exact problem it was meant to solve.
Why Most Media Wall Lighting Advice Skips the Part That Matters
Most articles on this topic treat lighting like paint color: pick a mood, buy a strip, done. That undersells how much placement and profile choice actually determine the outcome. Two identical LED strips, one bare and one in a diffused aluminum channel, produce results that look like they came from different budgets entirely, and that gap has nothing to do with the wall's material or design style.
The conventional advice also underweights power sizing. Plenty of guides tell you to "add an LED strip behind your TV" without mentioning that an undersized driver will quietly dim that strip within a year. If there's one thing worth getting right before anything else, it's the math on wattage and voltage drop, not the color temperature debate everyone spends time arguing about.
If you're starting from zero, prioritize the backlight and its power supply first. Everything else, the accent channels, the smart controls, the RGBW scenes, is easy to add later. A dim, flickering backlight is much harder to fix after the drywall's closed up.
Get a Media Wall With the Lighting Already Built In
Sourcing profiles, diffusers, drivers, and connectors from separate suppliers works, but it also means troubleshooting compatibility issues nobody warns you about until you're mid-install. Themediawallstore's kits skip that entirely: every panel, shelf, and LED provision is pre-cut and pre-labeled to fit together, so the lighting concepts covered in this guide, halos, under-shelf glow, vertical slat channels, arrive as a system instead of a shopping list.

That matters most if you've settled on a look, the marble halo, the slat wall with warm uplighting, the floating console with integrated LED, and just want it installed correctly the first time. The Oslo Lux LED floating shelf and Monaco Noir luxury media wall kit both build the lighting concepts from this guide directly into their construction, and every kit ships with expert support and a risk-free return if something doesn't fit your space. Browse the full DIY media wall kit lineup and measure your wall this week if you're aiming for a finished setup by next weekend.
Sources
- TV wall lighting ideas — Trendir
- TV wall decor examples — The Decor Made Easy
- TV wall ideas — The Spruce
FAQ
What Is the Best Type of Lighting for a Media Wall?
Diffused LED strip backlighting mounted a few inches behind the TV, housed in an aluminum profile, is the most effective starting point because it reduces screen-to-room contrast without creating glare.
Are Backlights for TVs Worth It?
Yes. Backlighting narrows the brightness gap between a bright screen and a dark room, which meaningfully reduces eye strain during long viewing sessions.
What Is the Best Lighting for a Media Room?
Layered lighting works best: a dim TV backlight for contrast, plus one or two accent sources, like under-shelf strips or a marble halo, kept at a lower brightness than the screen itself.
Where Should You Put Lights in a Media Wall?
Place backlighting a few inches behind the TV's edge, run under-shelf strips flush with the shelf lip angled downward, and keep any sconces or downlights positioned so they can't reflect off the screen.