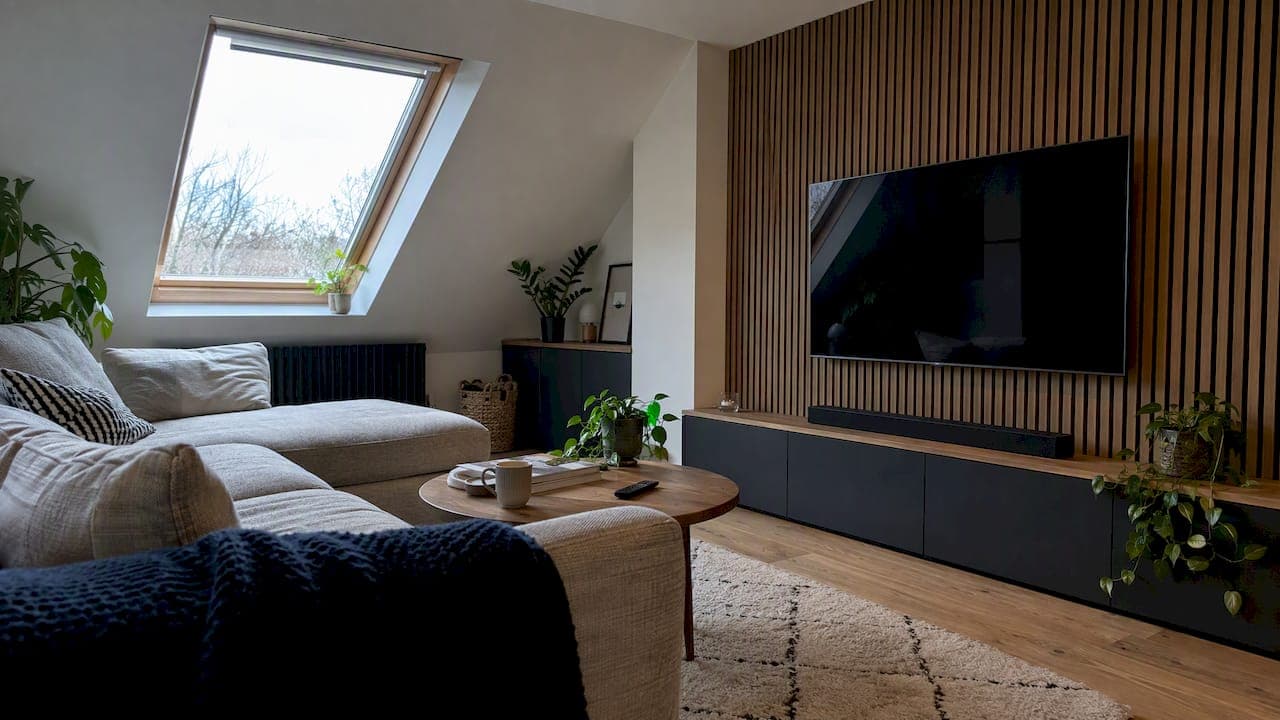
Acoustic panels improve in-room sound and reduce echo behind a TV, but they will not reliably stop sound from leaving the room. For that you need structural isolation. Adding absorptive or slat panels around the TV and mounting the screen correctly gives most homeowners the best mix of sound improvement and style. If the real goal is keeping sound from reaching a neighbor or the next room, panels alone won't get you there.
TL;DR:
- High quality mineral wool and fiberglass panels can reach NRC values from 0.8 to 0.95, while foam does little against subwoofer bass.
- In small living rooms, two or three panels at side wall reflection points, plus one behind the TV, are often enough.
- Mark studs before placing panels, then anchor the bracket through panels into studs or masonry, using spacers so panels do not support the TV.
- If sound travels into another room, address gaps around outlets and doors or add wall mass; extra surface panels barely affect the wall’s STC rating.
- Prefabricated acoustic slat panels cost about $8 to $14 per square foot, while a do it yourself build can approach $4.
Table of Contents
- Acoustic treatment vs. soundproofing: choosing the right approach for your TV wall
- Panel types and materials for TV walls, and which fits your room and budget
- Where to place panels around a TV for the biggest audible improvement
- Mounting and safety: installing panels without compromising structural support
- Installation options, timeline, and cost expectations for a soundproof TV wall
- Actionable installation checklist and best practices
- Keeping acoustic panels looking and performing their best
- Ventilation, cable access, and why surface treatments can't stop sound on their own
- Integrating acoustic treatment with a luxury media wall kit
- Combining acoustics with cabinetry, shelving, and smart tech for better sound
- Why integrated kits beat piecemeal panel shopping
- How we help: media wall kits built around acoustic performance
- FAQ
- Sources
Acoustic treatment vs. soundproofing: choosing the right approach for your TV wall
These two jobs get confused constantly, and the mix-up is why so many people end up disappointed with panels they installed correctly.
Acoustic treatment, which is what panels do, manages sound that's already inside the room. It absorbs reflections off hard surfaces like drywall, glass, and flooring, so dialogue sounds clearer and echo quiets down. Soundproofing is a different job entirely: it stops sound from traveling through the wall into another room, and that requires mass, sealing, and decoupling built into the wall assembly itself, not a surface layer hung on top of it, according to the Soundproofing Company.
The practical metric for panels is NRC, the Noise Reduction Coefficient, which rates how much sound a material absorbs rather than reflects. High-quality acoustic panels used in home theaters often reach NRC values between 0.8 and 0.95, depending on material density and thickness, according to GIK Acoustics. STC, by contrast, rates how well a wall assembly blocks sound transfer, and it's the number that matters if neighbors or family members in other rooms are the concern.
A simple way to tell which problem you have:
- If the TV room itself sounds harsh, echoey, or hard to follow during dialogue, that's an absorption problem panels can fix.
- If people outside the room can hear the TV clearly through the wall, that's a transmission problem panels won't solve.
Panel types and materials for TV walls, and which fits your room and budget
Material choice comes down to how much absorption you need and how much you care about the finished look.
- Mineral wool and fiberglass panels deliver the highest NRC ratings and suit dedicated home theaters where serious absorption matters more than decor.
- PET felt and fabric-wrapped panels balance appearance and performance well, which makes them a common choice for living rooms that double as media spaces.
- Acoustic foam costs less and handles mid and high frequencies reasonably well, but it does little for low-frequency rumble from subwoofers or movie soundtracks.
- Acoustic slat panels add a decorative wood-look finish, diffuse sound rather than just absorbing it, and conceal wiring behind the slats while still contributing useful mid-frequency absorption.
Pre-fabricated acoustic slat panels typically run about $8 to $14 per square foot, while a DIY slat build from raw materials can land closer to $4 per square foot, according to this TV accent wall guide. Fabric-wrapped, shop-fabricated sound-absorbing units require their own mounting hardware and coordination with wall penetrations, so check manufacturer specs before buying, per construction specification standards for sound-absorbing wall units.
Where to place panels around a TV for the biggest audible improvement
Placement matters more than panel quality. Professionals often mix absorptive panels with diffusive treatments, and poor placement can render even high-quality panels nearly useless, according to guidance on acoustic wall panel installation.
- Sit in your usual viewing spot and have someone slide a mirror along the side walls and ceiling. Wherever you can see the TV or speakers in the mirror is a first reflection point and needs a panel.
- Add absorption directly behind the TV and behind any speakers to cut slap-back echo bouncing off that flat surface.
- Offset panels rather than lining them up in a single uniform row, and mix in some diffusive slat material so the room doesn't sound dead or muffled.
- In a small living room, two or three panels at reflection points plus a behind-TV panel is often enough. A dedicated home theater usually needs full wall coverage plus ceiling treatment.
Pro Tip: Treat the wall behind the TV and the two side-wall reflection points first. That combination fixes most of the harsh echo in a typical living room before you spend money on anything else.
Mounting and safety: installing panels without compromising structural support
The order of operations matters here, and skipping steps is how TVs end up pulling loose from walls.
- Install acoustic panels first, across the full area you plan to treat.
- Mark stud locations (or masonry anchor points) before committing to panel placement so the mount lines up with structure, not empty cavity.
- Mount the TV bracket through the panels and into the studs or masonry behind them, never into the panel material itself.
- Use spacers or standoffs so the mounting plate clamps tight against the rigid wall surface rather than crushing the panel finish, following the 4x support and 1-inch clearance rule for safe acoustic backdrops.
Plan ahead for a cleaner result:
- Map bracket placement and cable paths before you cut or install a single panel.
- Leave access for ventilation so electronics behind the panel don't overheat.
- Avoid routing power cables where a lag bolt will later need to pass through.
Installation options, timeline, and cost expectations for a soundproof TV wall
Your timeline and budget depend heavily on which route you take.
- DIY panel-only installs: a weekend is typical for covering a standard TV wall area, with material costs scaling by square footage and panel type chosen above.
- Pre-cut media wall kits: pre-cut, pre-labeled panels with integrated cable management can install in a weekend and finish cleaner than buying individual pieces separately, since everything is sized to fit together.
- Structural soundproofing or electrical rework: if you need to add mass, seal penetrations, or run new wiring, budget for professional help and a longer timeline, since this work goes beyond a surface-level weekend project.
Buyer guides consistently point homeowners toward panels that balance easy installation with adequate NRC for home use, rather than the highest-rated commercial product on the market, according to Bob Vila's soundproofing panel guide.
Actionable installation checklist and best practices
Keep this sequence in front of you before you start drilling:
- Measure the wall, mark every stud, and sketch out bracket and cable paths before buying panels.
- Install panels across the planned area, then mount the TV through them into studs using spacers.
- Check NRC ratings when comparing panels, and remember that decorative panels improve room acoustics but won't stop sound from reaching another room.
- Reference acoustic wall panel product pages and our how-it-works guidance for exact panel dimensions before ordering, so sizing matches your wall the first time.
Pro Tip: Dry-fit your layout with painter's tape before mounting anything. Dry-fitting your layout with painter's tape can save you from redrilling holes you can't undo.
Keeping acoustic panels looking and performing their best
Panels built into a media wall take very little upkeep, but a few habits keep them performing years after install.
Dust is the main enemy of fabric-wrapped and felt panels, since it settles into the weave and dulls both the look and the absorption. A weekly pass with a soft brush attachment on a vacuum, held a few inches off the surface rather than pressed against it, keeps fibers clear without flattening them. For slat panels, a microfiber cloth or a slightly damp cloth along the grain handles dust and smudges without leaving streaks on the finish.

Avoid soaking any fabric-faced panel. Moisture trapped inside mineral wool or PET felt backing can lead to sagging, mildew, or a muffled, less effective absorption layer over time. Spot-clean light stains with a dry cleaning sponge rather than water or household cleaners, which can discolor fabric or break down adhesive backing.
Check panel edges and mounting points once or twice a year, especially in a room where the TV generates regular heat. Felt and foam can loosen slightly at the corners over time, and a quick press-back with double-sided mounting tape or a touch-up screw keeps the finish flush against the wall. For slat panels near a TV, wipe down any dust buildup around the slats where airflow from electronics tends to concentrate it.
Ventilation, cable access, and why surface treatments can't stop sound on their own
A few practical constraints come up in almost every TV wall project, and they're easy to overlook until the installation is half finished.
Ventilation matters more than people expect. Electronics behind a media wall, including the TV itself, soundbars, and streaming boxes, generate heat that needs somewhere to go. Leave gaps or vented panel sections where equipment sits, rather than sealing everything flush, so components don't run hot behind a finished surface.
Cable access should be planned before any panel goes up. Decide where power, HDMI, and any speaker wiring will run, and build in access points or channels rather than fishing cables through a finished wall later. Slat panels make this easier since gaps between slats can double as cable routing if planned in advance.
The constraint that trips up the most homeowners is assuming panels alone will quiet a room for the neighbors or the next room over. Unsealed gaps around outlets, doors, and panel edges can reduce acoustic performance substantially, and surface treatments have limited effect on a wall's STC rating, per acoustical assembly guidance. If transmission between rooms is the actual complaint, look at sealing gaps, upgrading doors, or adding mass to the wall assembly instead of adding more panels. Readers weighing a full renovation often also look at noise-reducing interior door options, since a hollow-core door is frequently the weakest link in an otherwise treated room.

Integrating acoustic treatment with a luxury media wall kit
A soundproof-style TV wall doesn't have to look like a recording studio bolted to your living room. The cleanest results come from treating acoustics as part of the overall wall design rather than an afterthought stuck on top of it.
Slat acoustic panels work especially well here because they do double duty: they diffuse and absorb mid-frequency sound while also serving as the visible, finished surface of the wall. When a kit's slat panels, floating console, and cable routing are designed together, the acoustic layer becomes part of the aesthetic instead of a separate add-on competing with it. That's the advantage of planning placement during the kit layout stage rather than retrofitting panels after a media wall is already built.
Cable and bracket planning described earlier applies directly here too. Because kit panels are pre-cut and pre-labeled, bracket points and cable channels can be mapped against the kit's own layout before anything goes on the wall, which avoids the guesswork of cutting into a finished surface later. The slat finish also hides wiring runs that would otherwise need a separate cover plate or raceway.
For a living room or media room where the TV wall is the focal point, this integration matters more than in a back bedroom. A seamless look where cabinetry, lighting, and slat panels share the same finish reads as intentional design, while a patchwork of separately sourced panels and brackets tends to look exactly like what it is.
Combining acoustics with cabinetry, shelving, and smart tech for better sound
Panels handle reflections, but the rest of the media wall affects sound quality too, and it's worth thinking about them together rather than treating acoustics as an isolated step.
Floating cabinetry below the TV can house a soundbar or AV receiver at the right height for even dispersion across the room, instead of leaving it boxed into a cabinet that muffles output. Open shelving placed near first reflection points can double as a mount for small diffusive objects or secondary absorptive panels, which is useful in rooms where a full panel array would feel heavy-handed.
Smart tech integration, like app-controlled lighting or hidden-wire AV setups, reduces the clutter of visible equipment and cables that otherwise create additional hard, reflective surfaces for sound to bounce off. A tidier wall is often a quieter-sounding one simply because there's less exposed hardware scattering reflections unpredictably.
Lighting placement also affects how a slat or fabric panel reads visually: ambient LED lighting along a floating shelf highlights the panel's texture rather than washing it out, which keeps the acoustic treatment looking like a design choice instead of a retrofit. When cabinetry, shelving, lighting, and panels are chosen from a coordinated set of finishes, the whole wall functions as one acoustic and visual system instead of a stack of separate purchases.
Why integrated kits beat piecemeal panel shopping
Buying panels, brackets, and cable management separately leaves a lot of room for measuring errors, mismatched finishes, and wiring that ends up exposed anyway. An integrated kit solves the fit problem before you ever pick up a drill: panels, console, and cable paths are sized to work together from the start.
For homeowners who want a high-end look without custom carpentry, that combination of correct panel placement and a pre-engineered kit is what actually delivers on the promise of a soundproof-looking TV wall.
— Jake
How we help: media wall kits built around acoustic performance
We design our media wall kits with slat acoustic panels, integrated cable management, and floating cabinetry already sized to fit together, so the measuring and matching problem is solved before the kit arrives. Every panel is pre-cut and pre-labeled, which means the acoustic layer and the finished look go up as one project instead of two separate ones.

If you'd rather not handle layout and bracket planning yourself, our White-Glove Installation service is available alongside the kits. For readers who want expert input on panel placement and overall design before ordering, our Single Concept Design is $99, or our Full Design & Quote package is $299 for a package that covers the whole wall.
Browse our acoustic slat wall panel options or check how it works to see sizing and ordering details before you start measuring your own wall.
FAQ
Can a wall be soundproof?
A wall can be built to block most sound transmission, but it takes structural changes like added mass, sealing, and decoupling, not just surface panels. Acoustic panels alone improve how a room sounds inside, per soundproofing wall guidance, but they don't meaningfully change how much sound passes through to another room.
Where can I find acoustic panels for sale?
Acoustic panels are sold through specialty acoustic retailers, home improvement stores, and direct-to-consumer brands that offer pre-cut, finish-matched options. We sell acoustic slat wall panels.
What are the best acoustic panels for home theaters?
Mineral wool and high-density PET felt panels tend to perform best in home theaters because they reach NRC ratings as high as 0.95, according to GIK Acoustics. Slat panels are a strong secondary option when you also want diffusion and a finished decorative look.
What is sound dampening?
Sound dampening, also called absorption, refers to materials that soak up sound energy inside a room to reduce echo and reverberation. It's different from soundproofing, which blocks sound from traveling between rooms entirely.
Does mounting a TV through acoustic panels damage them?
Mounting a TV through panels is safe when the bracket is anchored into studs or masonry behind the panel, using spacers so the plate doesn't crush the panel material, following the 4x support and 1-inch clearance rule. Panels should never bear the TV's weight on their own.
Sources
- How to Install Acoustic Wall Panels for Perfect Sound Control
- SECTION 098433 - SOUND-ABSORBING WALL UNITS
- Soundproofing Walls
- The Best Soundproofing Panels to Control Unwanted Noise