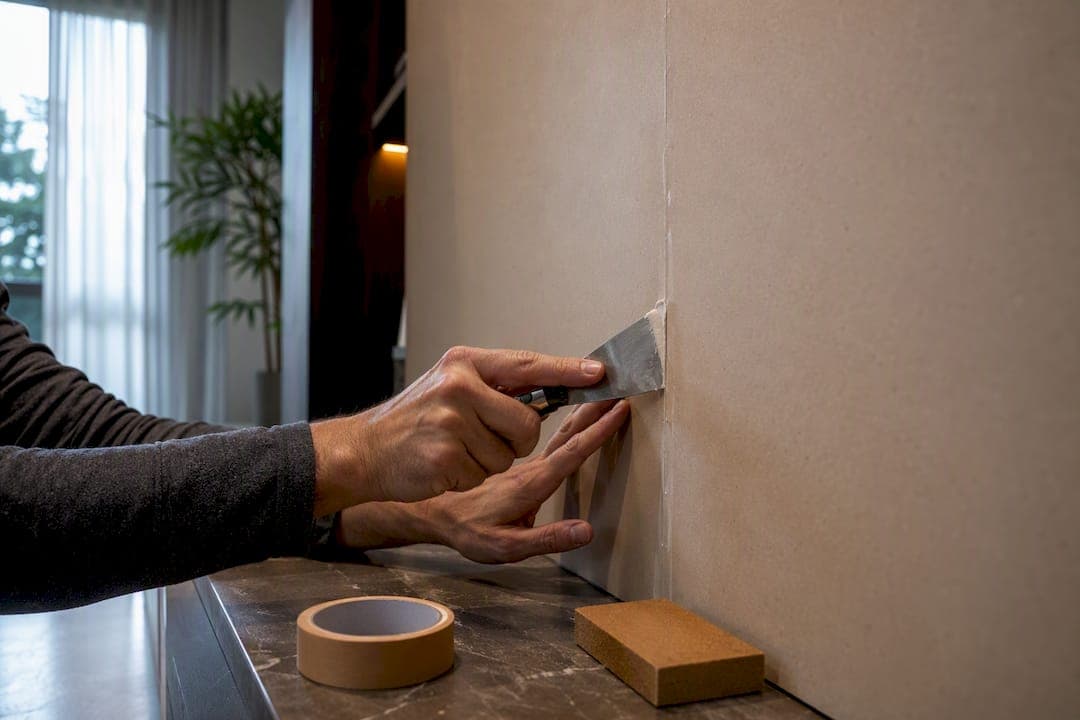
For hairline seams, fill and feather with a hard-setting MDF filler. For seams that will move with the seasons, use a thin trim strip or a shadow gap instead of fighting them with caulk. For a modern statement, cover the joint with an LED channel or metal trim. The right pick depends on gap size, whether the wall flexes, and how much upkeep you're willing to do later.
TL;DR:
- Seams smaller than a credit card can usually be filled with rigid MDF filler, but wider gaps should be covered with trim, shadow gaps, or LED channels based on movement and design goals.
- Seasonal humidity changes and improper sealing of MDF edges cause telegraphing and cracking, making proper acclimation and edge sealing before installation essential.
- For seamless blending, use a two-part filler, mesh tape for wide gaps, and feathering techniques, ensuring the repair is fully cured and sanded before painting.
- Shadow gaps and trim work best on tall or imperfectly straight walls, while LED or metal trims offer stylish, low-maintenance solutions for larger or uneven seams.
- Kits from Themediawallstore minimize seam issues by pre-cutting and labeling panels, reducing field errors that lead to cracks and visible seams over time.
Table of Contents
- What's the Best Way to Hide TV Wall Panel Seams?
- Why Do Seams Show Up on Media Wall Panels?
- How Do You Fill and Blend MDF or Plywood Seams?
- Should You Use Trim or a Shadow Gap Instead of Filling?
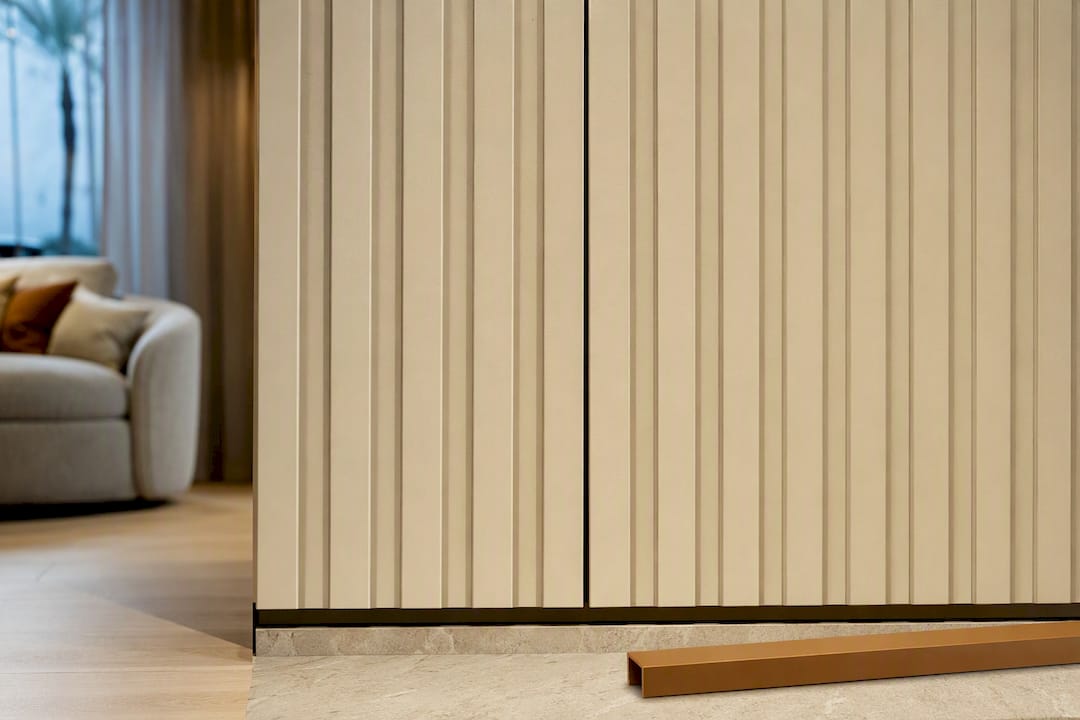
- Can LED Channels or Metal Trim Cover a Seam and Add Style?
- How Should You Prime and Paint So Seams Stay Hidden?
- How Themediawallstore's Kits Cut Down on Seam Problems
- What Actually Matters When You're Hiding a Seam
- Where to Find Kits Built to Minimize Seam Trouble
- Sources
- FAQ
What's the Best Way to Hide TV Wall Panel Seams?
Every seam-hiding method trades speed for durability, or looks for maintenance. Picking the wrong one for your gap size is why seams reopen six months after paint dries.
- Hard-setting filler with feathering: best for hairline gaps under 1/16-inch with no expected movement. Sands invisible but can crack if the wall flexes.
- Thin trim or batten: handles gaps up to about 1/4 inch and tolerates seasonal movement well. Adds a visible line, but it's a deliberate one.
- Shadow gap: a planned reveal that typically ranges from narrow to moderate width, turning the seam into a design line instead of a flaw. Zero cracking risk since nothing is filled.
- LED channel or metal trim: covers wider or uneven seams while adding a lighting feature. More installation work up front, easier access later if you need to service wiring behind the panel.
Here's the fast decision rule: if the gap is smaller than a credit card's edge and the wall is solid, fill it. If you can slide a business card into it, or if the panel sits over a stud wall that shifts with the seasons, trim it or plan a shadow gap. If you want the seam to double as a design feature, go LED or metal.
One quick warning: flexible caulk looks tempting for wide gaps because it's forgiving, but it telegraphs under paint and yellows faster than a rigid filler. Save caulk for true movement joints, not for a lazy fix on a static seam.
Why Do Seams Show Up on Media Wall Panels?
MDF and plywood edges soak up primer and paint differently than the factory face, which is why a seam can look invisible when you tape it and glaringly obvious a week after the topcoat cures. This is called telegraphing, and it's the single most common complaint from first-time panel installers.
Humidity and temperature swings cause the second big problem. Panels expand and contract slightly with the seasons, and if you butted them tight with no allowance for that movement, the joint eventually cracks the filler right along the seam line. Forum threads on installer boards report this as the leading cause of repeated cracking at MDF butt joints, and the fix isn't more filler. It's controlling moisture and giving the joint somewhere to move.
Preventing both problems starts before you ever pick up a putty knife:
- Acclimate the panels in the room for 24 to 48 hours before installing, so they've already expanded or contracted to match your home's humidity.
- Seal every cut edge with shellac-based primer or a stain-blocking primer before mounting. Raw MDF edges absorb finish unevenly, and sealing them first is what prevents that telegraphing later.
- Check wall straightness with a level before you start. Bowed drywall forces panels out of plane and opens seams unevenly.
- Use battens or full-coverage adhesive on uneven walls instead of relying on a few construction-adhesive dabs.
- Offset your joints over studs or blocking whenever the layout allows it, and combine adhesive with mechanical fasteners for extra holding power.
For gap spacing, plan a micro-gap just large enough to fill smoothly if you intend to fill and disappear the seam. If you're planning a trim strip or shadow gap on purpose, leave a small but visible gap so the reveal reads as intentional rather than sloppy.
Pro Tip: If your panels will sit on a wall near a window or exterior corner, budget for a slightly wider gap than you think you need. Exterior-adjacent walls swing in temperature more than interior ones, and a joint sized for a bedroom wall will crack faster on a wall backing onto the outdoors.
How Do You Fill and Blend MDF or Plywood Seams?
This is the workshop sequence for making a seam disappear completely, and it works whether you're following a full step-by-step panel installation or patching an existing wall.
Tools and materials checklist:
- Two-part MDF filler (Bondo-style) for hard-setting, sandable strength
- Flexible paintable caulk, reserved only for joints with real movement
- Fiberglass mesh tape for gaps wider than 1/8 inch
- Flexible putty knife, 3 and 6 inch widths
- Sanding block or pole sander with 120, 180, and 240 grit paper
- Stain-blocking primer
Work through it in order:
- Clean the joint. Vacuum dust, wipe with a tack cloth, and confirm the panel edges are dry.
- Bridge wide gaps. Anything wider than 1/8 inch needs mesh tape or a backer strip before filler goes on, the same way you'd treat a drywall butt joint.
- Apply a thin first pass. Press filler into the joint with the 3-inch knife, slightly underfilling. Trying to fill it flush in one pass is the most common rookie mistake.
- Let it cure fully, then apply a wider skim coat with the 6 inch knife, spreading 6 to 8 inches past the joint on each side. That wide spread is what keeps the repair from reading as a hump under raking light, a technique borrowed directly from drywall finishing.
- Sand in stages. Start at 120 grit to knock down ridges, move to 180 to smooth, finish at 240 for a paint-ready surface. Feather the edges 2 to 3 inches beyond the joint so there's no visible ledge.
- Prime a test patch first. Roll on primer over just the repair and check it under the room's actual lighting before committing to the whole wall.
If a seam keeps reopening after this process, the problem usually isn't your filler technique. It's a lack of mechanical backing behind the joint. Reinforcing with dowels or MDF-specific screws before refilling solves what a fourth skim coat never will.
Should You Use Trim or a Shadow Gap Instead of Filling?
Sometimes the smarter move is to stop fighting the seam and design around it. Thin battens and shadow gaps both do that, just in different ways.
For battens, use 1/4 inch lattice strips or primed 1x2 MDF, both of which are stable and take paint evenly without the heavy shadow a thicker trim casts. PVC trim is a solid alternative in rooms with humidity swings since it won't absorb moisture the way MDF does. Installation is straightforward: measure and cut each strip to length, run a bead of construction adhesive down the back, then set 18-gauge brad nails every 12 inches to hold it while the adhesive cures. Miter corners at 45 degrees for a clean look, and caulk the trim edges (not the seam itself) for a shadow-free transition into the wall.
- Battens work best on shorter walls or where you want a grid pattern across multiple panels.
- Shadow gaps suit tall, uninterrupted walls where a continuous reveal line looks more deliberate than a series of trim strips.
A shadow gap is a recessed line, usually cut into the panel edge or built with a receiving channel, that reads as a deliberate architectural detail rather than a repair. Architectural product guides point out that on very tall or multi-piece walls, this reveal is often the lowest-maintenance option available, since there's no filler to crack in the first place.
Pro Tip: If your panels have a strong grain or slat pattern, don't fight it with a butted seam. A shadow gap lets the pattern break cleanly instead of trying to align two edges that will never match perfectly under close inspection.
Can LED Channels or Metal Trim Cover a Seam and Add Style?
Yes, and this is where a seam problem turns into the best-looking feature on the wall. LED channels come in a range of profile widths, and most use a frosted or black cover that diffuses the light while also masking small gaps in the routing beneath it. Route the channel groove before final panel mounting if possible; it's far easier to cut cleanly on a bench than after the panel is already on the wall.
Metal edge trims work similarly but without the wiring. Most come as snap-in profiles with matching end caps, and you attach the base track with construction adhesive or screws depending on how much weight the trim needs to carry.
- Miter corners carefully; a slightly off angle on metal trim is far more visible than the same error on a painted batten.
- Use end caps at every exposed run to give the trim a finished, manufactured look rather than a raw cut edge.
- Paint the wall surface adjacent to the trim before final installation so you're not cutting in around a fragile metal edge afterward.
The trade-off is permanence versus access. A glued metal trim is a finished design upgrade, but a mechanically fastened one gives you easier future access if you ever need to get behind the panel for wiring or cable routing.
How Should You Prime and Paint So Seams Stay Hidden?
Even a perfectly filled or trimmed seam can reappear under the wrong light if the priming and paint steps get rushed. Raw MDF edges need a shellac-based primer or a stain-blocking product like KILZ; standard latex primer alone won't seal them evenly. Filled areas should get a coat of PVA or drywall primer before the finish coat, since bare filler and factory panel face absorb paint at different rates.
Sheen matters more than most DIYers expect:
- Flat or eggshell on broad wall surfaces, since low sheen scatters light and hides minor texture differences.
- Satin on trim and battens for a bit more durability without the glare.
- Avoid gloss or semi-gloss on the panel face itself. High sheen acts almost like a spotlight for any seam or filler ridge, no matter how well you sanded it.
Raking light from a window or an accent light near the TV wall will expose flaws that looked invisible under overhead lighting. Test your primer coat at the actual time of day the wall gets the harshest light before committing to the final color. If a seam still shows, a light hand-sand and a single touch-up coat, feathered wider than the last, usually finishes the job. One trick worth borrowing from finish carpenters: painting a narrow, slightly darker stripe directly behind a stubborn micro-gap makes any tiny opening read as intentional shadow instead of a bright flaw. For a deeper look at how sheen and color choice affect visible texture generally, this breakdown of interior paint finishes is a useful reference point.
How Themediawallstore's Kits Cut Down on Seam Problems
Most seam trouble starts with field-cut panels and raw edges nobody sealed properly. Kits that arrive pre-cut and pre-labeled can mean less on-site cutting and fewer exposed raw edges to prime.
Some kits include a recommended fixing pattern and hidden wire management designed to help keep panels from shifting after installation. That matters because panel movement, not bad filler technique, is the root cause of most reopened seams. A cleaner, more consistent fastening layout from the start does more for long-term seam stability than any amount of skilled patching after the fact.
What Actually Matters When You're Hiding a Seam
Most guides treat seam-hiding as a single skill: fill it, sand it, paint it, done. That's backwards. The filling technique is the easy part. The decision that actually determines whether your wall looks finished six months from now happens before you open the filler tub, when you decide whether this seam should disappear or whether it should become a line the design owns on purpose.
Conventional advice underrates shadow gaps and trim because they feel like a concession, like you're covering up a mistake instead of fixing it. That's the wrong frame. A shadow gap on a nine-foot media wall isn't hiding anything. It's the more honest solution, because it accepts that MDF moves and gives it somewhere to move without cracking your paint job.
If there's one thing worth prioritizing first, it's reading your wall's movement risk before you touch a putty knife. A stud wall near an exterior corner, a room with no climate control, a panel run taller than eight feet: any of those should push you toward trim or a reveal, not filler. Save the fill-and-feather approach for the seams that have earned the right to disappear, the short, interior, climate-stable ones where a hairline gap really is just a hairline gap.
— Jake
Where to Find Kits Built to Minimize Seam Trouble
If you'd rather skip the guesswork on fastening patterns and edge sealing altogether, Themediawallstore's kits are cut and labeled so you're assembling, not fabricating, which cuts out most of the field errors that cause seams to reopen.

Browse the full lineup in the DIY media wall kit shop to compare finishes and configurations. If your design leans toward a slatted look where seams are part of the pattern rather than something to hide, the Acoustic Slat Wall Panel in Red Walnut turns that joint spacing into a feature from the start. For a cleaner, minimalist wall where you want as few visible lines as possible, the Essential Modern media wall design is built around fewer, larger panel runs. Need LED channels, metal trim, or other finishing hardware to cover a seam the design-forward way? Check the media wall accessories page for parts that match your kit. Not sure which configuration fits your wall? Get in touch through the shop for guidance before you order.
Sources
- Today's Homeowner — How to hide seams when installing paneling
- This Old House — How to make perfect paneling seams
- Walston Architectural Products — How to handle panel seams for tall walls
FAQ
How Do You Hide Seams on Wall Paneling?
Fill hairline gaps with a hard-setting MDF filler and feather it 2 to 3 inches past the joint, or cover wider seams with a thin batten, shadow gap, or LED channel depending on how much movement the wall sees.
How Do You Hide Joins in Wall Paneling Where the Wall Moves?
For joints exposed to seasonal movement, a rigid filler alone will eventually crack; use a thin trim strip, a planned shadow gap, or reinforced mechanical fasteners behind the seam instead of relying on filler alone.
What Type of Trim Can You Use to Cover Paneling Seams?
Quarter-inch lattice strips or primed 1x2 MDF battens work well for most media walls, while PVC trim holds up better in humid rooms, and metal edge trims or LED channels suit a more modern, design-forward finish.
What Should the Gap Be Between Panels?
Leave a 1 to 2 millimeter micro-gap if you plan to fill and disappear the seam, or 1/8 to 1/4 inch if you're building an intentional trim reveal or shadow gap.
Do Themediawallstore Kits Reduce Seam Problems?
Yes. Because the panels come pre-cut, pre-labeled, and paired with a recommended fixing pattern, there's far less field cutting and raw-edge exposure, which are the two biggest causes of visible seams after installation.