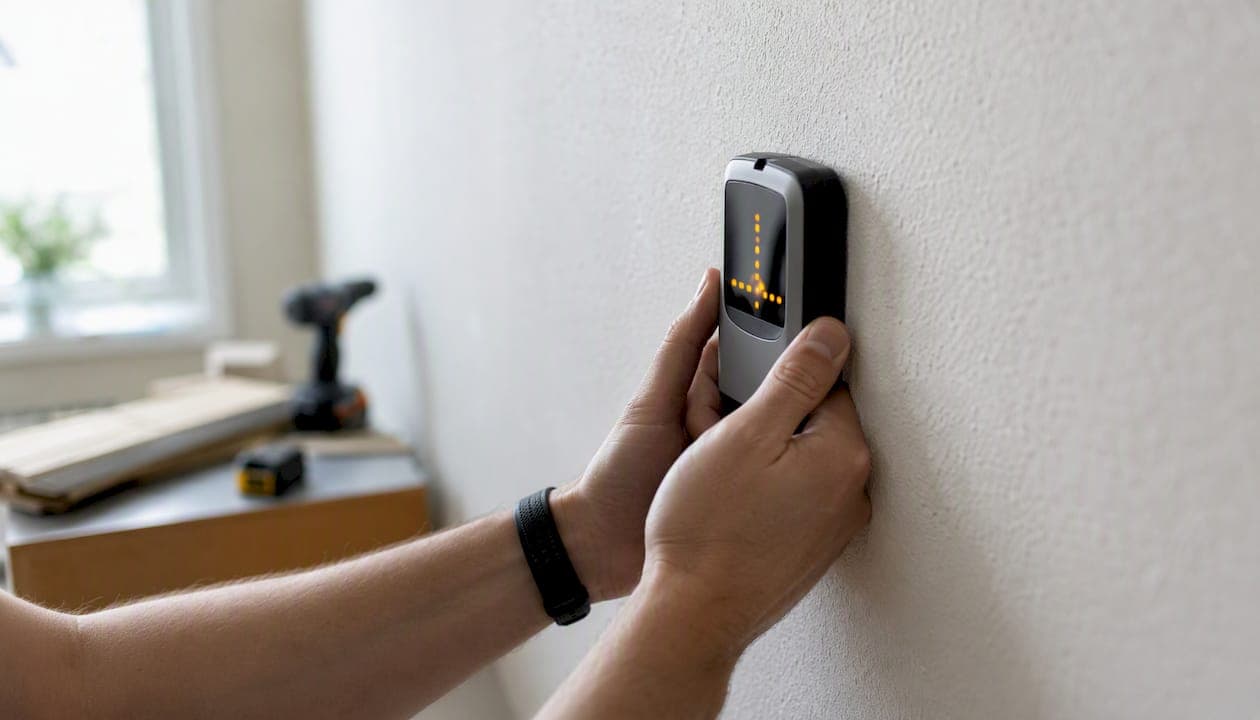
For most drywall TV mounts, the Franklin Sensors ProSensor is the best stud finder to use. It lights up the full stud width instantly, so you know exactly where the center is without sweeping back and forth. On a budget, the C.H. Hanson magnetic finder gets the job done for smaller TVs. For plaster, lath, or any wall that defeats a standard electronic finder, the Walabot DIY is the one to reach for.
The two features that matter most for TV mounting are center detection and AC wire detection. A finder that only marks an edge leaves you guessing where to drill. One that can't warn you about live wires is a genuine hazard when you're driving 3-inch lag bolts into a wall. Everything else is secondary.
**Top picks at a glance: **
- Best overall: Franklin Sensors ProSensor — instant multi-sensor center detection, no sweeping
- Best budget/magnetic: C.H. Hanson magnetic stud finder — battery-free, reliable for smaller TVs
- Best for plaster/complex walls: Walabot DIY — radar imaging for walls that fool capacitive finders
- Best multifunction scanner: VEVOR Stud Finder Wall Scanner — five modes, LCD readout, affordable
Key Takeaways
The Franklin Sensors ProSensor is the best stud finder for TV mounting on standard drywall because its instant multi-sensor detection confirms stud center without repeated sweeps.
| Point | Details |
|---|---|
| Best overall pick | Franklin Sensors ProSensor gives instant center detection, ideal for TVs heavier than 40 lbs. on drywall. |
| Budget alternative | C.H. Hanson magnetic finder works for smaller TVs but needs a separate voltage tester for safety. |
| Tricky walls | Walabot DIY's radar imaging handles plaster, lath, and layered walls where electronic finders fail. |
| Safety first | Always re-scan in AC-detection mode before drilling; wiring often runs vertically alongside studs. |
| Themediawallstore option | Pre-built media wall kits from Themediawallstore include integrated wire management, reducing stud-finding risk. |
Table of Contents
- Which stud finder is best for mounting a TV?
- How to use a stud finder to locate studs for a TV mount
- What to look for when choosing a stud finder for a TV mount
- Wall materials and tricky situations — when a basic finder fails
- Avoiding wires and pipes — safety checks before you drill
- How much does a stud finder cost, and how long does the job take?
- When should you call a professional instead?
- How these recommendations were chosen
- Skip the guesswork with a pre-built media wall kit
- Sources
- FAQ
Which stud finder is best for mounting a TV?
Stud finders fall into two main categories: magnetic and electronic. Electronic models break down further into edge-finding, center-finding, instant multi-sensor, and radar/imaging types. For TV mounting specifically, you want center detection and AC wire detection in the same tool.
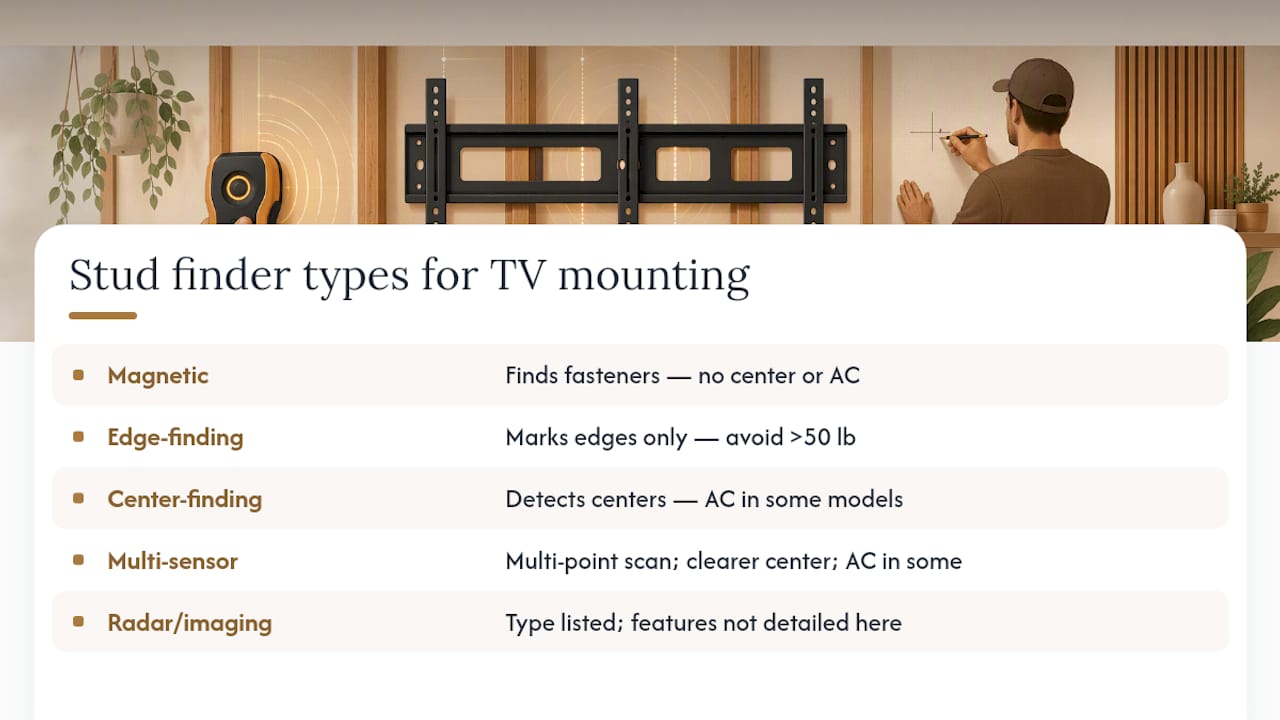
Authoritative reviews from CNN Underscored consistently call out ProSensor-style and multi-sensor models for heavy-item mounting because they scan multiple points simultaneously, giving a clearer center indication than single-sensor sweep finders.
Pro Tip: For TVs heavier than 50 lbs., skip any finder that only marks edges. You need confirmed center detection so both mount holes land squarely in the stud, not on the edge where the wood is thinner and the holding strength drops.
The Bosch GMS120 earns its place because of its dedicated metal and live-AC modes, which matter on walls with metal conduit or near electrical panels. The Zircon HD55 is the most widely available mid-range option at Home Depot and similar retailers, making it easy to return or exchange if it gives inconsistent readings on your specific wall. The VEVOR 5-in-1 scanner covers wood, metal, and AC wire detection with a backlit LCD and explicit depth settings, which is a lot of capability for its price.
Wirecutter's hands-on testing notes that the C.H. Hanson magnetic model performs well for occasional use, though it locates fasteners rather than stud centers. That distinction matters when you're drilling for a full-motion mount that needs precise placement.
How to use a stud finder to locate studs for a TV mount
Start by holding the finder flat against the wall and calibrating it away from any studs, usually 6 inches from a corner. That first step is the one most people skip, and it causes more false positives than any other mistake.
Step-by-step process:
- Calibrate the finder on a clear section of wall, following the manufacturer's instructions (usually hold the button until the indicator clears).
- Sweep slowly from left to right. Mark the point where the finder signals a stud edge with a light pencil mark.
- Sweep back from the other direction and mark the second edge. The stud center sits exactly between those two marks.
- Measure the midpoint between your two edge marks. For a standard 2x4 stud, that gap is typically 1.5 inches wide.
- Scan vertically up and down from your center mark to confirm the stud runs straight. A real stud reads consistently; a pipe or ductwork often shows up only in a horizontal band.
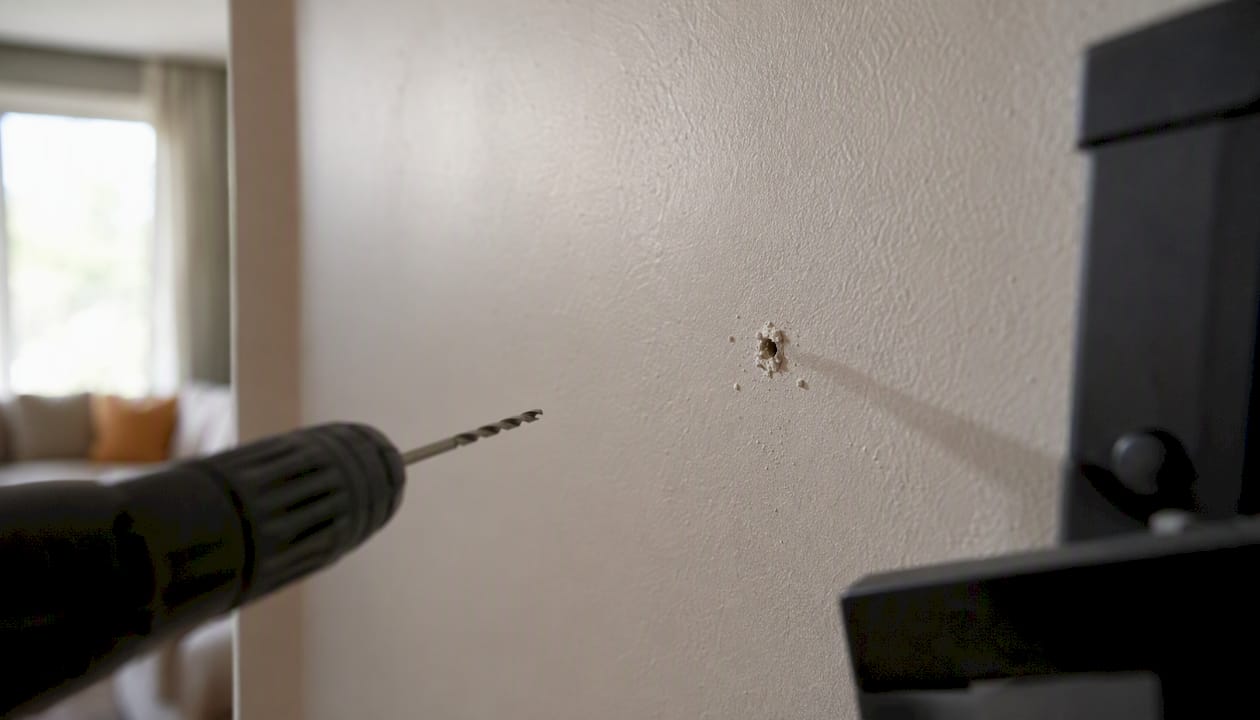
- Confirm with a pilot hole. Drill a small 1/16-inch hole at the center mark. If you hit solid wood, you're in. If the bit drops into empty space, move over an inch and try again.
Before you drill your mount holes, switch your finder to live-AC and metal modes and scan the full area around your marks. A stud sitting next to an outlet box almost always has a wire running vertically alongside it. Scanning 6 inches above and below your target spot takes 30 seconds and can prevent a serious hazard. Step-by-step how-to guidance recommends this vertical re-scan as standard practice before driving any lag bolt.
For marking stud locations cleanly, run a strip of painter's tape vertically over your center mark. Write the center measurement on the tape, then hold your TV mount bracket against the wall to check that the mount's hole pattern aligns with two studs. Standard stud spacing in newer construction is 16 inches on center; older homes sometimes run 24 inches or irregular spacing, so always measure between your confirmed studs before assuming the next one is where you expect it.
What to look for when choosing a stud finder for a TV mount
The features that matter for a TV mount are different from what you'd need to hang a picture frame.
- Center detection, not just edge detection. Edge finders tell you where the stud starts. Center finders tell you where to drill. For a TV mount with two bolt holes per stud, center detection prevents the kind of off-center drilling that splits wood or misses entirely.
- AC wire detection. Any finder you use for TV mounting should warn you about live wires. The Bosch GMS120 and Zircon HD55 both include this. The C.H. Hanson magnetic model does not, so pair it with a separate non-contact voltage tester if you go that route.
- Detection depth of at least 1.5 inches. Standard drywall is 1/2 inch thick. Older homes sometimes have double drywall or plaster over drywall, which pushes the stud surface further back. A finder rated to 1.5 inches handles most standard walls; go deeper for older construction.
- Multi-sensor or instant detection. Popular Mechanics notes that electronic finders are generally more precise for heavy items but can produce false positives from ductwork or wiring. Multi-sensor designs reduce that problem by reading multiple points at once.
- Clear display or audible feedback. When you're holding a mount bracket against a wall with one hand and a finder with the other, a loud beep or bright LED is more useful than a small LCD you have to squint at.
On price: a $25–$40 electronic finder handles most standard drywall TV mounts. Spend $50–$70 if you want instant center detection (ProSensor range). Go to $100+ only if your walls are plaster, lath, or heavily layered.
Wall materials and tricky situations — when a basic finder fails
Standard drywall over wood studs is the easiest case. Any electronic finder works here. The problems start with everything else.
- Drywall over metal studs: Common in newer condos and commercial conversions. A magnetic finder will light up constantly because it's detecting the metal stud itself, not a fastener. Use an electronic finder in metal-detection mode, or the Bosch GMS120 with its dedicated metal mode.
- Plaster and lath: The dense, irregular surface of plaster throws off capacitive electronic finders badly. Radar/imaging scanners like the Walabot DIY are the preferred option here because they create a subsurface image rather than relying on capacitance changes.
- Tile walls: Electronic finders struggle with ceramic or stone tile. A magnetic finder can locate fasteners behind tile if the grout lines are thin, but imaging scanners are more reliable for anything structural.
- Double drywall or layered walls: Older renovations sometimes add a second layer of drywall over the original. Detection depth becomes critical. The Walabot DIY reaches up to 4 inches, which covers most layered scenarios.
Pro Tip: In older homes where stud spacing is irregular, don't trust the 16-inch rule. Find two confirmed studs and measure the actual gap. Homes built before 1950 sometimes used 20-inch or 24-inch spacing, and some have non-structural walls with no regular spacing at all. Measure twice before you commit to a mount location.
When a finder gives inconsistent readings, the fastest workaround is a small pilot hole in an inconspicuous spot, ideally behind where the mount bracket will cover. A 1/16-inch bit tells you more in five seconds than ten sweeps with a confused finder.
Avoiding wires and pipes — safety checks before you drill
Finding a stud is step one. Confirming nothing dangerous runs through it is step two, and most DIYers skip it.
The most common wiring hazard in TV mounting isn't a wire running through the stud — it's a wire stapled to the side of the stud, running vertically between outlets and switches. Switch your finder to live-AC mode and scan a 12-inch vertical band centered on your mark before touching a drill. Safe wire routing guidance recommends checking both above and below your target height.
After locating your stud, run through these checks:
- Re-scan in metal-detection mode. A continuous horizontal metallic reading often means a pipe or conduit, not a stud.
- Scan 12 inches above and below your mark in AC-detection mode. Wiring typically runs vertically alongside studs.
- Check the horizontal distance from nearby outlets. Electrical boxes attach to studs, so the stud you're targeting may have wiring on its outlet-facing side.
- Look for wall patches, seams, or discoloration that might indicate previous repairs around plumbing or wiring.
Red flags that mean stop and call a pro:
- A continuous metallic signal running horizontally across multiple studs (likely a pipe)
- Multiple overlapping detections that don't resolve into a clear stud pattern
- Any live-AC signal directly at your drill mark
- Unusual signal shapes that don't match a standard 1.5-inch stud width
How much does a stud finder cost, and how long does the job take?
Home Depot's stud finder category shows three clear price tiers that map directly to capability:
- Magnetic finders ($8–$20): C.H. Hanson and similar rare-earth magnet models. No batteries, no calibration, no AC detection. Fine for small TVs on standard drywall.
- Mid-range electronic ($25–$70): Zircon HD55, VEVOR 5-in-1, Franklin ProSensor, Bosch GMS120. This is where most TV-mounting jobs land. AC detection, center finding, and reliable depth coverage.
- Premium imaging/radar ($100+): Walabot DIY. Worth it for plaster walls or if you're mounting multiple TVs in an older home.
Time estimates for a typical TV mount job:
- Locating and confirming two studs (scan, mark, pilot hole): 10–20 minutes
- Mounting a fixed or tilt bracket on a 55-inch TV: 30–45 minutes total
- Full-motion mount on a larger TV with wire management: 1–2 hours
The locating step is where most DIYers lose time. A multi-sensor finder like the ProSensor cuts that to under 10 minutes on a clean drywall wall.
Stat to know: A standard TV mount requires lag bolts driven into at least two studs. For TVs over 55 inches, most mount manufacturers specify 5/16-inch lag bolts, 2.5–3 inches long, to reach past drywall and at least 1.5 inches into the stud.
When should you call a professional instead?
Most standard drywall TV mounts are genuinely DIY-friendly. A few situations are not.
- Very large or very heavy TVs (85 inches+): The torque on a full-motion arm at that size puts serious stress on the mount points. A professional can assess whether the wall framing is adequate and add blocking if needed.
- Metal-stud or masonry walls: Mounting into metal studs requires toggle bolts or specialized anchors, not lag bolts. Brick and concrete need masonry anchors and a hammer drill. Both are doable DIY, but the margin for error is smaller.
- Evidence of concealed plumbing or confusing wiring: If your finder gives contradictory readings or you can hear water in the wall, stop. The cost of a professional inspection is far lower than a flooded room or an electrical repair.
- No comfort with lag bolts or anchors: If you're not confident about what size lag bolts for a TV mount your specific setup needs, a handyman or AV installer can spec and install the hardware correctly in under an hour.
A professional installer will also check that the mount's VESA pattern matches your TV, confirm the stud spacing aligns with the bracket's hole pattern, and often handle wire concealment in the same visit.
How these recommendations were chosen
Models were selected based on accuracy for TV mounts, AC wire detection, multi-sensor instant readouts, and results from authoritative third-party testing. The shortlist draws on Wirecutter's hands-on stud finder reviews, CNN Underscored's tested recommendations, and retailer spec sheets from Home Depot and Newegg. No model appears here solely because of marketing claims.
The most reliable way to validate a stud finder's specs is to test it on a known wall before your actual install. Find a spot where you can see a stud from an unfinished side (a basement ceiling, a closet with exposed framing) and verify the finder's readings match reality. That 60-second check tells you more than any spec sheet.
Pro Tip: Hands-on reviews and multi-sensor designs that reduce sweep requirements are the strongest signal of real-world accuracy. A finder that requires perfect technique to avoid false positives is a liability on a TV mount job where the stakes are higher than a picture hook.
Skip the guesswork with a pre-built media wall kit
If you want a TV mount that comes with integrated wire management, a finished surround, and a clear installation plan, Themediawallstore's DIY media wall kits are a direct alternative to sourcing a finder, a mount, and cable management separately.

Every kit ships pre-cut and pre-labeled, with hidden wire channels built into the panel system. That eliminates the most stressful part of a TV mount job: drilling blind into a wall and hoping the wires stay clear. Kits are designed for a weekend install without contractors, and Themediawallstore backs every order with expert support and risk-free returns. For homeowners who want a polished, finished media wall rather than a bare bracket on drywall, browse the full kit range or check the accessories catalog for add-ons that fit your setup.
The honest take on stud finders and TV mounting
Most stud finder articles treat every model as roughly equivalent and leave the reader to figure out which one actually matters for a TV mount. The real split is simpler: if you're mounting a TV heavier than 40 lbs. on standard drywall, a center-finding multi-sensor model is worth the extra $20–$30 over a basic edge finder. The time you save not re-drilling a missed hole pays for the upgrade immediately. The C.H. Hanson magnetic model is genuinely useful, but it finds fasteners, not centers, and pairing it with a non-contact voltage tester is non-optional for any wall with outlets nearby. For plaster walls, don't fight a capacitive finder. The Walabot DIY costs more, but it's the right tool for the job, and using the wrong tool on a plaster wall wastes more time and money than the price difference.
Sources
- Stud finder - Wikipedia
- Magnetic vs. Electric Stud Finder: Which Is Better for Most Projects? - Popular Mechanics
- Best stud finders 2026, tested and reviewed | CNN Underscored
- Nytheaternow
- Stud Finders - The Home Depot
FAQ
Do you really need a stud finder to mount a TV?
For any TV over 40 lbs. or any full-motion mount, yes. Drywall anchors alone won't hold the dynamic load of a swinging arm, and missing a stud by even half an inch significantly reduces holding strength.
How do I find studs for a TV mount without a stud finder?
Knock along the wall and listen for a solid, higher-pitched sound versus the hollow thud between studs, then confirm with a small pilot hole. Measuring 16 inches from a corner or outlet box also gives a starting estimate, though stud spacing in older homes can vary.
What size lag bolts should I use for a TV mount?
Most TV mount manufacturers specify 5/16-inch lag bolts, 2.5–3 inches long, so the bolt passes through drywall and reaches at least 1.5 inches into the stud. Always check your specific mount's hardware guide.
What's the difference between magnetic and electronic stud finders for TV mounting?
Magnetic finders locate fasteners in the stud surface and work without batteries, but they don't detect stud center or live wires. Electronic finders scan the wall's density changes and can identify center, depth, and AC hazards, making them the better choice for TV mounting.
Can a stud finder work on plaster walls?
Standard capacitive electronic finders struggle on plaster because the dense, irregular surface causes false positives. Radar/imaging models like the Walabot DIY are designed for exactly this scenario and give a subsurface image that capacitive finders can't produce.