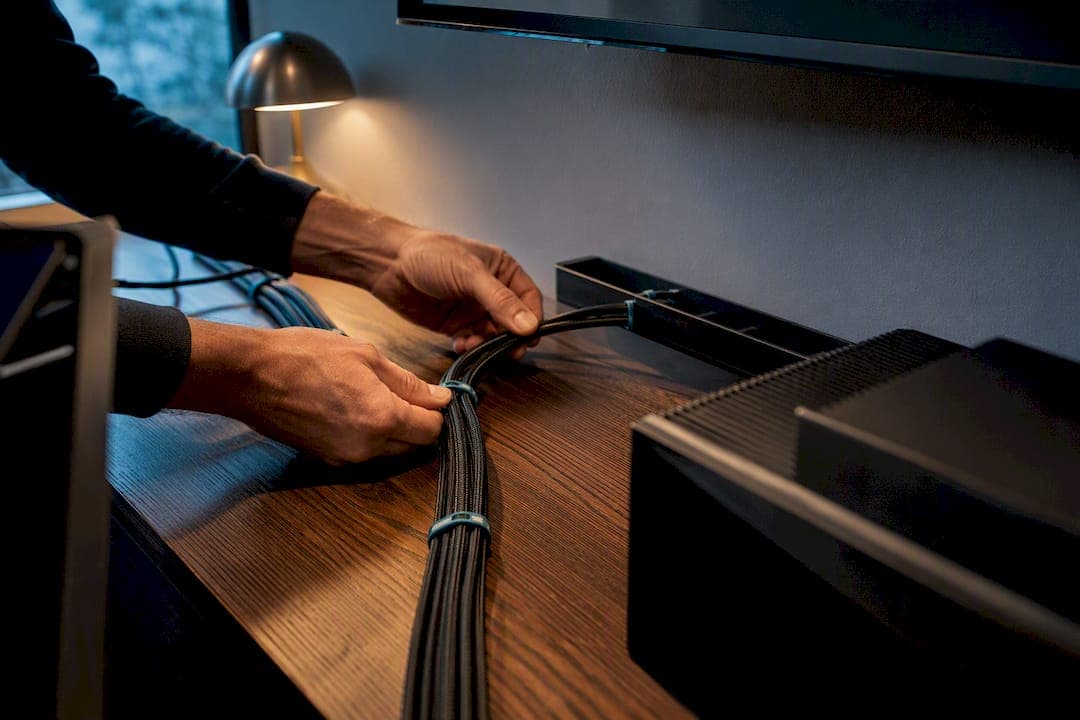
The fastest way to fix a tangled multi-console setup is to plan cable routes into zones, keep power separate from signal lines, mount power strips and bricks in accessible trays, and finish with Velcro, sleeves, and labeled service loops. That combination keeps the setup clean without gluing anything down permanently, and it stays serviceable when you add a console or swap a cable next year — for tips on how to do this with style, see how to make a TV look better in your living room.
TL;DR:
- Proper planning involves inventorying devices, creating zones, and leaving slack for service loops to prevent cable clutter and facilitate future upgrades.
- Use a limited set of tools like Velcro straps, sleeves, clips, trays, and labels, choosing permanent or removable fasteners based on whether cables will be moved.
- Route main trunk lines separately from signal cables, keep power and signal cables separated by a few inches, and test all connections before concealing.
- Distribute power load across multiple outlets, leave clearance for ventilation, and maintain a dedicated charging zone for controllers to prevent overheating and interference.
- Regular monthly maintenance, including checking for dust, securing fasteners, and avoiding tight bundling, keeps cable management effective and accessible for troubleshooting.
Table of Contents
- Why Gaming Console Cable Management Starts With a Plan, Not a Product
- Tools and Materials: What to Buy and When to Choose Reversible Fixes
- How Do You Route and Mount Cables for a Multi-Console Setup?
- Multi-Console Specifics: Ventilation, Power, and Charging Zones
- Monthly Maintenance and Common Cable Fixes
- Perspective: What Installers Know That DIY Guides Skip
- An Editorial Take on Tidy Cables Versus a Finished Wall
- A Coordinated Alternative: Hiding Cables Inside the Wall Itself
- Sources
- FAQ
Why Gaming Console Cable Management Starts With a Plan, Not a Product
Buying a bag of clips before you know where anything goes is how you end up with three different fixes fighting each other under the desk. Gaming console cable management works best as a planning exercise first, a shopping trip second.
Start with an inventory. Walk your setup and list every device: each console, the TV or monitor, a soundbar or receiver, a mouse bungee, chargers, a router if it lives nearby. Note what each one needs, power, HDMI, Ethernet, USB, and where its ports sit on the back panel. This single step catches problems before they become permanent. You will notice, for instance, that your PS5 and Xbox both want their power brick close to the outlet strip, not stretched across the cabinet.
Next, break the layout into zones instead of treating it as one big cable soup. A workable split looks like this:
- Console zone: all gaming systems and their power bricks, grouped together
- Audio/video zone: soundbar, receiver, HDMI switch
- Power zone: the strip or surge protector itself, ideally the single point everything else routes back to
- Peripheral zone: chargers, mouse bungee, controller docks
Planning distinct zones like this prevents what installers call the spaghetti effect, where every cable crosses every other cable because nothing had an assigned lane. It also makes future upgrades simpler: add a fourth console next year, and you are extending one zone, not re-routing the whole desk.
Map a main trunk line, the thick bundle that carries most cables toward the outlet, plus shorter branches peeling off to individual devices. Leave slack at both ends of every run. That slack, often called a service loop, is what lets you pull a console forward six inches to reach a port without dismantling the whole system. Measure twice before buying anything. A cable that is two inches short forces an awkward stretch that stresses the connector every time someone bumps the desk.
Tools and Materials: What to Buy and When to Choose Reversible Fixes
You do not need a toolbox full of gear. A short list handles the vast majority of gaming setups:
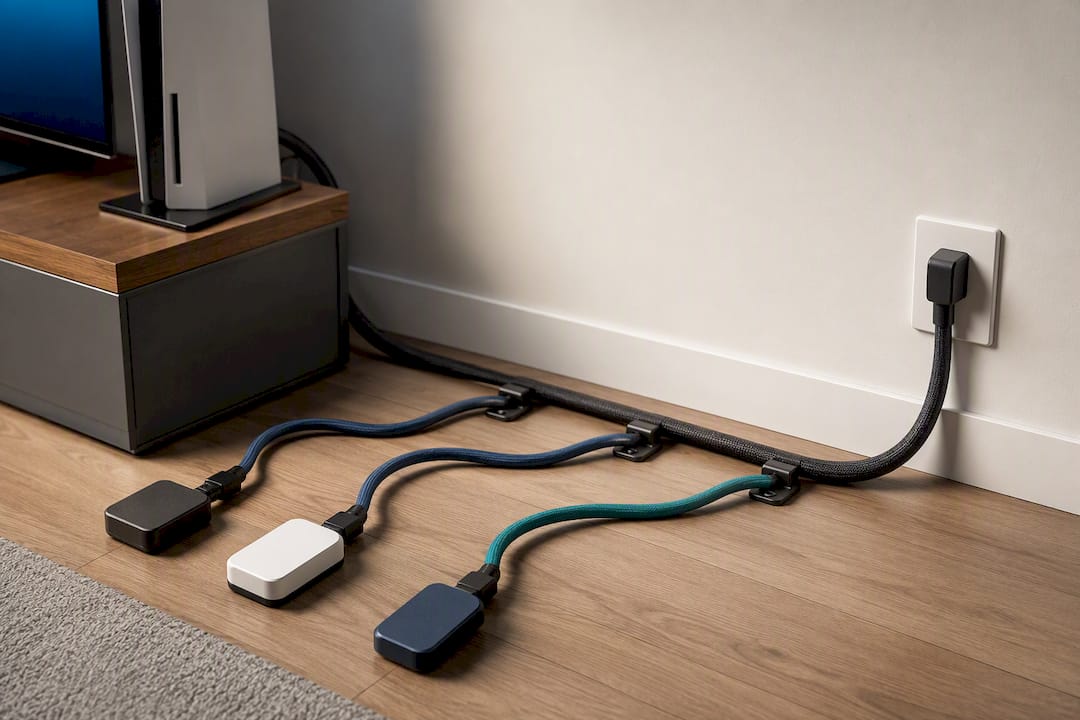
- Velcro straps for bundling cables you will need to separate again later
- Cable sleeves to consolidate a loose bundle into one manageable trunk
- Adhesive or screw-mounted clips to pin individual cables along a fixed path
- Under-desk or under-cabinet trays to elevate power bricks and strips off the floor
- Raceways for hiding longer horizontal runs behind furniture or along a wall
- Grommets where cables need to pass through a desk surface or cabinet back panel
- A cable box to conceal a surge protector without blocking its airflow
- A cheap label maker or labeled tags for identifying each cable at both ends
- A mouse bungee to keep one more cable off the desk entirely
Sleeves work well for flexible, temporary bundling, while raceways function as a more permanent, architectural hide for longer runs, the kind you would install once behind a media console and rarely touch again.
Choose adhesive mounts for lightweight cables you might reposition within the year. Save screws for anything permanent, like a raceway that will live on a wall for the next five years. On surge protectors, keep them visible enough to reach the reset button, and never bundle power cords tightly against signal cables like HDMI or Ethernet for long stretches. That close contact can introduce electromagnetic interference that shows up as dropped signal or audio hum.
Pro Tip: Buy cables slightly longer than your measurement, not shorter. An extra 6 to 12 inches gives you a service loop for free; a cable that is exactly the right length gives you zero room to move a console later.
Premium setups add raceways and grommets for a built-in look, which is where a zero-clutter cable management approach starts to resemble furniture-grade finishing rather than a desk hack.
How Do You Route and Mount Cables for a Multi-Console Setup?
Work in this order and you will avoid most of the rework that makes cable projects drag into a second weekend.
- Prep first. Photograph the back of every device before you touch anything, so you have a reference if a cable ends up in the wrong spot. Label both ends of every cable now, while you can still see clearly which port it came from.
- Mount the power infrastructure. Install the power strip or surge protector in an accessible spot, then set your under-desk tray or cable box beneath it. Power bricks are heavy and hot; they need a stable, ventilated shelf, not a pile on the carpet.
- Route the main trunk. Bundle the bulk of your cables into one sleeve running from the console zone to the power zone. Keep this trunk physically separate from any HDMI or Ethernet runs where possible.
- Separate power from signal. Where a power cord and a signal cable must run parallel, keep a few inches between them or cross them at a 90-degree angle rather than running side by side for several feet.
- Build in service loops. At each console and at the power strip, leave 4 to 6 inches of slack so the device can be pulled forward for cleaning or a port swap without unplugging the whole run.
- Secure with removable fasteners. Velcro straps and clips hold everything in place while staying easy to undo. Save adhesive-backed clips for runs you are confident will not move.
- Test before you conceal anything. Power on every console, check every controller pairs correctly, and confirm HDMI signal on each input before you tuck the last cable into a raceway or behind furniture.
- Do a final airflow check. Confirm nothing is blocking a console's intake or exhaust vents once everything is routed and mounted.
A stepwise process, plan, mount, route, test, consistently produces fewer redo cycles than jumping straight to concealment, because you catch a mislabeled cable or a signal issue while everything is still easy to reach.
That testing step matters more than it seems. A console pushed back against a wall with cables already zip tied tight is a nightmare to troubleshoot if the HDMI port turns out loose. Test first, hide second.
Multi-Console Specifics: Ventilation, Power, and Charging Zones
Running two or three consoles side by side changes the math on heat and power in ways a single-console setup never has to consider.
Leave real clearance around each unit. Consoles pull air in one side and push hot air out another, and a ventilated, measured shelf plan matters more in a cabinet housing three systems than one. Stacking consoles directly on top of each other, or wedging them into a closed cabinet with no rear cutout, traps heat and can shorten a console's lifespan.
Distribute power load rather than plugging everything into a single overloaded strip. A few practical habits help:
- Split power bricks across two outlets or two strips if you are running more than two consoles plus a receiver and TV
- Put large power bricks flat in a tray rather than letting them dangle and pull on the outlet
- Reserve one dedicated charging zone for controllers, ideally near the front edge of the desk for daily access
- Keep dense bundles of wireless controllers or receivers a few inches apart, since tightly packed electronics can interfere with wireless signal
That last point catches people off guard. A drawer stuffed with three wireless dongles and a stack of controllers can genuinely degrade signal range, not just cable clutter.
Monthly Maintenance and Common Cable Fixes
A tidy setup does not stay tidy without a little upkeep. Once a month, run through a short checklist:
- Check for dust buildup around console vents and power bricks
- Confirm Velcro straps and clips are still holding, not slipping loose
- Look for raceway adhesion coming away from a wall or desk edge
- Feel for pinched cables where a grommet or clip might be biting too tight
- Test controller response and Wi-Fi signal for any new lag
Sagging raceways usually mean the adhesive strip needs reinforcing with a screw-in clip at the weak point rather than a full reinstallation. An overstuffed grommet, one where cables are pinched at the passthrough, needs slack added back in, not more force pushing cables through. When adding new gear, use the pull-string technique: tape the new cable to the end of an existing one already routed through the raceway or sleeve, then pull both through together, so you never have to redo an entire run for one added device.
Pro Tip: Keep signal cables crossing power cables at a 90 degree angle instead of running parallel. That single habit cuts down on the electromagnetic interference that causes random audio hum or dropped HDMI signal.
Perspective: What Installers Know That DIY Guides Skip
Anyone who has actually installed cable routing inside a media wall will tell you the real skill is not hiding the cable, it is leaving yourself a way back to it. Access panels and a dedicated routing channel matter more than a perfectly invisible finish, because the console you can not reach in six months is the one that eventually gets yanked out through drywall.
The Media Wall Store's pre-cut, pre-labeled kits build that access in from the start, centralizing wire management behind panels designed to come off cleanly rather than requiring demolition. That structural approach costs less than a custom-built wall and has held up for over 1,000 customers who wanted the finished look without a contractor's timeline or price tag.
An Editorial Take on Tidy Cables Versus a Finished Wall
Most cable management advice treats concealment as the goal. That is backwards. The goal is a setup you can service in under a minute when a console needs a firmware update reboot or a controller stops pairing. Hide everything perfectly and you have built a system that punishes you the moment something breaks.
The cable management paradox is real: the tidiest-looking setups are often the hardest ones to actually maintain. Prioritize service loops and removable fasteners over glue and zip ties, every time.
If you want something that looks built rather than assembled, and you are ready to stop DIY-ing around a TV stand entirely, a coordinated media wall kit with integrated wire management is the honest upgrade path. That is a different budget and a different weekend, but it is worth knowing the option exists before you commit to another round of raceway.
— Jake
A Coordinated Alternative: Hiding Cables Inside the Wall Itself
Velcro straps and raceways solve the desk. They do not solve the wall behind a wall-mounted TV, where power cords and HDMI runs from three consoles can turn a beautiful screen into a mess of dangling cable the moment you step back and look at it.

That is the specific gap these kits close. Each panel arrives pre-cut and pre-labeled with built-in channels for hidden wire management, so your consoles, receiver, and power strip route behind the wall instead of down the side of a media console, and you still keep an access point for servicing. Installation runs over a weekend, not a month of contractor scheduling, and the finished price sits well below a custom carpentry build.
If your desk setup is already handled and it is the TV wall that looks unfinished, browse the DIY media wall kits or check the wire management accessories built specifically for hiding console cables behind a finished panel. For anyone weighing a raceway against a real wall solution, that is the point to make the call.
Sources
- How to build a zero-clutter gaming setup with expert cable management
- Gaming Desk Cable Management | Eliminate Clutter & Organize Wires
- Gaming TV Stand Guide: Safe Storage & Cable Routing for PS5 Xbox Switch
FAQ
Is Cable Management Worth the Effort?
Yes. Beyond looking cleaner, organized cables reduce tripping hazards, cut down on accidental disconnects, and make troubleshooting a dead port far faster since you can trace one labeled cable instead of untangling a bundle.
How Do You Manage Cables That Are Too Long?
Coil the extra length and secure it with a Velcro strap rather than cutting or forcing a tight bend, which keeps a usable service loop while still tidying the slack. Tucking excess length into a cable box or behind a raceway also works if you need it out of sight entirely.
What Should You Actually Use for Cable Management?
A short list covers most setups: Velcro straps for bundling, sleeves for flexible trunks, raceways for permanent runs, clips for pinning individual cables, and a cable box to hide a surge protector. Add grommets only if cables need to pass through a desk or cabinet panel.
Which Gaming Desk Features Help the Most With Cable Management?
Look for a desk with a built-in grommet hole, an under-desk tray or hook for a power strip, and enough rear clearance to run a raceway or sleeve along the back edge. If your setup extends to a TV wall rather than just a desk, a kit with integrated hidden wire management, like those from The Media Wall Store, solves the routing problem the desk alone can't reach.