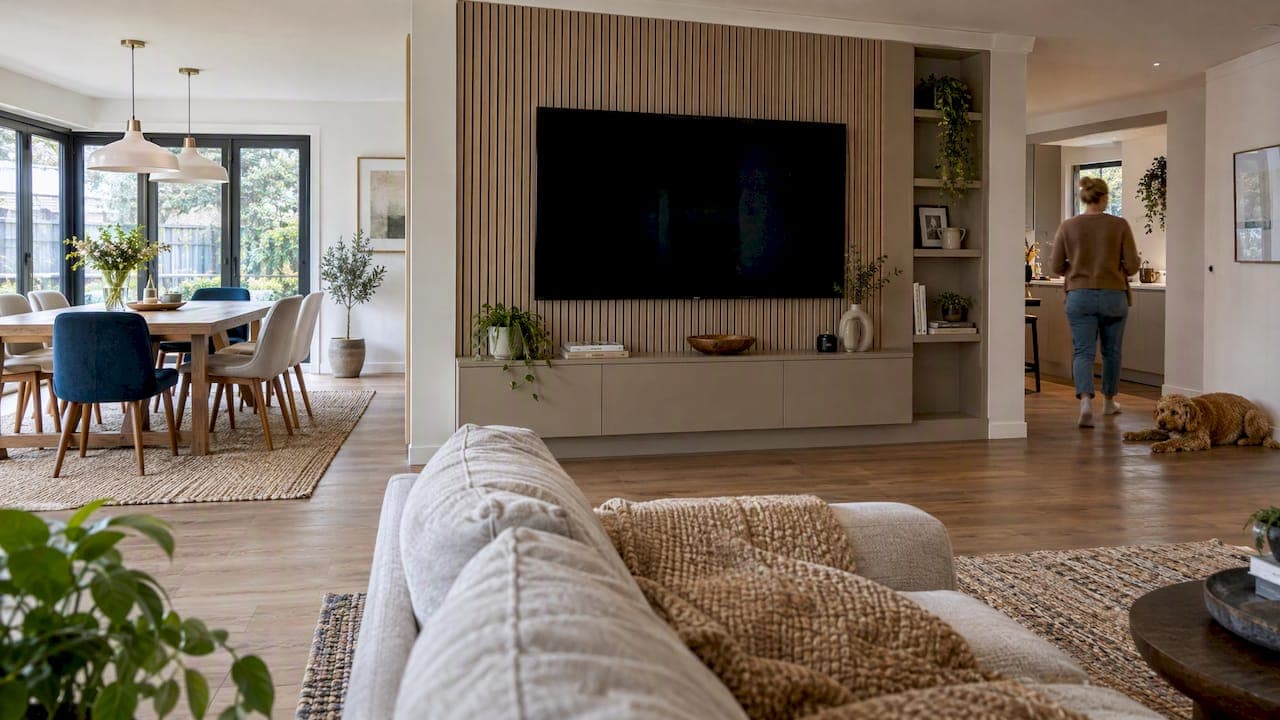
Place the TV so its center sits near seated eye level and align it to the main seating zone, not the physical center of the wall. For most couches, that means a center height of about 40 to 48 inches from the floor. When a fireplace or awkward corner forces compromise, using a tilting or full-motion mount can adjust the viewing angle for comfort.
TL;DR:
- Mount the TV with its center at 40 to 48 inches from the floor for most seated viewers, adjusting up to 60 to 70 inches if above a fireplace.
- Use a full-motion mount for corner setups and a fixed or tilting bracket for flat walls to optimize viewing angles and glare control.
- Leave at least 6 to 12 inches of space around the TV with proportioned paneling to avoid squeezed visuals and create a balanced feature wall.
- Plan for proper ventilation and cable management, choosing in-wall, raceway, or behind-TV options based on permanence and safety requirements.
- Incorporate bias lighting behind the screen and cluster smart home devices nearby to reduce glare and maintain a clean, integrated appearance.
Table of Contents
- Where to place the TV: height, viewing distance, and corner vs flat-wall decisions
- Zoning and furniture layout to protect sightlines in an open concept
- Design treatments that make a TV wall look intentional
- Mounting and hardware: mount types, stud anchoring, and when to hire a pro
- Audio and acoustics: soundbar placement and practical audio tips for open layouts
- Cable management and power routing: raceway, tuck, or in-wall
- Common mistakes and a short pre-install checklist
- A realistic DIY option: when a pre-cut media-wall kit is a smart choice
- Considerations for integrating smart home devices and connectivity near the TV wall
- Tips for HVAC and ventilation planning around the TV wall in open concept spaces
- Author perspective: balancing ergonomics, sightlines, and style in open-plan TV walls
- How The Media Wall Store can help
- FAQ
- Sources
Where to place the TV: height, viewing distance, and corner vs flat-wall decisions
Start with the seating, not the wall. Measure where people actually sit, then work backward to the mount point.
- Find seated eye level. Sit on the main sofa and measure from the floor to your eyes while relaxed; for most households this lands between 40 and 48 inches, and that number becomes the screen's center height.
- Calculate viewing distance. Divide the couch-to-wall distance in inches by 1.6 to 2 to estimate the ideal diagonal screen size: a 10-foot gap (120 inches) suggests a 60 to 75 inch TV.
- Decide corner versus flat wall. A corner placement often benefits from a full-motion mount so every seat has a straight view; a flat wall can usually work with a fixed or tilting bracket.
- Handle the fireplace exception. Mounting above a fireplace often pushes the center to 60 to 70 inches, well above comfortable eye level, so a tilting mount angled downward reduces the neck strain that comes with long viewing sessions.
Zoning and furniture layout to protect sightlines in an open concept
A TV wall only works if the furniture around it agrees on where "the room" is. Open-concept spaces lose that clarity fast without deliberate zoning.
- Define the seating zone first with an area rug, then build the furniture layout inward from its edges.
- Float the sofa away from the perimeter rather than pushing it against a wall; floating furniture tends to make open rooms feel larger and more intentional than lining everything up against the walls.
- Use the back of the sofa as a soft divider between the TV zone and an adjacent kitchen or dining area instead of a structural wall.
- Cluster lighting (a floor lamp, a pendant, a console lamp) around the seating zone so it reads as its own space within the larger room.
- Center the TV on the seating group, not the architectural wall, since a TV centered on a blank wall often sits off-axis from where people actually sit.
Pro Tip: Outline the TV's exact footprint on the wall with painter's tape and sit in each seat before you drill a single hole.
Check the walk path last. A TV wall that forces foot traffic directly in front of the screen will frustrate anyone trying to cross the room during a movie.
Design treatments that make a TV wall look intentional
A TV mounted on bare drywall looks like an afterthought. A few proportion and finish rules turn it into a feature wall.
- Wood slats or fluted panels add texture without competing with the screen, and they read well against the rest of an open floor plan when the finish repeats elsewhere in the room.
- Painted MDF panels or stone-look surfaces work for a cleaner, more minimal look.
- Leave 6 to 12 inches of breathing room on either side of the TV, and size the panel or feature zone to the TV's width plus 8 to 16 inches so the screen looks framed rather than squeezed.
- Keep the top of the TV below roughly two thirds of the wall's height so the composition doesn't feel top-heavy.
- Add bias lighting or an integrated LED strip around 6500K behind the screen; it softens contrast between the panel and the picture and cuts the perceived glare from nearby windows.
For storage, a floating console keeps the wall visually light, while built-ins offer more capacity but need ventilation gaps if they enclose any electronics. For panel inspiration, the Media Wall Panel Ideas London guide is a useful style reference for slat and fluted treatments, even for readers outside the UK.
Mounting and hardware: mount types, stud anchoring, and when to hire a pro
The right bracket depends on where the TV sits and how many seats need a clean view.
- Choose the mount type: fixed brackets hold the TV flush for flat walls with one straight sightline, tilting brackets angle the screen down to fight glare or compensate for high placement, and full-motion mounts swivel for corners or multiple seating areas.
- Anchor into studs whenever possible, and only use rated toggle anchors when a stud isn't available at the right spot.
- Pick hardware rated 20 to 30% above the TV's actual weight, never the minimum rating.
- Before final lag bolts, measure twice, locate studs with a finder, mark pilot holes, and check level with a bracket still loose enough to adjust.
- Call in a professional for masonry walls, metal studs, TVs over 70 pounds, or any job that requires running power inside the wall.
Audio and acoustics: soundbar placement and practical audio tips for open layouts
Sound separates good media walls from great ones, especially in a room with no walls to contain it.
- Keep the top of the soundbar 3 to 8 centimeters below the bottom of the TV and centered within about 2 centimeters horizontally so dialog stays anchored to the picture.
- Mount bars heavier than roughly 4 kilograms on stud-backed brackets or anchors rated for 1.5 times their weight rather than relying on adhesive strips.
- Soften hard, open floors with rugs and upholstered furniture to cut down on the echo that open-plan rooms are prone to.
- Route audio through HDMI eARC when the TV and soundbar both support it, since it carries higher-quality surround audio than standard ARC.
The vertical gap between TV and soundbar matters more than most people assume: keeping it within 3 to 8 centimeters is what keeps voices sounding like they come from the screen instead of a separate box below it.
Cable management and power routing: raceway, tuck, or in-wall
Wires are the detail that make or break a TV wall's finished look, and the right method depends on how permanent you want the install.
- Surface raceway is the practical default: it mounts over existing drywall, needs no permit, paints to match the wall, and a typical run takes 25 to 40 minutes for roughly $18 to $40 in materials.
- In-wall low-voltage routing gives the cleanest look but takes 2 to 3 hours and $60 to $120, and it may require rated cable or an electrician depending on local code.
- Behind-TV tuck is the fastest option at 10 to 15 minutes and $8 to $15, but it only works when there's an outlet already positioned directly behind the TV.
- A recessed in-wall outlet box keeps plugs flush, and a separate low-voltage box for streaming devices and routers makes future swaps easier.
For a step-by-step on keeping wires tidy without cutting drywall, see our guide on hiding wires behind a mounted TV.
Common mistakes and a short pre-install checklist
Most TV wall regrets trace back to one of a handful of avoidable errors.
- Mounting the TV too high because it was centered on the wall instead of the seating.
- Buying a screen too large or small for the actual viewing distance.
- Skipping stud location and relying on drywall anchors alone for a heavy TV.
- Enclosing electronics in a built-in cabinet with no ventilation gaps.
- Finalizing the mount before checking the mock-up against where people actually sit.
| Checklist step | What it confirms |
|---|---|
| Measure viewing distance | Correct screen size for the room |
| Mark eye level on the wall | Correct mount height |
| Locate studs | Safe anchor points |
| Plan outlets | Cable routing method |
| Tape mock-up | Sightlines from every seat |
A quick fix for a flawed placement is usually a tilt or full-motion mount plus bias lighting; a floating console sized at 1.1 to 1.2 times the TV's width also hides a lot of layout sins.
A realistic DIY option: when a pre-cut media-wall kit is a smart choice
Custom millwork delivers a built-in look but usually means contractor quotes, long lead times, and a wall you can't easily change later. A pre-cut kit solves a narrower but very common problem: getting that same finished look over a weekend.
- Panels arrive pre-cut and pre-labeled, which removes the guesswork of cutting slats or fluted boards to fit.
- Integrated LED lighting options add the backlighting effect without running separate wiring.
- Floating console designs keep hidden wire management built into the structure instead of bolted on after the fact.
- Assembly is designed to be completed in a weekend, without hiring a contractor.
- A white-glove install option exists for anyone who wants the kit handled start to finish.
Kits make the most sense when the goal is a high-end look without a custom budget; a fully custom build still makes sense for unusual wall shapes or structural changes. The Monaco kit and the Oslo slat wall kit are two examples of how a slat panel and floating console combination comes together as a kit.
Considerations for integrating smart home devices and connectivity near the TV wall
An open-concept TV wall is usually also the household's connectivity hub, so it's worth planning for more than just the TV and soundbar. Streaming boxes, a mesh Wi-Fi node, a smart speaker, and any smart lighting controller all tend to end up clustered in the same console or recess.
Plan a dedicated low-voltage compartment or shelf behind or beside the console for a router or mesh node, since burying it inside a sealed cabinet can weaken signal strength. Leave at least one accessible outlet for devices that need periodic resets or firmware updates, rather than running everything through a single hard-to-reach power strip.

If the wall includes smart lighting, such as an LED backlight on a dimmer or app control, run its low-voltage wiring through the same channel as the TV and soundbar cables so a future swap doesn't mean opening the wall twice. Smart plugs and hubs are easiest to manage when they sit on an open shelf rather than tucked fully out of reach, since most still need occasional manual access.
Keep smart home gear visually quiet: a cluster of blinking lights undercuts the clean look a media wall is meant to deliver, so look for devices with status lights that can be dimmed or disabled, and group cables with the same raceway or in-wall routing used for the TV itself.
Tips for HVAC and ventilation planning around the TV wall in open concept spaces
Electronics generate heat, and an open-concept layout often means the TV wall sits near a kitchen, a wide window run, or a central HVAC return, all of which affect comfort and equipment life.
Avoid positioning a TV directly in the path of a supply vent, since constant airflow across the screen can stress the panel over time and make the room feel uneven in temperature. If the media wall includes a closed cabinet for a streaming box, receiver, or gaming console, leave ventilation gaps or vented panel inserts so heat doesn't build up inside; a sealed cabinet with multiple warm devices can shorten their lifespan.
In open floor plans, a single HVAC return often serves a much larger area than in a traditional closed room, so furniture and media wall built-ins shouldn't block the return grille. Check where supply and return vents sit before finalizing cabinetry or slat panel placement, since blocking either one forces the system to work harder and can create a draft right where people are sitting to watch TV.

If a fireplace is part of the media wall, confirm clearance requirements around the firebox and any venting it needs, since those requirements are separate from and in addition to standard HVAC clearances.
Author perspective: balancing ergonomics, sightlines, and style in open-plan TV walls
Get the ergonomics right before the aesthetics. A beautifully finished wall with the TV mounted too high or off-center from the seating will bother a household every single evening, while a plain wall with the screen at the right height and angle disappears into comfortable use. Mock it up with tape, sit in the actual seats, and only then choose finishes.
— Jake
How The Media Wall Store can help
We build pre-cut, pre-labeled media wall kits specifically so homeowners can get a custom-looking result without hiring a contractor or waiting on a custom build schedule.

- Panels and components arrive cut and labeled, designed for assembly over a weekend rather than a multi-week installation window.
- Some kits include integrated LED lighting and floating console designs with wire management built in.
- Installation services are available for anyone who prefers a finished install without doing the work themselves.
- Design services range from a Single Concept Design at $99 to a Full Design & Quote at $299 for readers who want a layout mapped out before buying materials.
If you're ready to see finishes and configurations, visit our media wall kits shop to browse options or start a design quote.
FAQ
Where should I put the TV in an open concept layout?
Align the TV to the center of your main seating zone rather than the wall's physical center, with the screen's center around 40 to 48 inches from the floor for seated viewing. If the layout forces a corner, a full-motion mount lets every seat get a straight sightline.
What are the TV stand design trends for 2026?
Floating consoles paired with slat or fluted wall panels remain a dominant look, often combined with integrated LED backlighting to soften contrast around the screen. Hidden wire management and modular storage are increasingly expected rather than treated as upgrades.
How do I make a TV wall look nice?
Frame the screen with a panel sized to the TV's width plus 8 to 16 inches, leave breathing room at the sides, and keep the top of the TV below about two thirds of the wall's height. Adding bias lighting behind the screen and repeating the panel finish elsewhere in the room ties the wall into the rest of an open floor plan.
Is it better to place my TV in the corner or against a flat wall?
A flat wall is simpler to plan for and usually works with a fixed or tilting mount, while a corner placement needs a full-motion swivel mount so seats at an angle still get a direct view. Corners also tend to catch more glare from adjacent windows, which a swivel mount helps correct.
Sources
- Vogels — The perfect height
- Puls blog — Corner TV mount (glare mitigation and swivel advice)
- Smarttvs
- MegDecor — Nail it: How to plan a media wall layout