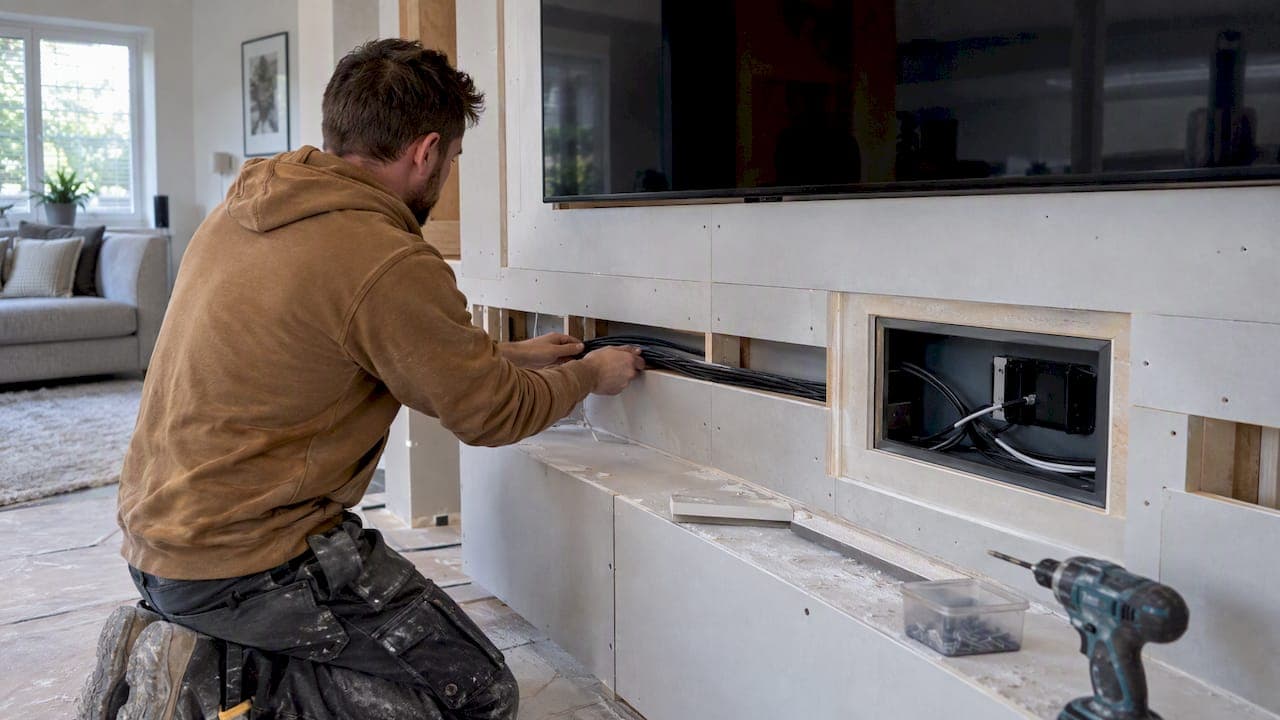
The safest, lasting way to handle cable slack behind a media wall is to use a code-compliant recessed power and low-voltage pass-through, then store extra cable length in a proper service loop, never by hiding an extension cord inside the wall. Recessed entertainment boxes centralize connections, service loops leave room to move gear later, and any new outlet or line-voltage work should go through a licensed electrician. The rest of this guide covers the safety rules behind that approach, the hands-on methods, step-by-step scenarios, the tools worth buying, and the mistakes that trip up most first-time installers.
TL;DR:
- Concealment inside wall cavities with extension cords is unsafe and illegal; proper solution involves installing recessed outlets or boxes through a licensed electrician.
- Using service loops secured with Velcro and leaving room for future adjustments prevents signal issues and facilitates maintenance without re-pulling cables.
- Recessed entertainment boxes and low-voltage pass-throughs help keep power and signal cables separated, organized, and easy to access.
- Coil excess cable in a loose figure-eight to avoid signal degradation and store less space while preventing damage.
- Pre-engineered media wall kits with built-in channels reduce mistakes, speed installation, and make future upgrades more manageable.
Table of Contents
- The safety and code basics you must follow before hiding any cable slack
- Safe methods that actually work for concealing and organizing excess cable length
- Two step-by-step scenarios for hiding cable slack the right way
- Tools, materials, and cable types that keep the job safe and tidy
- Common mistakes and how to fix them without compromising safety
- Why pre-engineered kits make safe cable slack management easier
- A kit built around clean cable routing
- FAQ
- Sources
The safety and code basics you must follow before hiding any cable slack
Before you touch a drill, understand the line between what you can conceal and what you cannot. Extension cords are built for temporary use, not permanent wiring, and building code treats them that way. OSHA's interpretation of 29 CFR 1910.305(g) states that flexible cords cannot substitute for fixed wiring and cannot be concealed behind walls, run through holes in walls, ceilings or floors, or treated as part of a building's permanent electrical system.
Extension cords are responsible for thousands of home fires each year, according to ESFI, which also warns against running cords through walls or ceilings, nailing or stapling them, or tucking them under rugs. That statistic matters for a media wall project specifically because the urge to hide a cord inside the cavity is strongest right where the risk is highest.
Here is what to check before you start:
- Confirm you have enough outlets near the media wall rather than planning to route a cord through the wall cavity.
- Treat any new outlet, relocated circuit, or line-voltage work as a job for a licensed electrician.
- Keep low-voltage AV cable (HDMI, Ethernet, coax, speaker wire) in a separate path from line-voltage power.
- Leave access points so cords and connections can be inspected or replaced later.
If your current setup does not have enough receptacles near the TV location, read about planning outlet placement for a media wall before you reach for a cord.
Safe methods that actually work for concealing and organizing excess cable length
A recessed entertainment box is the backbone of a clean installation. Leviton's documentation shows how these boxes centralize AC power and low-voltage connections behind the TV while keeping a physical barrier between the two, so you get a single access point without mixing mains power and signal cable.
From there, low-voltage pass-throughs, brush plates, and snap-in wallplate modules handle the HDMI, Ethernet, and coax runs without forcing them through the same opening as your power cord. Inside a pre-cut media wall kit, the internal channels are already sized for this, which is a real time-saver over cutting a raceway into finished drywall.
A few habits make the difference between tidy and merely hidden:
- Leave a service loop of extra cable at both ends so you can move the TV or swap a component without re-pulling wire.
- Secure loops with Velcro straps and a mounting point rather than letting them rest on sharp edges or hot components.
- Use a mud ring, not a standard electrical box, for low-voltage terminations so there is room to coil slack.
- Add a vent gap or louvered cover if the cavity houses a power brick or streaming box that generates heat.
Pro Tip: Coil excess cable loosely in a figure-eight rather than a tight circle. It stores the same length in less space and avoids the kinks that cause signal issues on long HDMI runs.
For more on routing without cutting into finished walls, see this guide on hiding wires from a mounted TV.
Two step-by-step scenarios for hiding cable slack the right way
Scenario A: recessed power and AV pass-through for a mounted TV
- Pick the TV location and confirm stud spacing before cutting anything.
- Install a recessed entertainment box or recessed duplex receptacle sized for your wallboard, following the manufacturer's cutout dimensions.
- Mount a low-voltage bracket beside it and add snap-in jacks for HDMI, Ethernet, or coax as needed.
- Pull cable through both openings, leaving a service loop at the TV end and another behind the box.
- Close up the wall, dress the loops with Velcro, and mount the TV.
Scenario B: hiding a cable box and storing slack in a media-wall cavity
- Build or use a ventilated shelf inside the cavity so the cable box has airflow.
- Route power to an accessible receptacle, never an extension cord buried behind the panel.
- Coil the AV and power slack into loops and secure them away from the shelf's edges.
- Confirm the remote's IR signal can still reach the box, or add an IR extender if the panel blocks it.
Materials for either scenario: recessed entertainment box or recessed duplex, low-voltage bracket, snap-in jacks, Velcro straps, and a vented shelf or cover plate. Stop and call a licensed electrician the moment the job involves a new circuit, a relocated outlet, or any work inside a breaker panel. A full how-to with photos is available in this DIY guide to hiding TV wires safely.
Tools, materials, and cable types that keep the job safe and tidy
Cable choice affects both signal quality and how much bend you can get away with. Use quad-shield RG-6 for coax, Cat5e or Cat6 for data runs, and keep HDMI cables as short as the layout allows. Speaker wire and most AV cable should never be bent tighter than roughly four times its own diameter, since a sharper bend can damage the conductors or shielding inside.
On the hardware side, mud rings keep low-voltage terminations separate from power and leave room for a service loop, and Leviton's recessed entertainment box specs are a useful reference when planning cutout size. Brush plates, grommets, and snap-on cover plates finish the opening without leaving raw edges.
Tools worth having on hand:
- A stud finder and a cutout template matched to your recessed box.
- Fish tape or a cable puller for routing through finished cavities.
- A drill with a hole saw or auger bit sized for your cable bundle.
- Velcro straps instead of zip ties, since Velcro does not cinch tight enough to damage cable jackets.
Size a service loop by cable type: a coax or HDMI run typically needs 18 to 36 inches of slack to allow for future repositioning, while thicker bundles need the longer end of that range so the bend radius stays gentle. For a parts list built around luxury media walls, see this rundown of a wire management kit for luxury media walls.
Common mistakes and how to fix them without compromising safety
The single most common mistake is running an extension cord through the wall cavity to feed a TV or soundbar. Fix it by installing a recessed outlet or having an electrician add a proper receptacle instead, rather than relying on the cord at all.
Stapled, kinked, or overly tight cable bundles are the next most frequent issue. Re-route the run, inspect for nicks in the jacket, and replace any cable that shows damage rather than hoping it still works.
- If a recessed box or cavity feels warm to the touch, add vent holes or move the power brick to a shelf with airflow.
- If the remote stops working through a closed panel, add an IR extender rather than leaving the panel open.
- Call a licensed electrician any time the fix involves a new circuit, breaker work, or moving line-voltage wiring.
Pro Tip: Label both ends of every cable run with painter's tape and a marker before you close the wall. Future you will thank present you.
Why pre-engineered kits make safe cable slack management easier
Most of the mistakes above come from working inside a finished wall with no plan for where power and signal cable will land. Pre-cut, pre-labeled panels remove a lot of that guesswork, since the channels for low-voltage cable and the cutouts for recessed boxes are already sized before the panel ever goes up. That structure makes it less tempting to feed an extension cord through a gap just because it is the path of least resistance.

Tutorials on routing wire without cutting into finished drywall, hiding a cable box without trapping heat, and laying out cable runs that match a kit's built-in channels all follow the same logic: plan the path before you commit to drywall. Jake's published tutorials on wire routing and recessed power cover these patterns in more detail for readers working through their first install.
Pre-engineered layouts tend to be faster and lower-risk than building the cavity and routing from scratch, especially when support is available for installation questions.
— Jake
A kit built around clean cable routing
A media wall kit with integrated channels and mud-ring accommodations solves the slack problem before it starts, since the panel is already designed around where power, low-voltage jacks, and service loops need to sit.

That is the gap The Media Wall Store kits are built to close: pre-cut panels that already account for recessed boxes and low-voltage pass-throughs, so you are not cutting a raceway into finished drywall after the fact.
- Browse DIY media wall kits built with pre-cut, pre-labeled panels and integrated cable channels.
- Shop cabinetry, hardware, and lighting accessories that pair with recessed power and low-voltage planning.
- Request a Full Design & Quote if you want a layout planned around your existing outlets before you order; current prices are available on the pricing page.
If your project needs cabinetry or custom millwork around the cavity, a local specialist like Classy Closets can help finish the build once the cable routing is planned.
FAQ
Can I hide an extension cord inside my media wall?
No. OSHA's interpretation states flexible cords cannot be used as a substitute for fixed wiring or concealed behind walls. Install a recessed outlet or have an electrician add a proper receptacle instead.
How much service loop should I leave for AV cables?
A common rule of thumb is 18 to 36 inches of slack per cable, depending on thickness and how far the component might need to move later. Coil the loop loosely and secure it with Velcro rather than zip ties to protect the cable jacket.
What is a recessed entertainment box and do I need one?
It is a wall-mounted enclosure that centralizes AC power and low-voltage connections behind a TV while keeping the two separated with a barrier, as documented by Leviton. It is not mandatory, but it is the cleanest way to avoid running an extension cord through the wall.
Why does ESFI warn against running cords through walls?
ESFI reports that roughly 3,300 home fires start in extension cords each year, largely because they are designed for temporary use and overheat or degrade when hidden in enclosed spaces. A permanent outlet or recessed box avoids that risk entirely.
Can The Media Wall Store help plan outlet and cable placement?
Yes, the Full Design & Quote service maps outlet and low-voltage placement against your kit layout before installation. Pricing and details are listed on the shop page.