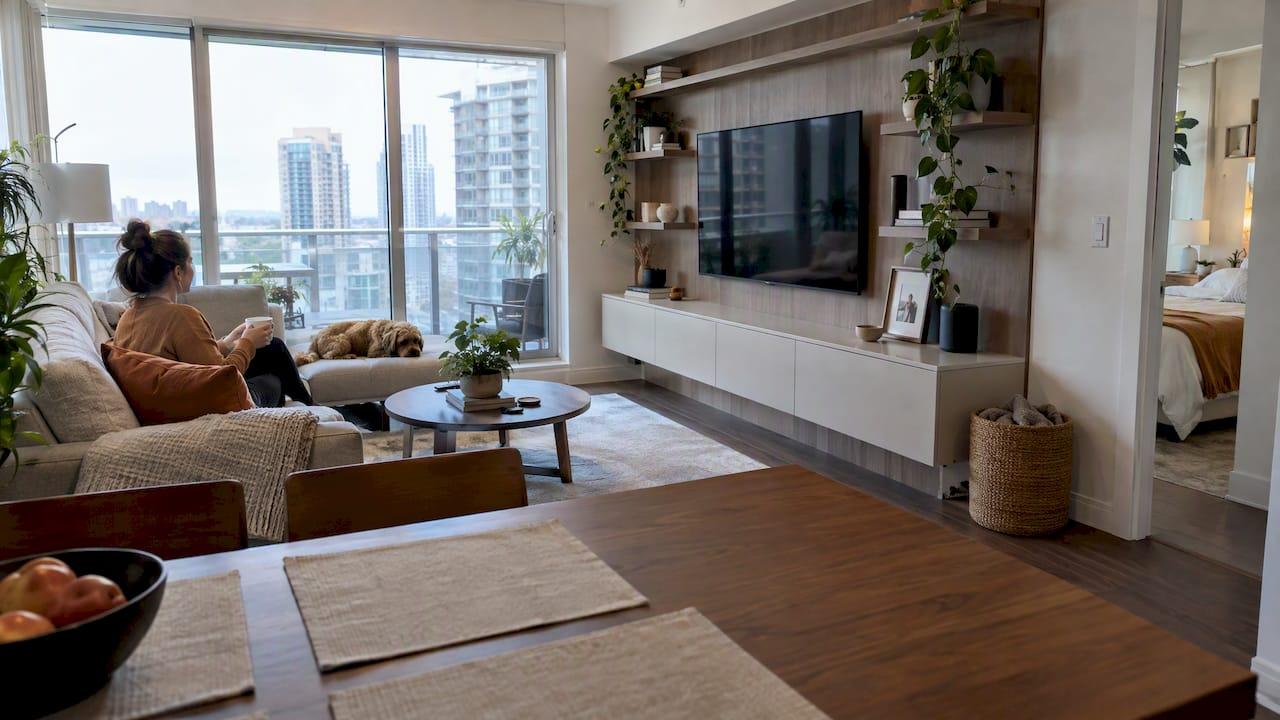
A media wall works well in a condo, and it often matters more there than in a house. Living rooms are smaller, outlets are fixed, and the TV usually ends up as the focal point of the whole space. A good media wall hides the wires, gives the devices a home, adds storage and makes a plain wall look designed. The trick is to plan around condo limits: shared walls, association rules, limited depth and electrical work you may not be allowed to touch.
This guide covers what a condo media wall can include, the approvals to sort out first, how to handle heat and cables, which finishes look expensive without costing a custom-build budget, and when a pre-cut kit or a professional is the better call.
TL;DR
- Check your HOA or condo association rules before you buy anything, and ask your city about permits if outlets or wiring will change.
- A media wall that adds no new wiring, plumbing or structural changes is usually the easiest kind to get approved.
- Leave room for airflow around any enclosed electronics. Heat is the most common mistake in built-in cabinetry.
- Pre-cut, pre-labeled kits give you the built-in look at a fraction of a custom carpentry bill, and can go up in a weekend.
- If you rent, or your building bans wall changes, a freestanding console or bookcase can fake the effect.
Table of Contents
- What a condo media wall actually includes
- Sort out the rules before you design
- Layouts that suit a condo living room
- Storage that keeps a small condo organized
- Heat, cables and mounting
- Finishes that look high-end without custom-build costs
- Kit, custom build or pro install?
- If you rent, or your building says no
- Get a plan before you buy
- Our view: plan the wall around the building, not the Pinterest photo
- FAQ
- Sources
What a condo media wall actually includes
A media wall centers a wall-mounted TV among cabinetry or shelving and organizes the devices around it. According to Real Homes, it can include concealed wires, decor, lighting and an electric fireplace. The same article points to open shelving, painted cabinetry, decorative objects, wall sconces, teakwood and aged-brass accents and marble mantles as typical features and materials.
For a condo, think of it as four layers:
- The backdrop: paneling, slats, paint or wallpaper that frames the TV.
- The storage: floating cabinets, shelves or a console that hold the streaming box, soundbar and games.
- The hidden parts: cable routing, power strips and ventilation.
- The glow: LED strips, sconces or an electric fireplace that give the wall depth in the evening.
You do not need all four. A slat panel, a floating console and a strip of LED light can already read as a custom build.
Sort out the rules before you design
Condo owners share walls, ceilings and building systems with neighbors, so the rules differ from a single-family house. Two separate questions come up: does your association need to approve the project, and does your city need to issue a permit?
The general principle is simple. The closer the work gets to structure, shared systems, plumbing or electrical wiring, the more likely you need approval from someone. A media wall that mounts to the wall surface, uses existing outlets and adds no new circuits sits at the low-risk end. Moving an outlet, adding a recessed niche that cuts into the wall, or running new power for a fireplace sits at the higher-risk end.
Here is a practical order of operations:
- Read your CC&Rs and renovation rules. Look for sections on wall alterations, flooring and noise, and any requirement for a contractor to be licensed or insured.
- Ask the association or property manager in writing. Describe the project in plain terms: panels fastened to the wall, a mounted TV, a plug-in electric fireplace, no new wiring.
- Ask your city or county building department about permits if you plan to add or move outlets or reroute any electrical line. Rules vary by jurisdiction, so the local office is the answer, not a general guide.
- Get approvals before you order or cut anything. Skipping approvals can mean fines or being told to remove finished work, and it can complicate a later sale.
If a wall in your unit is shared with a neighbor, ask which walls have concrete, metal studs or plumbing inside them. That changes how and where you can anchor a heavy TV. Our guide for SF condo owners deciding between a kit and a pro goes through that decision for Bay Area buildings in particular.
Layouts that suit a condo living room
Condo living rooms tend to be a single open space, so the TV wall also shapes the sitting area. Real Homes suggests a few approaches that translate well: a centered TV with cabinetry and open shelving around it, a console table that creates the media-wall effect, or freestanding modular shelving.
The compact floating wall
For walls under about nine feet wide, keep it simple. Mount the TV centered, hang a floating cabinet beneath it and add a narrow shelf or slat panel on one side. Floating cabinetry keeps the floor visible, which makes a small room feel larger. Our 71-inch floating TV console in black wood grain is the kind of piece that anchors this layout without needing a full wall build.
The fireplace wall
An electric fireplace gives a condo wall warmth and a clear focal point without a chimney or vent. It plugs into a standard outlet, which usually keeps it on the simpler side of the approval question, though you should confirm with your association. If you want the look in one piece, a linear electric fireplace TV stand with a walnut shelf combines fireplace, shelf and TV base. For separate components, browse electric fireplaces for media walls.
The open-concept divider
In a loft-style condo, the TV wall may face the kitchen or entry. Centering sightlines matters more there, because the screen is seen from several angles. We walk through this in our guide to an open concept TV wall you can build in a weekend.
The slat accent wall
Vertical wood slats add texture and can improve how the room sounds by softening echo in hard-surfaced condos. An acoustic slat wall panel in red walnut is a straightforward way to add warmth behind the screen. For more layouts, see our luxury TV wall design ideas.
Storage that keeps a small condo organized
The media wall earns its place when it removes clutter. Surrounding cabinetry and open shelves can hold devices and books, and Real Homes recommends keeping remotes and controllers in an accessible but less visible box or basket, with wires tucked out of sight. The same piece quotes interior-design specialist Sheva Knopfler arguing that function should not cost you style, and that shelves can mix technology with books, art and plants.
Some practical sizing guidance comes from Houzz, which quotes a cabinetmaker and an architect: split a built-in into a base and an upper cabinet, with a base about 36 inches high and 20 to 24 inches deep. In a condo, that depth is worth testing against your room. A 24-inch base in a narrow living room can eat the walkway, so floating cabinets that sit shallower, or a console, may fit better.
A few storage habits that work in small spaces:
- Put closed cabinets low and open shelves at eye level, so the daily clutter is hidden and the styled items show.
- Give every device a spot before you buy cabinets. Measure the streaming box, receiver and game console, including cables.
- Keep one basket or drawer for remotes and chargers.
- Leave a third of the shelf space empty. A full wall looks heavy in a small room.
For more ideas, see our guide to media wall storage ideas that do not trap heat, and the cabinetry options we carry.
Heat, cables and mounting
Ventilation
This is the part people skip. Enclosed electronics produce heat, and a sealed cabinet can trap it. Houzz quotes an architect who says components behind doors must be vented, and lists grilles, speaker cloth in the doors, toe-kick ventilation or a thermostat-controlled fan as options. In a condo, where you may not have central cooling control in every room, an open shelf for the hottest device is the simplest answer.

Cable management
Plan the cable path before you mount anything. Route the TV cable and power cord down behind the panel to a shelf or cabinet where the power strip sits. This is a surface-level job and does not require opening the wall. If you want a recessed outlet behind the TV, that is electrical work and brings you back to the approvals above.
Mounting
A modern TV is heavy and sits at a leverage point on the wall, so the anchor matters. Find out what is behind your wall first: wood studs, metal studs or concrete. Use hardware rated for your TV's weight and your wall type, and follow the mount maker's instructions. If you cannot confirm what the wall is made of, hire a pro. A fallen TV costs far more than an installer. Our hardware finishes come in brass, chrome and matte black so the visible pieces match the rest of the wall.
Finishes that look high-end without custom-build costs
Custom carpentry is where media wall budgets balloon. The good news is that most of the visual impact comes from a handful of surface choices. The Spruce shows paint, wallpaper, wood paneling, wood veneer, LED backlighting and built-in or console storage as finishes and features for TV walls.
In practice:
- Dark paint behind the TV makes the screen recede when it is off. It is the cheapest upgrade on the list.
- Wood veneer or slats add warmth and read as custom.
- LED backlighting gives the wall a soft glow and hides the edge of the TV. Browse our LED and ambient lighting.
- Metal hardware in one finish keeps the look consistent. Pick brass, chrome or matte black and stick to it.
- A few styled objects such as books, a plant and one piece of art finish the shelves. Our decor ideas for a TV wall has ten to pick from.
For a broader look at budget-friendly directions, our media wall ideas guide covers the styles currently popular.
Kit, custom build or pro install?
Most condo owners choose between three routes. Here is how they compare on what matters.
| DIY media wall kit | Custom carpentry | Freestanding console or bookcase | |
|---|---|---|---|
| Look | Built-in, designed finish | Fully tailored | Furniture look, less built-in |
| Effort | Weekend project, pre-cut and pre-labeled parts | Contractor-led, long lead time | Very low |
| Wall impact | Fastened to the wall surface | Often involves more alteration | None |
| Cost | Well below custom | Highest | Lowest |
| Best for | Owners who want a premium result and are comfortable with basic tools | Irregular walls, niches, heavy structural work | Renters or strict buildings |
A kit suits most condo owners because the panels arrive pre-cut and pre-labeled, so you assemble rather than measure and saw in a small space. You still need to check your wall type and your association's rules, but the work is mostly fastening, not construction. See how it works for the process, from design to install.
A custom build or a professional install makes sense when the wall is concrete or has hidden services, when you want a recessed niche, or when you simply do not want to handle a heavy TV. In the San Francisco Bay Area, we offer white-glove installation for exactly those jobs.
If you rent, or your building says no
Some condo units are rented, and some associations restrict wall changes. In that case, a freestanding approach gets you most of the look. Real Homes suggests a console table as a lower-budget alternative to a custom-built media wall, and a bookcase with space for a TV can give a built-in look without a custom shelving system, as shown in this renter-friendly built-in bookcase project. Add a plug-in LED strip, a dark wall color if the lease allows, and a few styled shelves. For the rest of the room, a few renter-friendly condo fixes can take care of privacy without drilling.
A note on scope: our kits are designed for homeowners who can fasten to their walls. If you are a renter, treat our kits as inspiration and choose a freestanding piece.
Get a plan before you buy
If you are unsure which layout fits your wall, start with a design. We offer a Single Concept Design for $99, a 3 Concepts + Revision Design Package for $199 and a Full Design & Quote for $299, all one-off fees. You get a plan sized to your room before you commit to a kit.

When you are ready, shop DIY media wall kits and pair them with smart tech for lighting and control. If you would rather have someone else handle it in the Bay Area, ask about white-glove installation. Kits ship nationwide, and returns are risk-free.
Our view: plan the wall around the building, not the Pinterest photo
Most condo media wall problems start before a single panel goes up. People fall in love with a photo from a house with a 14-foot wall, a deep niche and a chimney, and then try to copy it into a 10-foot wall with a shared neighbor behind it.
We design our kits around the opposite idea. The panels are pre-cut and pre-labeled so the build is mostly assembly, and the system is modular so you can scale it to the wall you have. Hidden wire management and floating cabinetry are built into the concept because a condo owner cares more about a clean line and a clear floor than about a huge piece of furniture.

Our advice is always the same three things. Ask your association first. Measure twice, and test the depth against how you walk through the room. Give your electronics air. If the wall turns out to be tricky, a design concept at $99 costs far less than a mistake in a drywall wall or a rejected renovation request.
The best condo media wall is not the biggest one. It is the one that makes the room feel calmer every evening.
— Jake
FAQ
Do I need HOA approval for a media wall in a condo?
Often yes, or at least it is wise to ask. Rules differ by association, and changes to walls, electrical work or anything near shared systems are the most likely to need sign-off. Send your property manager a written description and wait for a written reply before ordering.
Do I need a permit?
An association's approval and a city permit are separate things. A surface-mounted wall with existing outlets usually involves less than one that adds or moves outlets or reroutes electrical lines. Your local building department can tell you what applies in your jurisdiction.
Can I put a TV in an enclosed cabinet?
Yes, but vent it. Grilles, speaker-cloth doors, toe-kick ventilation or a thermostat-controlled fan are the options experts suggest for components that generate heat. For hot devices, an open shelf is the easiest fix.
What is the cheapest way to get the media wall look in a small condo?
Start with paint, a mounted TV and a floating console or a slim bookcase, then add LED lighting and a few styled shelf items. A kit adds the built-in look at a fraction of the cost of custom carpentry, and a design concept helps you pick the right size.
Sources
- 10 media wall ideas to display your TV in style, Real Homes
- How to Get That Built-in Media Wall You Really Want, Houzz
- 34 TV Wall Ideas That Are Both Functional and Stylish, The Spruce
- Renter-friendly built-in bookcase, Style by Emily Henderson
- Privacy Without Curtains: 3 Renter Friendly Fixes in Under an Hour