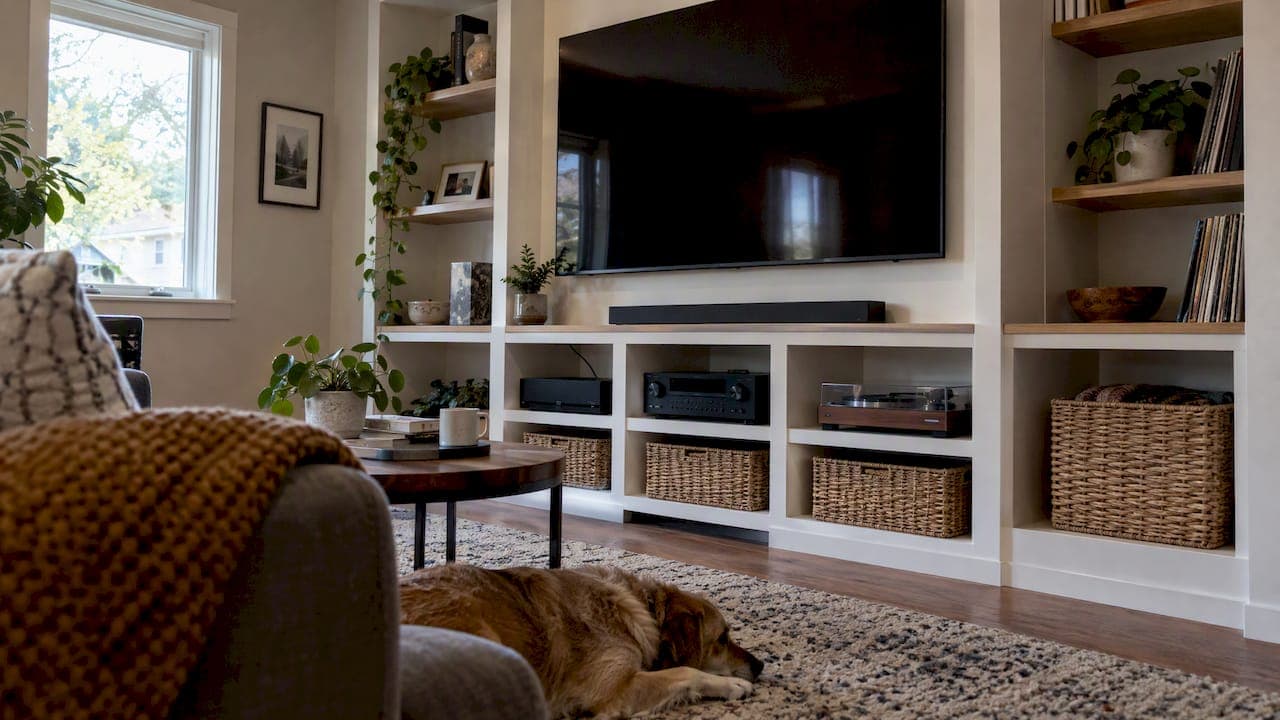
The best media wall mixes closed cabinetry with ventilated equipment bays, hides cables inside planned channels, and frames the TV with intentional joinery and lighting so it reads as furniture, not a gadget on a wall. This approach solves the two biggest headaches homeowners run into: overheating gear and messy cords. Below, we walk through concrete ideas, measurements, and planning steps to get there.
TL;DR:
- Measure components, outlets, and ports before ordering cabinetry; place the TV near seated eye level and allow one foot per 10 inches of screen.
- Use ventilated or slatted storage for warm electronics, leave 2 to 3 inches of side clearance for servicing, and keep routers out of metal enclosures.
- Use recessed outlets or code approved in wall power kits, leave 2 to 4 inches of cable at each connection, and label both ends.
- Pre cut kits offer a middle ground between basic shelf setups and custom builds, but in wall power and structural work require professionals.
Table of Contents
- 1. Media wall storage ideas you can copy
- 2. How to plan and measure before you buy
- 3. Tech, cable management, and airflow best practices
- 4. Styling tips that make storage look intentional
- 5. Budget and installation: DIY kits versus custom builds
- 6. An installer-minded checklist and a few lessons learned
- Get a polished media wall without the contractor timeline
- FAQ
- Sources
1. Media wall storage ideas you can copy
These ten approaches cover the range from simple swaps to full builds, and most can be mixed on the same wall.
- Floating cabinets with hidden channels: wall-mounted cabinets with a routed back panel let cords drop straight down without a visible cord. Leave at least 4 inches of depth behind the cabinet for a cable chase, and pair with a matte finish to keep the look quiet.
- Full-width pull-out drawers: a long, shallow drawer under the TV holds remotes, game controllers, and chargers in one spot. Size drawers 4 to 6 inches deep so items stay visible at a glance instead of buried.
- Built-in bookcases with lower closed doors: open shelving above and solid doors below balances display with storage. Use the closed section for anything you do not want on view, like cable boxes or paperwork.
- Slatted, ventilated cabinets: slim wood or MDF slats replace solid doors so warm air escapes a cabinet holding a receiver or streaming box. This keeps the clean look of a closed door without trapping heat.
- Recessed soundbar niches: a shallow notch cut into the cabinetry lets a soundbar sit flush instead of perched awkwardly below the screen. Size the niche about 1 inch wider than the soundbar on each side for easy placement.
- Overhead shallow cabinets: cabinets above the TV use vertical space that usually sits empty. Keep the depth under 10 inches so they do not read as bulky overhead.
- Sliding panels or doors: a panel on a track can conceal the TV entirely when not in use, which works well in a shared living and dining space. Choose a track rated for the panel's weight to avoid sagging over time.
- Secret compartments: a push-to-open panel or false drawer front hides a router or modem without extra visual clutter. This pairs naturally with the hidden-channel cabinets above.
- Floating consoles with wire troughs: a console mounted a few inches off the floor with a built-in trough along the back keeps cords off the baseboard entirely.
- Display shelves with integrated LED: open shelves with low-profile LED strips highlight books or decor and add warmth to the wall when the screen is off.
- Pull-out media drawers for controllers: a dedicated shallow drawer near seating height keeps remotes and handheld electronics reachable without opening a full cabinet.
A few styling notes apply across all of these: keep hardware finishes consistent (all matte black or all brushed brass, not a mix), and reserve at least one open shelf for rotating decor so the wall does not feel like a sealed box.
2. How to plan and measure before you buy
Getting the measurements right before you order cabinetry or a kit prevents most of the common regrets homeowners report later.
- Mount the TV so its center sits near seated eye level, and if it has to go higher, use a tilting mount to compensate, per Consumer Reports' wall-mounting guidance.
- Use a viewing-distance rule of about 1 foot of distance per 10 inches of screen size, so a 55 inch TV works well from roughly 5.5 feet away, a figure that Consumer Reports ties to SMPTE and THX viewing-angle standards.
- Connect cables to the TV before mounting if the ports face the rear, since slim mounts can make them hard to reach once the screen is on the wall.
- Measure the depth of every component, from the game console to the cable box, and leave extra depth for cords and connectors. Our guide to TV mounting height walks through the measurement process in more detail.
- Confirm exactly where ports and outlets will sit relative to your planned cabinetry before cutting anything.
- Decide which components need open, ventilated storage based on heat output, and which can go behind solid doors.
Before you order, record: TV size and mount type, total component depth, outlet locations, and whether you need in-wall power. Getting these details down on paper avoids the single most common planning mistake: finalizing cabinetry before confirming where the signal path and ports actually land.
3. Tech, cable management, and airflow best practices
Electronics generate heat even when idle, and ENERGY STAR's draft Audio/Video specification reflects a broader push toward lower idle power, which makes it even more worth giving gear room to breathe rather than sealing it behind solid doors. Reserve fully enclosed cabinets for passive items like books, and use slatted or perforated backs for anything that gets warm, following the same logic SharpTV's organizing guidance lays out for avoiding overheated components.
- Use code-compliant in-wall power kits or recessed outlets instead of running ordinary extension cords through wall cavities.
- Leave a service loop of 2 to 4 inches of extra cable at each connection so devices can slide out without unplugging everything.
- Label cables at both ends before you close up cabinetry.
- Keep routers out of metal enclosures, which block signal, and favor IR-friendly sightlines or an RF remote extender if a component sits behind a closed door.
Planning outlet count and placement early also saves a redo later. Our breakdown of outlet placement for media walls covers how many receptacles to plan for.
Pro Tip: Size equipment niches with 2 to 3 inches of clearance on each side so components slide out easily for servicing instead of requiring a full cabinet teardown.

4. Styling tips that make storage look intentional
Treating the TV as part of a designed wall, rather than an object hung on an empty surface, is what separates a finished-looking media wall from an afterthought, a point The Spruce's storage guidance makes directly.
- Frame the TV with shelving or cabinetry on both sides so it sits inside a composition rather than floating alone.
- Mix closed storage for clutter with open shelving for display, roughly balanced so neither side dominates.
- Add integrated LED shelf lighting and warm wood tones to soften the look of a large dark screen.
- Store remotes, cords, and chargers in drawers, and reserve open shelves for books, art, or objects worth looking at.
- Swap out displayed decor seasonally to keep the wall feeling current without any structural change.
Our decor ideas for TV walls and art-around-the-TV guide both expand on this framing approach.
5. Budget and installation: DIY kits versus custom builds
Costs scale with material quality, electrical work, and labor. A simple shelf-and-console setup costs the least, while in-wall power, structural changes, or a fireplace insert push a project toward hiring a pro.
- Hire an electrician for any in-wall power run or recessed outlet.
- Bring in a contractor for mounting above a fireplace or any structural wall changes. If you are opening up a wall, a load-bearing wall removal cost breakdown is worth reviewing before committing.
- Fresh drywall or paint work ahead of installation goes smoother with proper prep, something a drywall and painting prep guide covers well.
- Pre-cut kits offer a middle path: a premium look without full custom pricing or a multi-week install timeline.
6. An installer-minded checklist and a few lessons learned
Three priorities matter more than any single product choice: measure before you buy, ventilate anything that generates heat, and conceal cables with a planned route rather than an afterthought. Get those three right and the rest, finishes, lighting, and layout, tends to fall into place. Pre-cut, pre-labeled kits have made this process far more approachable for homeowners who want a finished look without hiring a full design team, and the support that comes with a well-documented kit often matters more than the tools in the box.
— Jake
Get a polished media wall without the contractor timeline
If you want the framed, ventilated, cable-concealed look described above without cutting panels yourself, our pre-cut, pre-labeled media wall kits are built for a weekend install, with integrated options for lighting and hidden wire management already worked into the design.

- Weekend DIYers get pre-labeled panels and clear instructions so there is no guessing where a cut or cable channel goes.
- Homeowners who want a fully managed result can request a custom design and local installation instead of assembling it themselves.
Browse the full shop for design packages and kits, or start with a Single Concept Design for $99 if you want a plan before you commit to materials.
FAQ
Where should I place the TV in my living room?
Position the TV so its center lands near seated eye level, and sit far enough back that the screen fills a comfortable field of view. Consumer Reports suggests roughly 1 foot of viewing distance for every 10 inches of screen size as a starting point.
What are the most common media wall mistakes?
The most frequent mistake is finalizing cabinetry before confirming where ports and outlets will sit, which creates awkward cable runs later. Sealing warm components inside fully enclosed cabinets without ventilation is a close second, since it risks overheating gear.
What should go on the shelves of a TV stand or media wall?
Open shelves work best for books, decor, and anything meant to be seen, while drawers or closed cabinets should hold remotes, chargers, and cable boxes. Rotating what is on display seasonally keeps the wall feeling current without any rebuild.
What can I put inside a media wall besides the TV?
A well-planned media wall can house a soundbar in a recessed niche, a streaming box or game console in a ventilated bay, and a router tucked into a compartment that avoids metal enclosures. Many designs also include an electric fireplace insert, floating shelves for display, and drawers for smaller accessories.
How deep should media wall storage be for electronics?
Depth depends on the components involved, but most game consoles, streaming boxes, and receivers require cabinet depths sized to their components plus a few extra inches for cable clearance. Measuring each component's depth before ordering cabinetry, as outlined in SharpTV's organizing guidance, prevents a tight fit later.
Sources
- Wall-Mounting a TV Step-by-Step Guide - Consumer Reports
- How to organize an entertainment center | SharpTV USA
- Living room storage ideas - The Spruce
- ENERGY STAR Audio/Video Version 4.0 Draft 1 Specification