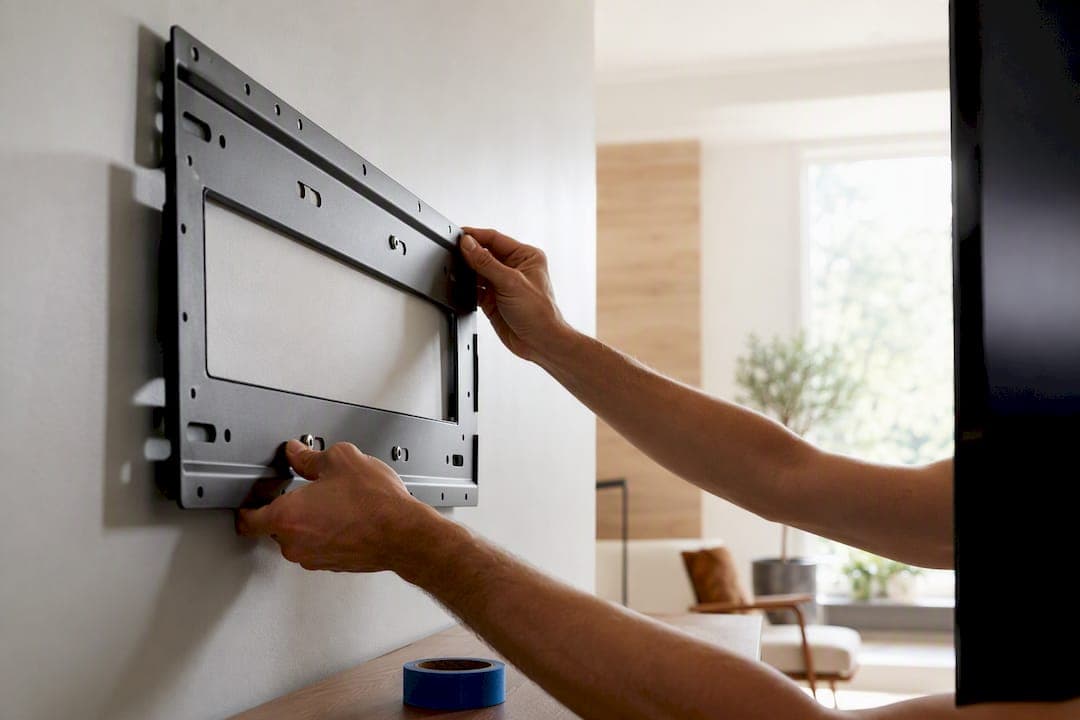
Yes, but only with the right anchor and the right expectations. Studs are the gold standard for any TV over 40 inches or any full-motion arm, since drywall alone can't handle cantilever forces. Studless mounting works only with anchors rated for the exact weight and pull force involved, or a plywood backer spreading the load. Whatever method you choose, check the mount's weight rating against your TV, check the anchor's pull rating, and test the installation with real force before you trust it.
TL;DR:
- Mounting a TV over 40 inches or on a full-motion arm requires securing into studs or using a plywood backer for proper load distribution.
- Proper hardware includes lag bolts of 3/8 inch by 3 inches, paired with washers, installed into sturdy stud centers for most DIY wall mounts.
- Drywall anchors like plastic expansion anchors are unsuitable for large TVs or full-motion arms; heavy-duty toggle or snap-toggle anchors are safer options.
- Regularly testing the mount by applying force after installation and during the first year helps prevent failure due to gradual drywall stress.
- For complex walls or large screens, hiring a professional installer or choosing a pre-engineered media wall kit reduces risk and simplifies setup.
Table of Contents
- Tools and Materials You Need Before You Start
- How Do You Find Studs Behind Drywall?
- Step-by-Step: Mounting Into Studs
- Mounting a TV Without Studs: What Actually Works
- Testing Your Mount and Spotting Failure Early
- When Should You Hire a Professional Installer?
- Why a Pre-Engineered Media Wall Kit Lowers the Risk
- Studs, Toggles, and the Advice Most Guides Skip
- Want the Anchor Decisions Made for You?
- Sources
- FAQ
Tools and Materials You Need Before You Start
Half of botched TV mounts trace back to one thing: someone grabbed whatever anchor was in the garage instead of buying the right one for the job. Before you touch a drill, get your gear sorted.
Tools:
- Stud finder (electronic, not the cheap magnetic kind alone)
- Cordless drill with a full bit set, including a long 1/8" pilot bit
- 4-foot level or a laser level
- Socket wrench or ratchet set matching your lag bolt heads
- Pencil, tape measure, and painter's tape for marking
- A second person. TVs over 50 inches are a two-person job, full stop
Choosing the mount: Match the mount's VESA pattern (the bolt-hole spacing on the back of your TV) to the bracket before you buy anything. Fixed mounts hold the TV flat against the wall and put the least stress on anchors. Tilting mounts add a small angle. Full-motion arms extend the TV away from the wall on a swing arm, which multiplies the pulling force on your top anchors dramatically, and that's exactly why full-motion arms almost always require studs.
Anchors: This is where people get hurt or lose a television. Plastic expansion anchors, the kind sold for hanging picture frames, are not built for this job. Home Depot's anchor guidance is blunt about it: those common plastic anchors are unsuitable for TV mounts because they're rated for static, light loads, not the dynamic pull a wall-mounted screen creates. Look for self-drilling snap-toggle anchors, metal sleeve anchors, or a proper toggle bolt instead, and always check the printed weight rating on the packaging against your TV's actual weight, not its screen size.
How Do You Find Studs Behind Drywall?
Finding studs correctly is the difference between a TV that stays up for ten years and one that ends up on the floor at 2 a.m.
- Scan with an electronic stud finder. Start in center mode to locate the general area, then switch to edge mode and sweep slowly from both directions until it beeps on the same spot twice. That confirms an edge rather than a false read.
- Verify with a small test hole or a magnet. Drive a thin pilot hole (it'll be hidden behind the mount) or run a strong magnet across the wall to find the drywall screws holding the stud in place. This second check catches the stud finders that lie, and they all lie occasionally.
- Mark both edges of the stud, then find the center. Studs are typically 1.5 inches wide. Marking both edges and splitting the difference gets you a center mark you can trust instead of guessing.
- Measure the standard spacing. Most homes built to code use 16-inch on-center framing, though some, especially newer construction, use 24-inch. Once you find one stud, measure 16 inches (or 24) in either direction to predict the next one, then confirm with the finder.
- Use outlets and corners as landmarks. Electrical boxes are almost always nailed to the side of a stud, and exterior corners always have framing. Both give you a fast starting point before you even turn on the stud finder.
Studs aren't optional for every install. If you're mounting a TV over 40 inches, using a full-motion arm, or mounting into a fireplace surround with mixed stone or tile, studs (or a code-rated fireplace bracket) are required, not recommended. For lighter, fixed TVs under about 32 inches, a hybrid approach—one bolt into a stud plus one heavy-duty toggle anchor—can work, but only when the mount's instructions explicitly allow a mixed anchor pattern.
Step-by-Step: Mounting Into Studs
This is the method Consumer Reports recommends for most installs, and it's the one that lets you stop worrying every time someone bumps the wall.
- Hold the mounting plate against the wall at your marked stud locations and use a level to keep it dead straight. Crooked mounts are the most common cosmetic mistake, and they're nearly impossible to fix after the holes are drilled.
- Mark your bolt holes through the plate's template with a pencil, then double-check the spacing lines up with your stud centers before drilling anything.
- Pre-drill pilot holes into the stud itself, not just the drywall. A 1/8-inch bit at roughly 2.5 to 3 inches deep works for most standard lag bolts and keeps the wood from splitting.
- Use lag bolts sized for the job. A tested, widely used approach calls for four lag bolts, 3/8 inch by 3 inches, sunk into two separate studs, paired with washers under each bolt head to spread the load across the plate. Spreading the mount across two studs instead of one cuts the stress on any single point in half.
- Skip the hardware that comes in the box, at least for the bolts. Many mount kits ship with bolts that are shorter than they should be for a solid two-stud grip. Bring your own 3/8 x 3 inch lag bolts and matching washers instead.
- Tighten by hand first, then snug with a ratchet. Overtightening can strip the wood or crack the wall plate, so stop once the bolt is firm and the plate sits flush, not once it's cranked as hard as it'll go.
- Attach the TV brackets to the back of the television on a soft, flat surface before you ever lift it, matching the VESA holes exactly.
- Lift with two people, one on each side, and hang the TV brackets onto the wall plate according to the mount's locking mechanism, whether that's a hook-and-drop design or a slide-and-click system.
- Pull test before you let go. Grip the top of the TV and pull firmly outward and downward. If the plate flexes, shifts, or you hear cracking, stop and recheck every bolt before trusting it with a full release.
Pro Tip: Buy your lag bolts and washers as a separate trip to the hardware store rather than trusting the mount's included hardware bag. The $6 you spend on proper 3/8 x 3 inch bolts is cheap insurance compared to a TV that pulls loose six months later.
Mounting a TV Without Studs: What Actually Works
Studless mounting isn't a myth, but it comes with real limits that a lot of product listings gloss over.
Snap-toggle and heavy-duty toggle anchors are the most reliable studless option for mid-size TVs. Drill a hole sized exactly to the anchor's spec, usually 1/2 inch, fold the toggle wings flat, push it through the drywall, and pull the strap until the wings sit flush against the back of the wall. Then snap off the excess strap and drive the screw. MantelMount's studless guidance stresses following the manufacturer's rated capacity and building in a real safety margin rather than mounting right up to the printed limit.
Molly bolts and metal sleeve anchors work for lighter loads, generally TVs under 30 pounds combined with a low-profile fixed mount. They're a step up from plastic anchors but still not designed for the leverage a full-motion arm creates.
A plywood backer plate is the most bulletproof studless method. Cut a piece of half-inch or three-quarter-inch plywood to span at least two stud bays, attach it to the wall with several toggle anchors distributed across its surface, then mount your bracket to the plywood instead of directly to drywall. The load spreads across a much wider anchor pattern instead of concentrating on two or four points.
A few non-negotiables for studless installs:
- Never use a full-motion arm without studs or a plywood backer. The cantilever force is too concentrated for drywall anchors alone.
- Retail listings for "no-stud" mounts rated for screens up to 80 inches still require exact, correct installation. These aren't the same as a picture hook, and skipping a step in the instructions voids that rated capacity fast.
- Fixed, low-profile mounts on smaller TVs are typically the recommended upper size limit for studless setups, even with premium toggle anchors.
Testing Your Mount and Spotting Failure Early
A drywall anchor's printed weight rating is measured under a straight, steady pull. A TV mount doesn't apply force that way. Every time the arm extends or someone leans on the stand below it, the load shifts to a cantilever, concentrating far more stress on your top anchors than the bottom ones. That mismatch between how anchors get rated and how TVs actually pull on them is the single biggest reason mounts fail months after installation, not on day one.
Test it the same way installers do: grip the TV near the top corners and apply firm pressure outward and downward, simulating someone bumping it. Watch the wall around the anchors, not just the mount itself, for any flexing, cracking, or drywall dust falling from behind the plate.
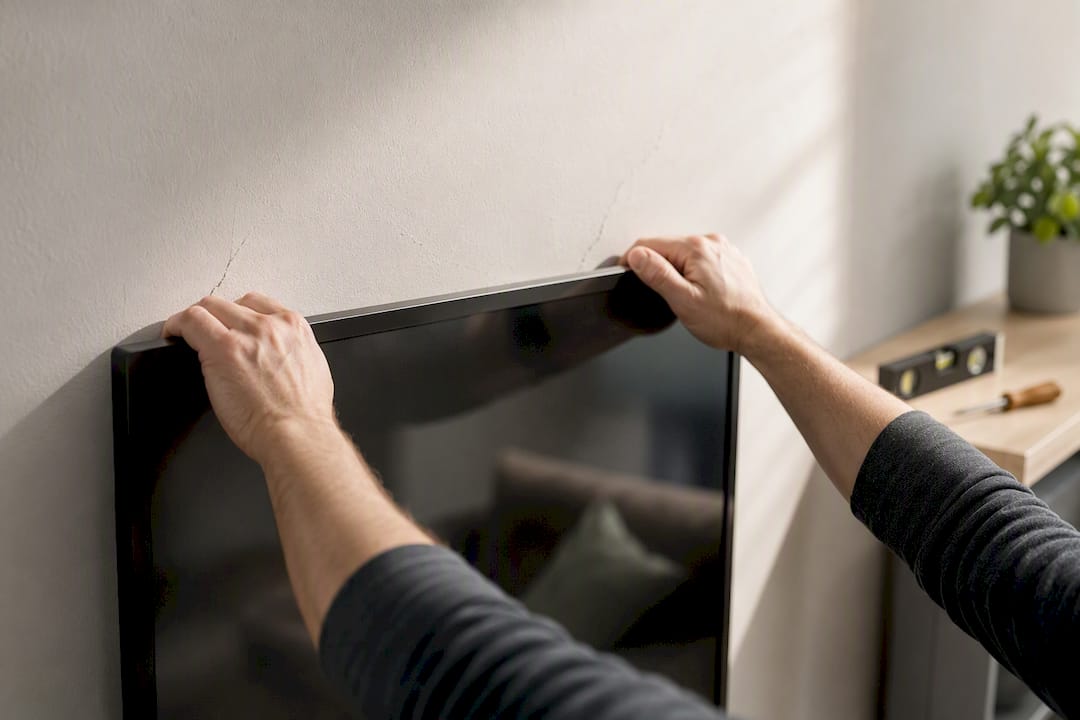
Check the installation every few months for the first year. Look for hairline cracks radiating from the anchor points, a mount that's developed even a slight tilt, or screws that have backed out a fraction of a turn. For any studless setup, keep your combined anchor capacity at least double the TV's actual weight, and treat full-motion arms with extra suspicion since they concentrate force unevenly across the anchor pattern.
Pro Tip: Take a photo of your mount straight-on right after installation. Six months later, hold your phone at the same spot and compare. A tilt you can't feel by eye often shows up clearly in a side-by-side photo.
When Should You Hire a Professional Installer?
Some walls just aren't a DIY project, and pretending otherwise is how people end up patching drywall instead of watching TV.
- Fireplace surrounds with stone, brick, or tile need masonry anchors and often a mantel bracket system, not standard drywall hardware.
- Plaster walls (common in older homes) crack unpredictably when drilled and usually need a different anchoring approach entirely.
- TVs over 65 inches on full-motion arms carry enough leverage that a mistake becomes expensive fast.
- Concrete or cinder block walls require masonry bits and anchors most homeowners don't own.
Typical US pricing runs about $140 to $250 for a basic drywall install into studs, with complex surfaces like brick, stone, or above-fireplace installs pushing costs well past that range because they demand different anchors, more time, and sometimes structural reinforcement. When you're vetting an installer, check recent reviews specifically for TV mounting (not just general handyman work), ask whether they carry damage insurance, and confirm in writing whether the mount hardware and any wall patching are included in the quote.
Why a Pre-Engineered Media Wall Kit Lowers the Risk
Most of the failure points in a DIY mount come down to guesswork: where exactly the backer goes, how the wiring routes, whether the anchor pattern matches the wall. A pre-cut, pre-labeled kit removes that guesswork by engineering the anchor and backer placement into the panel layout before it ever ships. Some pre-built kits feature panels labeled for exact placement and wiring channels built in so cables disappear without cutting into open drywall, similar to the routing approach covered in this guide to hiding TV wires.
That structure matters most for homeowners who don't want to make anchor-placement decisions themselves, or who've read this far and realized their wall is more complicated than a clean stud bay. With customer support built into the purchase, a kit-based install trades ad-hoc studless workarounds for a system designed to hide the seams from day one.
Studs, Toggles, and the Advice Most Guides Skip
Here's the uncomfortable truth about most TV mounting guides: they treat stud mounting and studless mounting as roughly equivalent options with different steps, when they're not. Studs give you wood to bite into. Everything else is drywall paper and gypsum trying to hold a cantilevered weight it was never designed for, no matter how impressive the anchor's box claims to be.
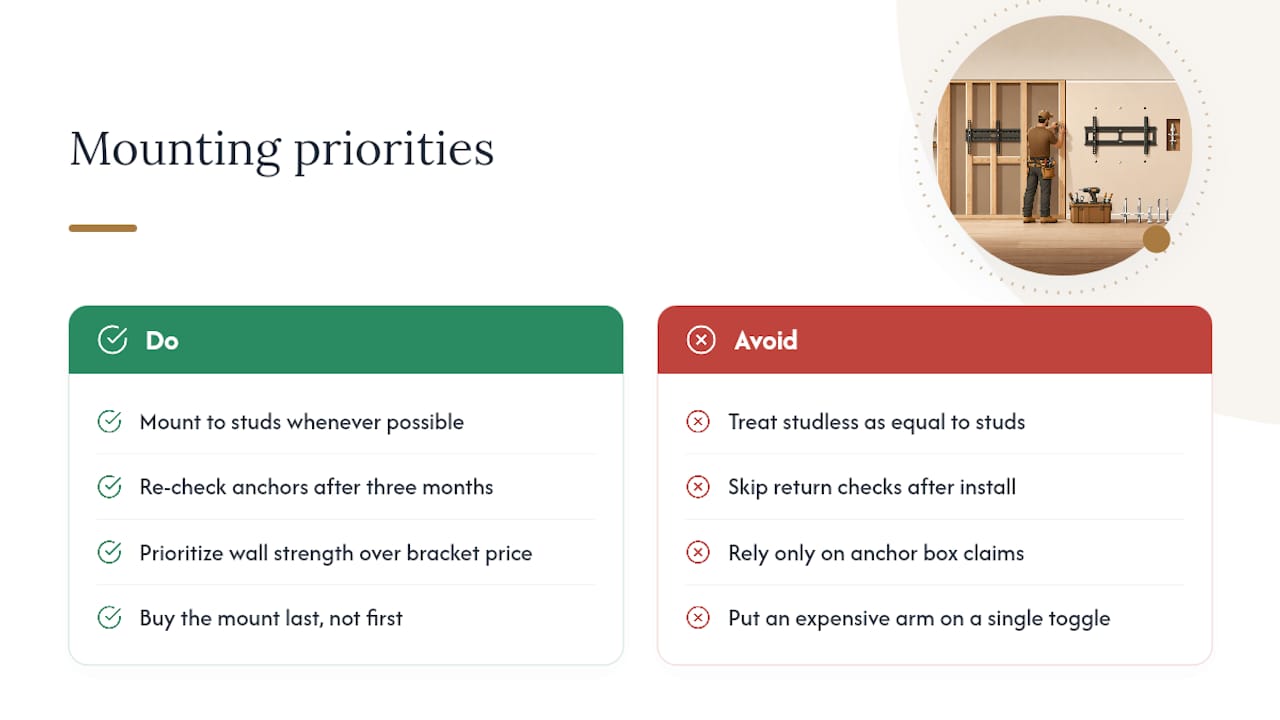
The bigger blind spot is testing. Almost every guide tells you how to install the anchor and stops there. Nobody tells you to come back in three months and check it. Drywall fails slowly, not all at once, and a mount that felt rock solid on install day can develop play in the anchors long before it actually gives way.
If you take one thing from this playbook, prioritize the wall over the mount. A cheap bracket on solid studs beats an expensive full-motion arm on a single toggle anchor every time. Buy the mount last, not first.
— Jake
Want the Anchor Decisions Made for You?
If drilling into your own wall and betting on an anchor rating still makes you nervous, that's a reasonable instinct, not overcaution. Some kits sidestep the anchor guesswork entirely: panels come pre-cut and pre-labeled with backer placement already engineered in, so you're following a diagram instead of hoping your stud spacing lines up with generic instructions.

Browse the Media Wall Kits to see finish and layout options, or check the how-it-works page if you're deciding between building it yourself over a weekend or booking White-Glove Installation for a fully finished result. If your TV wall includes a fireplace surround, the electric fireplace options are worth a look before you commit to a mounting plan, since masonry and stone change the anchoring approach entirely. Start by browsing the shop to see which kit fits your wall and screen size.
Sources
- Step-by-step guide to wall-mounting your TV — Consumer Reports
- How to use a drywall anchor — The Home Depot
- How to mount a TV on drywall with lag bolts — TestedByRobby
- No stud? No problem: How to mount a TV on drywall — MantelMount
FAQ
Is It Safe to Mount a TV on Drywall?
It's safe when the mount is anchored into studs, which is what Consumer Reports recommends for most installs. Drywall alone, without studs or a rated anchor system, isn't safe for anything beyond a small, lightweight fixed mount.
Can I Mount My TV on Drywall Without Studs?
Yes, but only using anchors specifically rated for the job, like snap-toggles or a plywood backer plate, never standard plastic expansion anchors. Home Depot's guidance confirms common plastic anchors aren't built for this kind of load, and studless setups work best for smaller, fixed TVs rather than large screens or full-motion arms.
How Heavy of a TV Can Drywall Hold?
It depends entirely on the anchor, not the drywall itself. A properly rated snap-toggle system can support a mid-size fixed TV, but MantelMount's studless guidance recommends staying well under the anchor's printed maximum rather than mounting right up to the limit.
Can Drywall Hold a 55-Inch TV?
A TV can be mounted using drywall anchors only with a fixed, low-profile bracket and anchors rated for that specific weight, and even then studs are the safer choice. For a full-motion arm, studs or a plywood backer are not optional, since the cantilever force at larger screen sizes is too concentrated for drywall anchors alone.