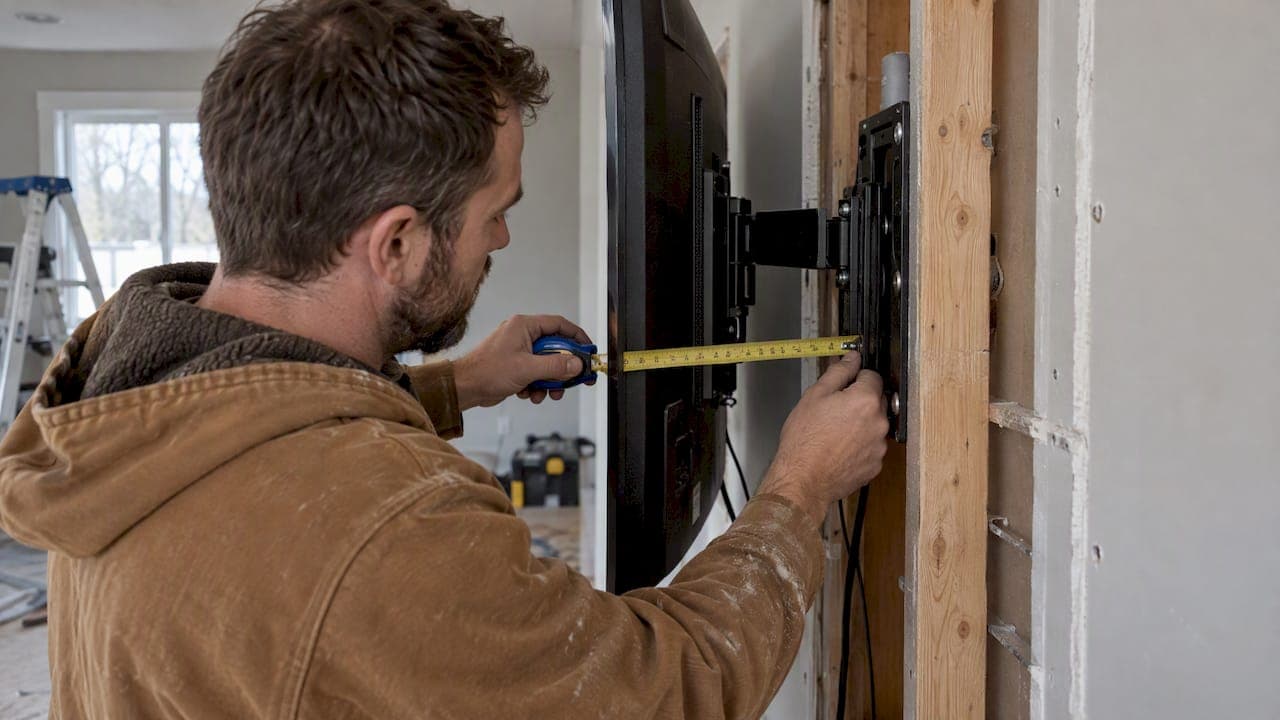
For most flat screens, plan on a recess depth starting at a few inches up to about several inches, with ultra-slim flush mounts requiring the shallowest space, moderate depth for niches hiding the mount and cabling, and greater depth if you want to tuck in streaming boxes or soundbar electronics. The formula is simple: TV thickness plus mount thickness plus a half-inch of clearance equals your minimum recess depth, with extra room added for power components or breakout boxes.
TL;DR:
- The recess depth should match the TV thickness, mount profile, and additional clearance for cables and airflow, often totaling 3 to 4 inches for popular setups.
- Fixed mounts require only about half an inch to one inch of clearance, while full-motion mounts need a minimum of three inches to accommodate the arm and movement.
- Installing solid blocking behind studs and avoiding drywall-only anchors are crucial for safely supporting large or heavy TVs.
- Power outlets must be code-compliant, often requiring licensed electricians to install in-wall circuits, and should include surge protection and separation from low-voltage cables.
- Proper ventilation involves leaving small gaps and using trim or reveals to prevent heat buildup, which can impair TV lifespan.
Table of Contents
- How to calculate the exact recess depth for your TV and mount
- In-wall mounting options and how each changes your depth
- Framing and structural details for a safe, load-bearing recess
- Powering a recessed TV safely and within code
- Keeping airflow and a flush finish without overheating your TV
- Checklist and common mistakes from recessed TV installs
- When to DIY your recess and when to call in help
- Getting a flush recess right without the trial and error
- FAQ
- Sources
How to calculate the exact recess depth for your TV and mount
The formula sounds simple, but getting it right means measuring the right things in the right order. Skip a step here and you end up either chiseling out drywall mid-project or staring at a TV that sticks out further than you wanted.
Start with the TV itself. Measure its thickness at the thickest point, not the thin bezel edge. Many modern panels taper, so the back housing near the ports and vents is often an inch or more deeper than the screen edge. Check for protruding power inlets or HDMI connectors too. These can add another quarter to half inch if cables plug in straight rather than at an angle.
Next, measure the mount. This is where recess depth swings the most:
- Fixed flush mounts sit the TV 0.5 to 1 inch off the wall, the shallowest option available.
- Low-profile tilting mounts typically need 1 to 2 inches of clearance for the tilt mechanism.
- Full-motion articulating arms require 3 inches or more just for the folded arm, before the TV is added.
- Recessed in-wall mount boxes replace the wall cavity itself as the mounting surface, which changes the math entirely since the box depth becomes your recess depth.
Once you know TV thickness and mount profile, add clearance. A half inch to a full inch covers cable loops and lets air move behind the screen. If you plan to hide a cable box, streaming device, or audio receiver inside the recess, add another 1 to 2 inches so the box fits without crushing cables against the back of the TV.
Pro Tip: Cut a cardboard template matching your TV's exact footprint and test-fit it in the open stud bay before closing up any drywall.
Here's how that math plays out for common screen sizes using a low-profile mount versus a recessed in-wall box:
A mid-sized TV with a moderate thickness paired with a low-profile mount generally needs a shallow recess depth plus clearance to fit comfortably in the wall. Swap in a recessed in-wall box designed for that screen size and you're often working with 3 to 4 inches of internal depth, since the box itself becomes the mounting surface and absorbs some of what a surface mount would add.
Larger TVs often are a bit thicker, and when paired with a low-profile mount, you should allow slightly more recess depth to accommodate the increased thickness. A recessed in-wall mount built for 65 to 90-inch TVs can support a true "zero gap" flush profile for screens with compatible VESA patterns, which is worth checking before you frame anything, according to Kanto's recessed in-wall mount specifications.
Very large TVs with thicker housings combined with low-profile mounts usually call for a recess depth in the moderate range, and adding internal storage for breakout boxes or power bricks requires additional depth.

In-wall mounting options and how each changes your depth
The mount you choose does more than hold the TV. It sets the ceiling on how shallow your recess can go and determines how much of the installation happens before drywall versus after.
Low-profile flush mounts are the shallowest path to a finished look, often adding under an inch to the TV's own thickness. The tradeoff is compatibility: not every TV supports a near-wall mount, and the VESA bolt pattern on the back has to match what the mount offers. A mount rated for a tighter VESA spacing will sit closer to the wall than one built for a wider pattern, so check the mount's spec sheet against your TV's panel before buying either one.
Recessed in-wall boxes take a different approach entirely. Instead of a bracket attached to the wall surface, the box itself gets built into the stud bay, and the TV mounts to a plate inside that box. Common setups include:
- Metal knockouts for running a power outlet directly into the box.
- Rubber grommets that route cables cleanly without sharp edges catching on wires.
- Removable accessory plates that let you store a small breakout box or streaming device inside the recess itself.
These features, confirmed in Kanto's recessed in-wall mount product details, explain why in-wall boxes are popular for anyone who wants outlets and cable management hidden entirely from view, not just the mount itself.
Retrofit and new-construction jobs call for different tools. A retrofit means cutting into existing drywall after the fact, which limits you to whatever depth the stud bay already provides. New-construction installs, done before drywall goes up, let you use a template to frame the exact opening size before anything is covered. Some recessed mounts ship with foldable new-construction templates, allowing a contractor to finish drywall around the opening while the actual mount stays boxed and protected until final install, a detail noted in product documentation for in-wall recessed systems.
Either way, your recess depth is capped by the width of the stud bay you're working with, typically 3.5 inches for standard 2x4 framing. If your calculated depth exceeds that, you'll need to either choose a shallower mount or modify the framing, which the next section covers.
The mount you pick also shapes your finishing choices. A flush mount with a thin TV might sit nearly even with the wall, calling for a tight reveal or shadow gap around the edge. A deeper recessed box leaves more of a visible frame, which some homeowners lean into with trim rather than trying to hide it.
Framing and structural details for a safe, load-bearing recess
Before any recess gets cut, the framing behind it has to support the TV's actual weight, not just look right on paper. This is the step most DIYers underestimate, and it's the one that causes problems years later when a mount pulls loose from drywall alone.
- Locate every stud within the planned recess area using a stud finder, then mark both edges of each stud so you know your exact bay width.
- Measure the stud bay width against your calculated recess depth. Standard 2x4 framing gives you roughly 3.5 inches of depth to work with before you hit the opposite side of the wall cavity.
- Install solid blocking between the studs at the height where the mount plate will attach. This blocking should be sized to match the mount's footprint, not just a single narrow board, so every mounting screw lands in solid wood.
- Check stud alignment against your mount's width. If the mount plate needs to span wider than one bay, you have three options: cross brace between two bays, extend a header to span the gap, or install an internal metal mounting plate rated for the TV's weight.
- Choose fasteners rated for the load. Lag bolts into blocking generally outperform drywall anchors alone, especially for TVs over 50 pounds mounted on full-motion arms that put repeated stress on the wall.
For larger TVs, particularly 65 inches and up, the blocking should run at minimum 1.5 inches thick, matching standard lumber dimensions, and span the full width of the mount's VESA pattern rather than just the center point. A mount that flexes under weight because it's anchored to drywall alone is a safety issue, not just a cosmetic one.
If you're recessing into a bay that already has plumbing or ductwork, don't force the issue. Reframing around an obstruction is far safer than notching a stud to make room, which can compromise the wall's structural integrity.
Powering a recessed TV safely and within code
Once the TV fits, you still need power inside that wall, and this is where code requirements actually matter. There are two widely used, legal approaches: install a listed in-wall power relocation kit that reroutes an existing outlet's power up into the recess, or run a new receptacle directly into the niche. Both require listed electrical products, and both often call for a licensed electrician, particularly if you're adding a circuit rather than relocating one.
Tamper-Resistant Receptacles (TRRs) matter here more than most DIYers expect. TRRs are required in new home construction and recommended during renovations, since they block foreign objects from being inserted into unused outlet slots. If your project touches existing wiring at all, this is a good moment to upgrade to TRRs rather than reinstalling older receptacles.
A few placement rules keep the job both safer and cleaner:
- Keep low-voltage lines (HDMI, speaker wire) separated from line-voltage power runs to avoid interference.
- Leave clearance around outlet boxes inside the recess so cables aren't crimped against the box edge.
- Plan for surge protection at the outlet level, especially for TVs that stay plugged in continuously.
- Check whether AFCI or GFCI protection applies to the circuit you're tapping, since requirements vary by room and local code.
You should hire an electrician, not attempt the work yourself, in a few specific situations: adding a new circuit rather than extending an existing one, any work that touches your home's main service equipment, or installing in-wall power where your local permit office requires inspection. Electrical work done late in a renovation, after drywall and trim are finished, causes expensive rework, so plan the outlet location before you cut the recess opening, not after. For a deeper look at planning outlet counts across a full media wall, see our guide on future-proofing outlet placement.
Keeping airflow and a flush finish without overheating your TV
TVs generate heat, and a recess that looks great but blocks ventilation will shorten the set's lifespan. Manufacturer guidance generally calls for leaving the TV's vented areas uncovered and avoiding a tight seal against insulation or backing material, since trapped heat has nowhere to go in a sealed cavity.
A few practical habits protect both airflow and appearance:
- Leave a small air gap behind the TV even in a flush mount, rather than letting the back panel touch the recess wall directly.
- Use shadow gaps or trim reveals around the recess edge to visually "hide" depth without sealing off the opening.
- Route cables through grommets or channels that don't compress against the TV's vents.
- Choose a backerboard material that won't trap moisture, since a sealed recess with no airflow can hold humidity against the wall.
Pro Tip: A magnetic or snap-on access cover at the bottom of the recess gives you service access later without redoing trim work.
Checklist and common mistakes from recessed TV installs
A consistent sequence prevents most problems: measure TV and mount thickness, choose your mount type, plan power and ventilation, install blocking, test-fit with a temporary backing or cardboard template, then finish drywall and trim.
The most common mistakes we see are a recess cut too shallow to fit breakout boxes once everything's installed, ventilation blocked by tight backing material, missing blocking behind heavy TVs, and drywall finished before anyone confirmed the TV actually fits. Pre-cut, pre-labeled media wall kits remove much of this guesswork since every panel is sized before it reaches your garage, which cuts down on the measurement errors that cause the most rework.
When to DIY your recess and when to call in help
A straightforward retrofit, using a low-profile mount with studs that line up where you need them, is a reasonable weekend project for an experienced homeowner with basic tools. I'd stop short of DIY, though, the moment new electrical circuits, service panel work, or framing changes beyond simple blocking enter the picture. That's not a confidence problem, it's a liability one.
If your TV is large, your wall has obstructions, or you'd rather skip the trial and error entirely, a white-glove installation service handles the framing, power, and finish work in one pass, which is worth considering for anyone who wants a guaranteed flush result without owning the mistakes along the way.
— Jake
Getting a flush recess right without the trial and error
We built our pre-cut, pre-labeled media wall kits specifically to remove the guesswork from projects like this. Every panel ships sized and labeled for its exact position, so you're not out in the garage recalculating a formula mid-install because a measurement was off by half an inch.

If you'd rather hand off the framing and electrical planning entirely, a white-glove installation service can cover the full build, from blocking to final trim, so the recess comes out flush on the first try. For homeowners who want a second set of eyes before buying anything, our design packages (Single Concept Design at $99, the 3 Concepts + Revision Design Package at $199, or a Full Design & Quote at $299) give you a concrete plan before a single stud gets cut. And if your project is more about precise drywall work than a full media wall, a local plaster and drywall specialist like Wendell Barco Plastering can handle the recess framing and finish while you source the mount and TV yourself.
Whichever path fits your project, you can browse finishes, fireplace integrations, and floating shelf options, or start with a kit built for your room, on our shop page.
FAQ
How deep does a TV niche need to be?
Most TV niches need several inches of depth to hide the mount, cables, and a small breakout box behind a flush screen. The exact number depends on your TV's thickness plus your mount's profile plus a clearance buffer, following the formula of TV thickness plus mount thickness plus a half-inch clearance.
How high off the floor should a 55 inch TV be?
A commonly used rule of thumb places the center of the screen around 40 inches from the floor, adjusted based on your typical seated eye level. This height guideline is separate from recess depth planning, since one addresses viewing comfort and the other addresses wall clearance.
Can you recess a TV into the wall?
Yes, recessing a TV into the wall is a common DIY and professional installation method, using either a low-profile flush mount or a dedicated recessed in-wall mounting box. The approach requires open access to the stud bay, solid blocking for support, and planning for power and ventilation before the wall is closed up.
What is the ideal depth for a TV unit?
The ideal depth depends on what the unit needs to hold: a flush mount alone may need as little as 2 to 3 inches, while a recess meant to hide a streaming box or soundbar typically needs extra clearance beyond that. Using the TV thickness plus mount thickness plus clearance formula gives you the precise minimum for your specific setup.
Sources
- Kanto - R600 Recessed In-Wall TV Mount for 65"- 90" TVs - Black
- How high to mount your TV on the wall
- Tamper-Resistant Receptacles (TRRs)
- Recessed Art Dimensions - Support - Frame My TV