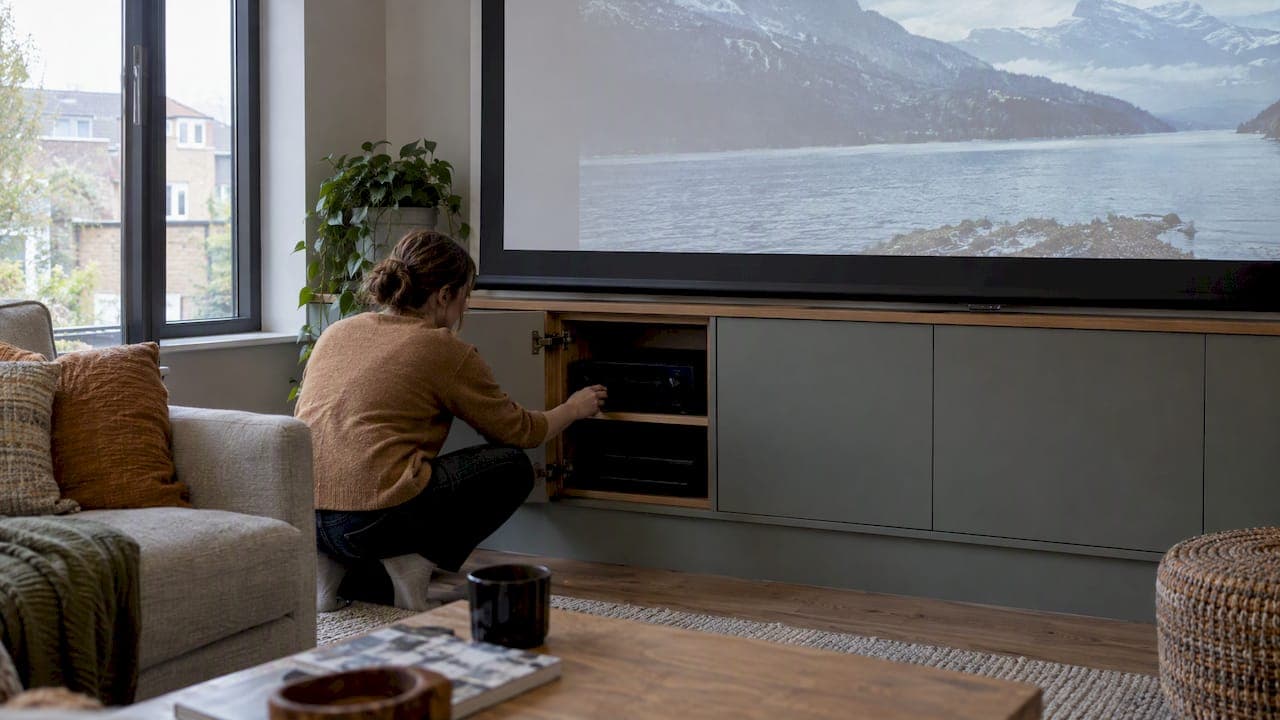
For most living rooms, a short-throw projector paired with an ALR screen gives you the best balance of image size, brightness, and concealment, while a UST unit works better in tight spaces where you cannot ceiling mount. Dedicated theaters usually do better with standard throw projectors and matte white screens. Before picking any model, measure your room's depth and expected throw distance first.
TL;DR:
- At 100 inches, UST needs under 2.5 feet; short throw needs 2.5 to 7, standard needs 7 to 14, and long throw needs at least 14.
- Use an ALR screen when windows, lamps, or daytime viewing add ambient light; reserve matte white for a theater where you can control every light source.
- Plan soffit depth around the roller, TV, and soundbar, and leave a service panel; anchor heavy hardware into studs or reinforced blocking.
- Speakers placed behind the screen need an acoustically transparent surface, extra enclosure depth, and acoustic backing because fiberglass can color the sound.
- A precut, labeled kit can suit a weekend DIY build after you confirm studs and wiring; hire a professional for electrical, structural, or HVAC conflicts.
Table of Contents
- Design ideas and real-world media wall examples worth copying
- Projector throw types and how to size one for your room
- Choosing the right screen surface and handling ambient light
- How to hide projectors, screens, and AV gear inside a media wall
- Framing, mounting, and a safety checklist before you build
- Short install case vignettes and what each teaches
- Acoustic considerations and sound integration within media walls
- Maintenance and care tips for projector media wall components
- Step-by-step overview of installing a DIY media wall kit
- Author's practical view and a prioritized next-step checklist
- How The Media Wall Store kits speed up your projector media wall project
- FAQ
- Sources
Design ideas and real-world media wall examples worth copying
The strongest projector media walls hide the gear and let the wall itself do the design work. A few templates come up again and again, each with its own trade-offs.
- Flush projection wall: a recessed motorized screen disappears into a soffit or ceiling pocket, leaving a clean plaster or paneled surface when not in use.
- TV and projector combo: a drop-down screen lowers in front of a wall-mounted television for bigger movie nights, then retracts so the TV handles daily viewing.
- Slat or acoustic panel wall: vertical slats with integrated LED strips and hidden speaker cutouts add texture while masking cable runs and enclosure boxes.
- Credenza-mounted UST setup: an ultra-short throw projector sits low on a console, throwing upward onto a screen just above it, which suits smaller rooms without ceiling access.
Each approach creates its own constraints. A flush wall needs soffit depth. A TV combo needs clearance for the TV's depth plus the roller mechanism. A slat wall needs planned gaps for sound and wiring. For more layouts, see this home theater wall ideas collection.
Projector throw types and how to size one for your room
Throw distance determines where your projector can physically sit relative to the screen, and it is the first filter for any media wall plan. For a 100 inch image, ultra-short throw units typically work from under 2.5 feet, short throw models need roughly 2.5 to 7 feet, standard throw needs 7 to 14 feet, and long throw requires 14 feet or more.
Throw ratio does the math for you: multiply your target image width by the projector's throw ratio to get the lens-to-screen distance, so a 0.4 throw ratio on a 100 inch wide image needs about 40 inches of clearance.
- Apartments and condos: UST projectors avoid ceiling mounts and long cable runs, which suits rentals and smaller footprints.
- Living rooms: short throw projectors rated at 3,000+ ANSI lumens paired with an ALR screen handle ambient light while filling a large wall.
- Dedicated theaters: standard throw projectors generally offer the best price-to-performance when you control the room's light and can mount farther back.
A 100 inch image needs under 2.5 feet of throw distance for UST units, which is why they fit rooms where a ceiling mount or long wire run isn't practical, according to ProjVue's throw distance guide.
Choosing the right screen surface and handling ambient light
Screen choice matters as much as the projector itself, and the deciding factor is almost always how much light enters the room. ALR (ambient light rejecting) screens are the right call for multi-purpose living rooms because they reject off-axis light and preserve contrast even with lamps or daylight present. Matte white screens still win in a dark, dedicated theater where you control every light source.
- Gain describes how much a screen reflects light back toward viewers: higher gain brightens the center seat but narrows the usable viewing cone, while lower gain spreads brightness more evenly across a wide seating area.
- Acoustically transparent screens let sound pass through from speakers mounted directly behind them, which keeps the front soundstage centered on the picture instead of pushed to the room's sides.
Manufacturer contrast ratios are measured in lab conditions, and actual perceived contrast in a home depends far more on how well you control room light than on the number printed on the box.
How to hide projectors, screens, and AV gear inside a media wall
Concealment is the detail that separates a finished-looking media wall from a visible tangle of hardware. A few principles keep the gear invisible without sacrificing serviceability.
- Build in clearance first. A motorized drop screen housed in a soffit needs room for the full roller mechanism plus enough depth to clear a wall-mounted TV and soundbar if both share the wall.
- Use cabinetry or hidden doors for receivers, streaming boxes, and UST projectors, placing the projector on a low credenza so its upward throw angle stays correct.
- Plan wire management early, running conduit or in-wall power so cables never cross an open wall face, and leaving at least one access panel for servicing the roller motor or screen cassette.
A soffit or custom ceiling cavity is often the only way to fully hide a roller mechanism, and skipping that access panel turns a five-minute repair into a demolition project.
Pro Tip: Build your access panel behind a removable cabinet face rather than a painted ceiling patch, since you'll likely need it again within a few years.
For hardware choices and hidden-mount techniques, our media wall mount guide covers the options in more depth.
Framing, mounting, and a safety checklist before you build
Heavy mounts, motorized screens, and recessed soffits all depend on sound framing, not just a good-looking panel. Structural anchoring is the one step that cannot be skipped or improvised.
- Anchor into studs. Standard framing runs on 16 inch centers, and any wall-mounted TV bracket, screen housing, or cabinetry needs to tie into those studs or reinforced blocking rather than drywall alone.
- Size soffits for the mechanism. Roller screens and motorized housings need specific depth and width clearances; check your screen manufacturer's spec sheet before framing the cavity.
- Call a professional for electrical, load-bearing, or HVAC conflicts. Running new circuits, moving a header, or working around ductwork and fire-rated assemblies is outside typical DIY scope.
Our open concept TV wall guide covers sightline planning for open-plan spaces that share a media wall with a kitchen or dining area.
Short install case vignettes and what each teaches
Three real-world scenarios illustrate how the decisions above play out.
- Small living room, UST plus credenza: a narrow room with no ceiling access called for a UST projector on a low console, throwing onto a fixed ALR screen mounted flush to the wall. No cable runs, no soffit, just a console and a screen.
- Short throw with ALR in a shared living space: a family room doubling as a daytime play space used a short-throw projector with 3,000+ lumens and an ALR screen, keeping the image watchable with blinds open during the day.
- Weekend DIY kit install: a homeowner using a pre-cut, pre-labeled kit from The Media Wall Store assembled a slat-paneled media wall with integrated lighting and hidden wire channels over a single weekend, without hiring a contractor.
Each case started with the same question: how much throw distance and ceiling access does this room actually have.
Acoustic considerations and sound integration within media walls
Sound quality often gets less attention than picture quality in a media wall build, but the two are tied together once speakers share wall space with a screen. Front speakers placed directly behind an acoustically transparent screen keep dialogue centered on the picture instead of pulled off to the sides, which matters more in a wide room than a narrow one.
When speakers sit behind the screen, leave extra depth for the enclosures and use purpose-built acoustic backing material rather than standard fiberglass insulation, since fiberglass can color the sound. Slat panel walls create a natural spot for this kind of hidden speaker placement, since the gaps between slats pass sound while the panel face conceals the driver.

For a wall that doesn't use an acoustically transparent screen, side and height channels can mount within slat panels or behind fabric-wrapped sections elsewhere on the wall, keeping the front screen area clear. Soundbars mounted below a drop-down screen need enough clearance so the screen doesn't bump the bar on its way down, a detail worth checking before you finalize soffit depth. Our acoustic treatment behind a TV guide covers clearance and backing choices if you're placing audio gear directly behind a screen or panel.
A well-planned media wall treats speaker placement as part of the layout from the start, not an afterthought squeezed in after the screen and projector are already mounted.
Maintenance and care tips for projector media wall components
A projector media wall holds up well over time with a short list of routine checks. Dust is the main enemy of both image quality and projector longevity, since it settles on lenses and clogs intake filters.
Wipe the screen surface with a microfiber cloth and avoid household glass cleaners, which can degrade ALR coatings over time. Check the projector's air filter every few months and clean or replace it according to the manufacturer's schedule, since a clogged filter raises internal temperatures and shortens lamp or LED life.
Motorized drop screens benefit from an occasional manual cycle test, watching for any hesitation or noise in the roller mechanism that might signal a developing issue. Keep the access panel behind your soffit or cabinetry clear of stored items so you can reach the motor or cassette without disassembling trim. For any wired connections, confirm that in-wall conduit runs are intact if you ever renovate nearby, since a damaged cable run is harder to trace once walls are closed back up.
A quick seasonal check, screen surface, filter, and roller mechanism, takes a few minutes and avoids most of the common failure points in a projector-based media wall.
Step-by-step overview of installing a DIY media wall kit
A pre-cut, pre-labeled kit follows a predictable sequence that most homeowners can complete in a weekend.
First, confirm wall dimensions against the kit's sizing before anything is unboxed, since panel layout depends on matching the kit to your actual wall width and height. Second, mark stud locations and verify anchor points, since any kit designed for heavy panels or integrated lighting still needs secure framing underneath. Third, lay out pre-labeled panels on the floor in order, which is where labeling saves the most time compared to a fully custom build. Fourth, mount the frame or base structure first, following the kit's sequence rather than improvising an order. Fifth, run wiring for LED lighting or AV components through the built-in channels before closing up any panel faces. Sixth, attach finish panels and trim, checking alignment as you go rather than at the end. Finally, install any add-ons, floating shelves, a fireplace insert, or hardware finishes, once the main structure is secure.

The how it works page walks through what's included in each kit and how design support fits into the process for anyone ordering online.
Author's practical view and a prioritized next-step checklist
The most common mistake I see is sizing the screen to the wall instead of the seating. A screen that looks proportional on an empty wall often turns out too large once furniture and sightlines are accounted for, and the second most common mistake is forgetting that a roller screen needs real clearance behind the fascia, not just in front of it. Both are easy to catch early and expensive to fix later.
- Mock up the screen size with painter's tape and live with it for a day.
- Measure your actual throw distance, not an estimate.
- Pick ALR or matte based on your room's light, not your budget.
- Plan concealment (soffit, cabinetry, or credenza) before buying anything.
- Pre-wire conduit and power while the wall is still open.
- Decide between a DIY kit and a professional install based on your timeline.
— Jake
How The Media Wall Store kits speed up your projector media wall project
We build pre-cut, pre-labeled media wall kits specifically so you can skip the contractor timeline and still end up with a finished look. Panels arrive ready to assemble, with integrated LED lighting and hidden wire channels already planned into the design, which can shorten installation time compared to custom building.

We back every order with expert support if you run into a question mid-install. If your wall will share space with motorized shades or blackout curtains for light control, a partner guide on automated curtain options is worth a look before you finalize your plan.
- Browse Media Wall Kits and design packages to see finishes and layouts.
- Request a Full Design & Quote for a custom plan built around your room.
- Review White-Glove Installation if you'd rather have our team handle the build.
FAQ
What throw distance do I need for a 100 inch screen?
It depends on the projector class: UST units need under 2.5 feet, short throw needs 2.5 to 7 feet, standard throw needs 7 to 14 feet, and long throw needs 14 feet or more. Measure your actual room before choosing a model.
Should I choose an ALR or matte white screen?
Choose ALR if your room has windows, lamps, or daytime use, since ALR screens reject ambient light and preserve contrast better than matte white in those conditions. Choose matte white only in a fully darkened, dedicated theater room.
Are ultra-short throw projectors worth the trade-offs?
UST projectors avoid ceiling mounts and long cable runs, making them a strong fit for small rooms or rentals, but they perform best on a smooth, even screen surface and are more sensitive to ambient light. For larger or brighter rooms, a short throw projector with an ALR screen is usually a better balance.
Does a media wall need special wall framing?
Yes, any heavy mount, soffit, or motorized screen housing needs to anchor into studs or reinforced blocking rather than drywall alone, and standard framing runs on 16 inch centers. Confirm stud locations before finalizing cabinetry or soffit placement.
Can I install a projector media wall kit myself?
A pre-cut, pre-labeled kit is designed for a weekend DIY install once you've confirmed stud locations and planned your wiring in advance. If your project involves electrical work, load-bearing changes, or ductwork conflicts, bring in a professional for that portion before completing the rest yourself.
Sources
- Projector Throw Distance Guide: Short vs Long Throw (2026)
- Epson projector guide: throw distance and positioning
- Projector contrast ratios explained