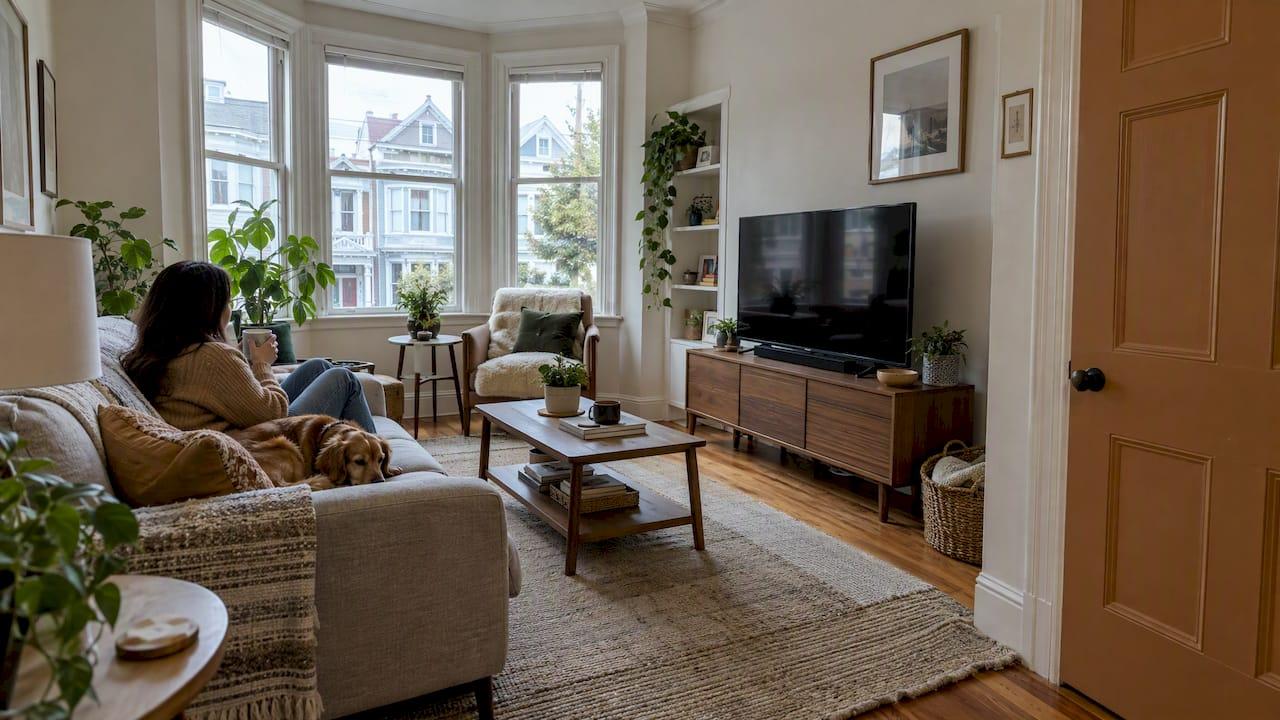
A good San Francisco living room makeover starts with the room you actually have: a bay-windowed Victorian flat, an Edwardian with cove ceilings, or a condo with one usable wall. Measure first, fix the layout and lighting before you buy anything, check whether your plans need a permit, and put your budget into one focal wall that does the most work. This guide walks through each step, with the San Francisco specifics that generic decor articles skip.
TL;DR
- Measure the room and tape out furniture footprints before you order; layout mistakes cost more than any paint color.
- Small rooms feel bigger with light colors, mirrors, vertical storage and several light sources, not one overhead fixture.
- In an older home, keep the original details (cove ceilings, stained glass, hardware) and build the new elements around them. Permits are required for most structural, window and electrical work.
- Secure the TV and tall furniture, because this is earthquake country.
- A pre-cut media wall kit gives you a custom-looking focal wall in a weekend, without a contractor.
Table of Contents
- Start with the room, not the shopping list
- Fix the layout before you buy anything
- Make a small living room feel bigger
- Quick DIY upgrades that personalize the room
- Refreshing a Victorian, Edwardian or other historic living room
- Permits, costs and what stays DIY
- Make the TV wall safe, because this is earthquake country
- Our perspective on makeovers that last
- Build the focal wall with a kit
- A weekend plan
- FAQ
- Sources
Start with the room, not the shopping list
San Francisco living rooms vary more than most cities' do. A designer blending original fixtures with contemporary pieces in a 100-year-old San Francisco home kept the old Cremone bolts and staircase railings and chose modern elements in a similar color palette. That is the pattern worth copying: let the architecture set the palette, then add the new pieces in quiet contrast.
Before you pick anything, answer four questions:
- What is the room for? Movie nights, remote work, a toddler's play area, hosting? Most SF living rooms do three jobs at once.
- Where does the eye land first? Every room needs one focal point. In a modern condo it is usually the TV wall. In a Victorian it may be a bay window or fireplace.
- What cannot change? Rental-style limits apply to condos with HOA rules too: shared walls, restricted drilling, noise rules for contractors.
- What is the budget ceiling? Decide this before you fall in love with a $4,000 sofa.
Fix the layout before you buy anything
Layout is where makeovers succeed or fail. Architectural Digest's advice is to measure the room, draft a floor plan and use painter's tape to mark each furniture footprint before buying. It shows you when a piece technically fits but overwhelms the room. Do this over a weekend with blue tape and a tape measure, and live with the outlines for a few days.

Clearances that work
Better Homes & Gardens suggests 30 inches between furniture that people walk around and 14 to 18 inches between a sofa and coffee table. Its 2026 layout guidance adds that circulation paths should generally have 2.5 to 3 feet of clearance, and that oversized furniture overwhelms small rooms while undersized pieces look lost in large ones.
In practice, for a typical 12 by 14 foot San Francisco living room:
- Keep a 30-inch lane from the front door to the main seat.
- Leave about 18 inches between the sofa and coffee table for knees and cups.
- Choose a sofa by depth as well as width. A deep sofa eats floor space faster than a long one.
- Let a rug anchor the group. Designers quoted by Better Homes & Gardens suggest the front legs of the main seating sit on the rug to define a conversation zone.
Rectangular and square rooms
Long, narrow rooms, common in flats, do well with two zones: a seating group at one end and a reading or desk nook at the other. Pottery Barn's layout ideas for rectangular rooms include symmetrical seating, zones divided by rugs or furniture, or open pathways, and for square rooms circular seating or a corner-focused sectional. Pushing everything against the walls is the habit to avoid.
The crystal and stone accents in this guide to crystal decor for living room updates also pair well with clear entry paths and defined seating zones, since small objects add personality without taking floor area.
Make a small living room feel bigger
A lot of the city's homes are compact. KQED's guide to living large in a small San Francisco space points to multifunctional furniture, vertical storage, mirrors, edited belongings and light colors as the reliable moves. They are old tricks because they work.
Some specifics to apply:
- Go vertical. Floor-to-ceiling shelving or a wall-mounted console frees the floor. Floating cabinetry is especially useful because you can see the floor underneath.
- Use mirrors opposite windows, not opposite clutter.
- Choose lighter materials and pedestal bases. A small-space condo project in San Francisco used a round pedestal-base table and a light ash finish to keep an extra-small room feeling open.
- Edit. Take out one-third of what is on the shelves, then add back only what you love.
Light the room in layers
Designer Maxwell Gillingham-Ryan told KQED that light makes a space feel expansive and recommended three points of light in every room. San Francisco's gray, foggy mornings make this more than a style tip. A practical combination: one ambient source (ceiling or wall), one task lamp by the seating, and one accent, such as LED strips behind a TV wall or inside shelves. Our media wall lighting options cover the accent layer.
Quick DIY upgrades that personalize the room
You do not need a remodel to change how a living room feels. These upgrades are low-risk, mostly reversible, and sensible for owners and for condo boards that dislike surprises.
- Paint one wall deliberately. A deep green, warm clay or charcoal behind the sofa or TV adds depth. See our guide to accent wall paint ideas for living room media walls for pairing paint with a TV wall.
- Swap hardware and fixtures. New cabinet pulls, switch plates and a statement pendant refresh a room in an afternoon. Brass, chrome and matte black each read differently, and our hardware finishes show how.
- Add texture. Wool throws, linen curtains hung high and wide, and a larger rug make a room feel finished.
- Layer in scent and warmth. A few cozy home essentials such as candles and soft textiles help a room feel lived in, and they cost little.
- Build a slat wall. Vertical wood slats add warmth and soften sound in rooms with hard floors and tall windows. A single acoustic slat wall panel in red walnut can be the starting point.
- Rethink the TV wall. Our 10 stylish upgrades for a TV wall cover everything from picture lights to shelving, and the accent wall living room ideas go further on materials.
Refreshing a Victorian, Edwardian or other historic living room
San Francisco's older homes carry the best raw material: tall ceilings, bay windows, plaster moldings. A refresh should show them off. Designer Caryn Sloan, who has restored historic buildings, describes the goal as making the building current while letting its history show, rather than freezing it in amber. In her Edwardian project, the original cove ceilings and stained-glass windows were kept, and the living room bookcases were reworked around them to display family treasures.
A few rules for an older home:
- Keep the good bones. The Nob Hill Gazette's panel of local experts points to high ceilings and original architectural details as worth preserving.
- Don't remove original features without checking. One local design firm lists common pitfalls in historic remodels: replacing original features without approval, skipping permits for façade changes, and assuming nothing is protected.
- Make new elements read as new. A modern floating media console against plaster walls looks intentional. A fake period reproduction rarely does.
- Protect what you keep. If a project involves stripping paint, opening walls or old moisture issues, bring in a licensed restoration professional first. Hidden water or mold damage is easier to deal with before new finishes go on. Our contractor-minded readers sometimes read how a restoration company documents customer results before hiring for that stage.
A media wall can fit an older room when it is freestanding, mounted to the wall without disturbing trim, or placed on a wall with no original detail. Choose the wall without the window casings or the plaster medallion.
Permits, costs and what stays DIY
Cosmetic work needs no permit: paint, furniture, lighting you plug in, shelves hung on a wall. Structural changes are different. The Nob Hill Gazette's local expert roundup notes that permits are required for most structural changes, window replacements, exterior alterations, and electrical or plumbing work. If you are moving outlets, adding circuits or relocating a gas line for a fireplace, check with the city's building department before you start.
If you do pull a permit, budget for it. One industry estimate puts San Francisco permit fees at roughly 6% to 9% of construction costs when all fees are included, and typical fees for a remodel valued between $50,000 and $150,000 at $3,000 to $12,000. Those figures apply to larger remodels, not to a weekend of painting and shelving.
Historic properties can add steps. The same source says a Historic Resource Evaluation can take months and cost $5,000 to $25,000 or more. That matters if your project touches the exterior or a protected feature, not for rearranging a living room.
A useful legal point for single-family owners: in Martin v. City of San Francisco, the California Court of Appeal ruled in 2005 that the city cannot require CEQA review for interior renovations of a single-family home that are not visible to the public. That does not exempt you from building permits. Check your project with the city or a licensed architect.
For a sense of scale, a full historic restoration is a different category of spending: one local design firm estimates a basic refresh of preserved features at $50,000 to $120,000, and an estate-scale rebuild far above that. A living room makeover built on furniture, lighting and a focal wall sits well below it.
Where the savings are: labor. A custom-built media wall from a contractor takes design time, carpentry, finishing and scheduling. Our breakdown of San Francisco media wall costs shows the ranges and when a kit saves money.

Make the TV wall safe, because this is earthquake country
A makeover that puts a heavy TV on a floating console should plan for shaking. Earthquake Country Alliance guidance says a TV can tip or fall in an earthquake and recommends either strapping it to furniture or securing it with a wall mounting kit. For tall furniture it advises securing to studs with a stud finder.
What that means for a media wall:
- Mount the TV to studs or proper blocking, following the mount maker's instructions.
- Anchor tall cabinets and display towers to the wall.
- Keep heavy objects off high open shelves, or use museum putty and lips on shelf edges.
- If you are unsure about the wall behind your TV, such as old plaster or lath, hire a professional for that step.
We wrote a separate guide for when SF condo owners should buy a kit or hire a pro so a TV stays on the wall.
Our perspective on makeovers that last
We see the same pattern in San Francisco homes. People buy furniture first, then discover the room has no focal point, no layered lighting and a TV floating on a blank wall with cables running down it. The fix is rarely more things. It is one well-planned wall.
That is why we build kits the way we do. Pre-cut, pre-labeled panels mean you are assembling rather than measuring and cutting. Hidden wire management means the cords disappear. Integrated LED lighting handles one of your three light points. Modular pieces mean you can start with a floating console and slat wall and add shelves or a fireplace later. And you do not need a contractor, which in a condo with strict work hours is a real advantage.
But a kit is not right for every room. If your wall needs electrical work, a gas line or structural changes, hire licensed trades for that part and use our design service to plan the rest. We would rather you do that than force a kit onto a wall that does not suit it.
— Jake
Build the focal wall with a kit
If the living room needs a single big upgrade, this is it. The Monaco Luxury Media Wall Kit combines a floating console, slat wall and display tower, and fits the layered look described above. Our kits include pre-cut, pre-labeled panels meant to be installed over a weekend, with expert support and risk-free returns. You can see the full process on How It Works.

Not sure which wall or style fits your room? Our design services start at $99 for a single concept, $199 for three concepts with a revision, and $299 for a full design and quote, all on the shop page. In the San Francisco Bay Area we also offer white-glove installation if you would rather have us do the work. For a fireplace, shelves or smart controls, see the accessories collection, including electric fireplaces for media walls and smart tech.
A weekend plan
Here is a sequence that works for most living rooms:
- Friday evening: Measure the room, tape out furniture and the walking path, and decide on the focal wall.
- Saturday morning: Declutter, paint if needed and remove old wall fixtures. Find the studs.
- Saturday afternoon: Install the media wall kit or shelving, run cables and mount the TV.
- Sunday: Add the rug, lighting layers and textiles, then style shelves with a few objects, not many.
If you want a framed-TV look, our guide to framed TV wall ideas covers options from small fixes to full DIY kits, and the Nationwide Maintenance Blog has more project guides.
FAQ
Do I need a permit for a living room makeover in San Francisco?
Not for painting, furniture, plug-in lighting or shelves hung on a wall. Permits are generally needed for structural changes, window replacements, exterior alterations, and electrical or plumbing work, according to local design experts. Check with the city's building department for your project.
How do I make a small San Francisco living room look bigger?
Use light colors, mirrors, vertical storage and multifunctional furniture, and edit your belongings. Add layered light, since light makes a space feel expansive. Floating cabinetry also keeps the floor visible.
How much space should I leave between furniture?
About 30 inches for walkways and 14 to 18 inches between a sofa and coffee table, per Better Homes & Gardens. Tape the outlines on the floor first to test it.
Can I install a media wall myself in a condo?
Often yes, with a pre-cut kit and a weekend. Check your HOA rules on drilling and noise, and locate the studs before mounting the TV. Wiring changes or gas fireplaces need licensed professionals.
What is the best focal point for a living room?
It depends on the room: a bay window, an original fireplace or, in many modern condos, the TV wall. Pick the strongest feature and arrange the seating to face it. If the TV wall is the focus, make it a designed element rather than a black rectangle on blank paint.
Sources
- Designer Anu Jain's San Francisco home, Architectural Digest India
- How to Live Big in a Small Space in San Francisco, KQED
- Pattern and Room Layout Tips to Prevent Mistakes, Architectural Digest
- 26 Expert Tips to Help You Arrange Furniture in Every Room, Better Homes & Gardens
- 7 Layout Mistakes Sabotaging Your Living Room, Better Homes & Gardens
- Designers Share 6 Smart Ways to Arrange Your Furniture, Better Homes & Gardens
- Living Room Furniture Layout Ideas, Pottery Barn
- Furnishing A Small Space Condo In San Francisco, Room & Board
- Caryn Sloan Updates A Charming San Francisco Edwardian, Luxe Source
- The Experts Weigh in on How to Renovate in San Francisco, Nob Hill Gazette
- San Francisco Historic Preservation Design Standards for Home Remodels
- San Francisco, CA Building Permits, PermitPlace
- Martin v. City of San Francisco, California Court of Appeal (2005)
- Televisions, Computers, and other Electronics, Earthquake Country Alliance