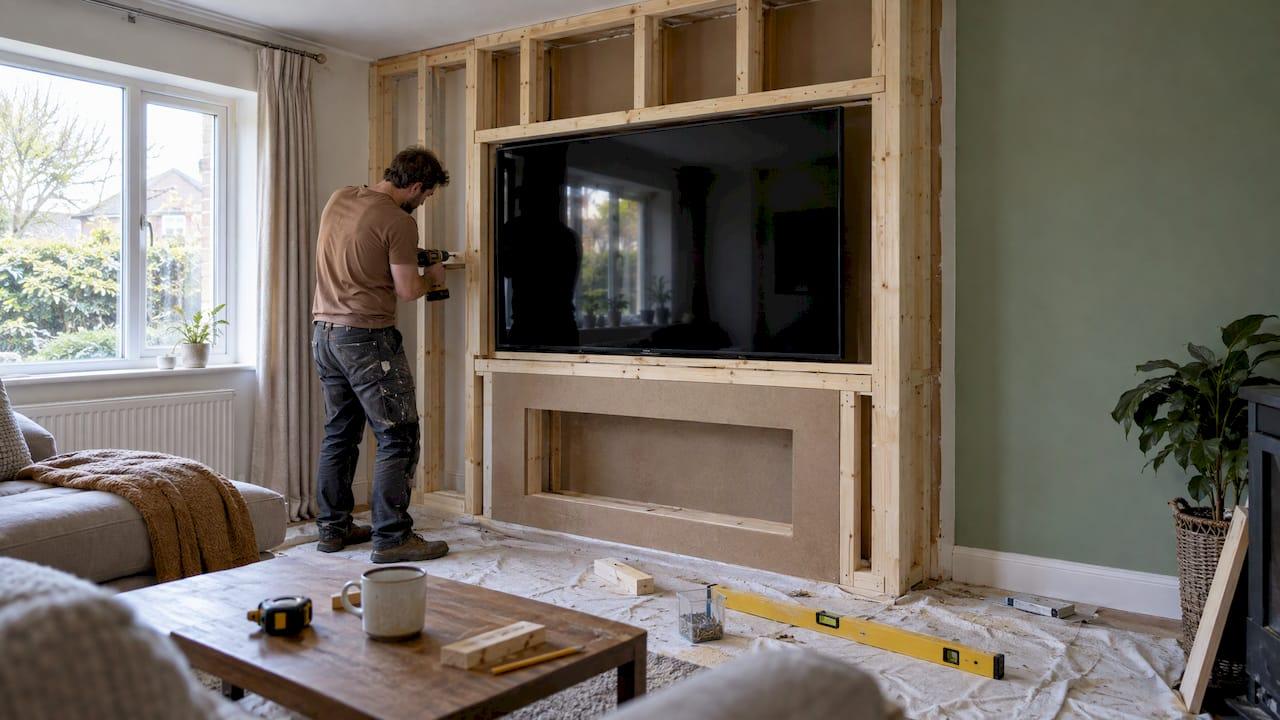
You can finish a media wall in a weekend if you decide everything before Saturday morning. That means the TV size, the wall depth, the fireplace (or no fireplace), the cable route and the finish. The build itself is the easy part. The weekend is won or lost in the planning and in how much of the wall arrives pre-cut.
This guide walks through the plan we would hand a friend: how to size the wall, what it costs, what to buy, a day-by-day schedule, and the electrical and heat checks that keep it safe.
TL;DR
- A weekend media wall works when the design is locked in before you start. Measure, sketch and choose your TV, fireplace and shelves first.
- Budget builds range from about $100 for paint and cable covers up to several thousand dollars with framing, a fireplace and slat paneling. Finish material is the biggest swing.
- Put blocking behind the TV mount, give electronics ventilation, and keep anything that can burn well clear of a fireplace.
- Pre-cut, pre-labeled panels remove the saw work, which is where most weekend plans slip.
- Schedule a Friday evening prep, Saturday for structure and wiring, Sunday for finish and install.
Table of Contents
- What a weekend media wall project really involves
- Plan the wall before you buy anything
- What a DIY media wall costs
- Tools and materials checklist
- The weekend schedule
- Make it look polished, not homemade
- Safety checks before you close the wall
- Our perspective
- Get a kit or a design for your weekend
- FAQ
- Sources
What a weekend media wall project really involves
A media wall is a feature wall built around the TV. Depending on your plan, it can be as simple as paint plus floating shelves, or as involved as a framed wall with a recessed fireplace, lighting and hidden cabling.
The scope decides whether a weekend is realistic. One guide to a weekend build recommends starting by choosing exactly what the wall needs to do: where the TV goes, whether there is an electric fireplace, and which shelves or soundbar you want. Then you sketch and measure so you do not mis-size the framing and openings.
Here is how scope maps to time for a first-timer:
| Scope | Typical weekend fit | What takes the time |
|---|---|---|
| Paint, trim and floating shelves | Easy, often one day | Paint drying, leveling shelves |
| Slat or panel accent wall with LED and a cable channel | Realistic with pre-cut parts | Fastening panels, wiring lights |
| Framed wall with electric fireplace and drywall | Tight, plan for Friday prep | Taping, compound, sanding, drying |
| Floor-to-ceiling built-in with custom cabinets | More than a weekend | Carpentry, electrical, finishing |
The drywall route is where weekends disappear. Joint compound needs drying time between coats, so if your plan includes taping and mudding, start Friday evening or choose a panel system that skips it.
Plan the wall before you buy anything
Size the wall to the TV and the room
Start with the screen. A cost and layout guide from Build-Construct notes that a 65-inch TV needs roughly 8 to 10 feet of viewing distance, and a 75-inch screen 9 to 12 feet. It also suggests marking the screen center at seated eye level, typically 40 to 42 inches from the floor.
If your room is small, that distance rule helps you choose a screen as much as a layout. A flush, shallow design keeps the footprint down and leaves walking space.
Decide the depth
Wall depth depends on what goes inside it. A basic structure of 2×4 framing with 1/2-inch drywall suits a flat wall. If you want niches or a cable chase, the same weekend guide suggests planning extra depth, such as 2×6 framing. Check the fireplace insert's depth and clearance requirements in its manual before you cut anything.
Draw it full size
Tape the outline on the wall with painter's tape: TV, shelves, fireplace opening, outlets. Stand back, sit on the couch, and adjust. It takes 20 minutes and prevents the most expensive mistake, which is building to a drawing that looked right on paper.
If you want a second opinion before you commit, we offer design help: a Single Concept Design is $99, a 3 Concepts + Revision Design Package is $199, and a Full Design & Quote is $299, all one-off. You can see them on our shop page.
What a DIY media wall costs
Published budgets vary a lot because "media wall" covers everything from a paint job to millwork. Treat the figures below as ranges from different guides, not a quote.
- Simplest version: OSMOZ puts a simple DIY wall at about $100 to $300 if you use existing furniture, paint and basic cable covers. Framing, electrical work and custom cabinet fronts raise the cost quickly.
- MDF trim accent wall: one tutorial lands at roughly $150 excluding tools: $50 for MDF trim, $30 for paint and supplies, $20 for adhesive and caulk. A brad nailer is about $70 and a miter saw $100 or more.
- Framed wall build: a cost guide from a home builder estimates an 8 to 10 foot wall at $740 to $1,530 for a budget build and $1,430 to $2,570 mid-range. That includes framing lumber ($150 to $400), drywall and finishing supplies ($150 to $400), electrical parts ($50 to $150) and an electric fireplace ($300 to $1,200) if you add one.
- Weekend fireplace build: another weekend plan estimates $600 to $2,500, with a 50 to 60 inch electric insert at $300 to $900.
The finish is the big swing
A budget guide from Brandi Homes lists shiplap at about $2 to $7 per square foot, stone about $5 to $15, and wood slat paneling around $18 to $25. On a 10 by 8 foot wall that is the difference between a few hundred dollars and a couple of thousand. The same guide puts LED strip lighting, in a cove, behind shelves or around the TV, at about $300 to $1,500, with dimmers and zones adding to the total.

For comparison, the same guide's figures for professionally built walls run $2,500 to $4,500 for a basic TV feature wall and $4,500 to $9,000 with an electric fireplace. That gap is why a kit approach appeals: you get the designed look without paying for custom labor. For our own breakdown, see what a media wall kit really costs.
Where to spend and where to save
OSMOZ advises spending first on safe mounting, a clean cable route and storage, and treating paint as the low-risk experiment. That order makes sense: you can repaint in an afternoon, but you cannot easily reroute cables buried behind a finished wall.
If your wall already has dings or old anchor holes, factor in prep. This drywall repair cost breakdown shows what homeowners typically pay, which helps you decide whether to patch it yourself or hand that one job off before you build over it.
Tools and materials checklist
The list depends on your design. For a framed build, a weekend guide lists 2×4 studs, drywall or cement board, screws, electrical boxes, low-voltage wall plates and conduit. Tools include a stud finder, level, miter saw, drill/driver, oscillating tool, drywall tools and a sander.

For a cabinet-and-shelf style wall, Lowe's lists a circular saw with straightedge, miter saw or handsaw with miter box, cordless drill, jigsaw, random-orbit sander, wood glue, putty knife, hollow-wall anchors and a caulk gun. Materials there include 3/4-inch MDF and pine, #8 wood screws, shelf brackets, wood filler, construction adhesive, latex caulk, primer and paint.
A short version for a panel-based wall:
- Stud finder and 4-foot level
- Drill/driver and bits
- Tape measure and painter's tape
- Construction adhesive and caulk gun
- Cable channel or low-voltage wall plate
- TV mount rated above your TV's weight, plus blocking lumber if you are framing
- Safety glasses and dust mask
Pre-cut, pre-labeled panels shift work off your saw. Our kits are designed that way, so cutting is mostly done before the box arrives. That is the main reason we say a weekend is realistic.
The weekend schedule
Friday evening: prep (1 to 2 hours)
- Clear the wall and move furniture.
- Tape the full-size outline and confirm TV center height. Seated eye level is typically 40 to 42 inches, per the Build-Construct layout guide.
- Locate studs and mark them.
- Lay out every part and check the count against the packing list.
- If you are painting a dark recessed zone, paint it tonight so it cures overnight.
Saturday: structure, power and cables
The weekend plan from MegDecor runs in this order: sketch the layout, gather materials, frame with blocking, run power and cables, close the wall with drywall or panels, then install the fireplace and TV.
- Frame or fix the backing. Where the TV mounts, install solid blocking. The Stewart Milne guide stresses that mount bolts should go into backing capable of holding the weight rather than drywall alone.
- Run low-voltage and power. Keep power and low-voltage cables separate, use proper boxes and wall plates, and have an electrician handle any new circuit or in-wall power work. Check local code before you open walls.
- Close the wall. Fasten panels or drywall. With a panel system, this is a few hours. With drywall, apply the first tape and compound coat and stop.
Sunday: finish and install
- Finish. For drywall, the same builder guide advises paper tape and multiple thin coats of joint compound rather than one thick coat, and an angled flashlight across the wall to spot ridges. Sand, prime and paint.
- Add shelves, lighting and trim. Level shelves with a long level, then add LED strips or sconces.
- Install the fireplace and TV. Follow the manufacturer's clearances. Mount the TV last, once the paint is dry.
- Tidy cables and test everything before you move furniture back.
If you want only a floating console rather than a whole wall, a build guide says a beginner can do it in 6 to 12 hours over a weekend, with materials in the $70 to $150 range.
Make it look polished, not homemade
The difference between a project and a feature comes down to a few choices.
- Slats over a cable channel. Wood slats fixed to a backing with a channel behind them hide the wiring and add texture. A budget ideas guide recommends slats, shiplap or a floating-shelf surround for a polished look.
- Intentional asymmetry. The same guide notes that offsetting shelves on one side makes the wall feel designed rather than assembled.
- A dark recess. OSMOZ suggests a dark paint in a recessed zone so the screen disappears at night.
- Lighting in layers. LED behind shelves or around the TV gives the high-end glow most people notice first.
- Matching hardware. Brass, chrome or matte black pulls and brackets should repeat across the wall.
Our acoustic slat wall panel in Red Walnut is one way to get the slat look without cutting dozens of strips, and our hardware finishes come in brass, chrome and matte black.
Safety checks before you close the wall
This is the part not to rush, because once panels are on, the wiring is behind them.
- Outlets and power strips. U.S. Fire Administration guidance says to never overload outlets, insert plugs fully, and replace wall outlets if plugs do not fit snugly. Avoid cords where they can be pinched.
- Cords. The CPSC home electrical checklist says damaged or frayed cords should be replaced and cords should not be wrapped tightly around objects, since that can heat and melt insulation.
- Ventilation. The same checklist advises giving equipment space to breathe and not enclosing AV electronics in a cabinet without proper openings. If you are building storage into the wall, see our guide to media wall storage that does not trap heat.
- Warning signs. The CPSC wiring hazards guide lists sparks, unusual sounds, overheating parts and burned odors as signs to stop and have the wiring checked by a licensed electrician.
- Fireplaces. Fire-safety guidance says to keep anything that can burn at least 3 feet from fireplaces. That card is written for wood-burning units. For an electric insert, follow the manufacturer's clearances above and beside the unit, especially when a TV sits over it. Our recessed electric fireplace safety rules cover this in more detail.
If any step involves new circuits or hardwired fixtures, hire a licensed electrician for that part.
Our perspective
Most weekend media wall projects fail for one reason: the plan was a feeling, not a drawing. People start with a TV and an Instagram photo, then discover on Saturday afternoon that the stud spacing, the fireplace depth and the cable route do not agree.
We built our kits around that problem. Pre-cut, pre-labeled panels, a modular system, hidden wire management and integrated LED lighting mean the hard decisions are made in the design, and the weekend is about assembly. That is how you get a high-end look at a fraction of what a custom build costs, without hiring a contractor for the whole job.
Our advice: choose your finish and fireplace first, confirm the TV mount location, and treat blocking and ventilation as non-negotiable. Do those and a first-timer can finish with a wall that looks like it was designed by a pro.
Jake
Get a kit or a design for your weekend
If you want the weekend to go as planned, start with the parts that remove the guesswork. Our media wall kits come with pre-cut, pre-labeled panels, floating cabinetry, slat accents and options for LED lighting and fireplaces, in multiple finishes. Browse them in our DIY media wall kit shop.
Not sure about layout or fit? Our design packages start at $99 for a Single Concept Design, and on the Bay Area side, we also offer white-glove installation. See how it works for the DIY and custom paths. For more on the weekend approach, read our DIY media wall build guide.
FAQ
Can you really build a media wall in a weekend?
Yes, if the design is finished before you start and the scope fits two days. Paint, shelves, slat panels and a pre-cut kit are realistic. A framed wall with drywall and a fireplace is tight because of compound drying time, so begin on Friday evening.
How much does a weekend media wall cost?
It depends on the finish and whether you add a fireplace. Published DIY guides range from about $100 to $300 for a simple wall to $600 to $2,500 for a weekend fireplace build. Slat paneling and stone push the total up.
How high should the TV go on a media wall?
Mark the screen center at seated eye level, typically 40 to 42 inches from the floor according to this layout guide. If a fireplace sits below, check the manufacturer's heat clearance first, since that can raise the mounting height.
Do I need an electrician?
For new circuits, in-wall power or hardwired fixtures, yes. Plug-in components and low-voltage cabling are more approachable, but check your local code. Stop and call a licensed electrician if you notice sparks, odd sounds, overheating or burned smells.
What is the easiest way to start?
Tape the layout on your wall, measure the TV and decide on the fireplace. Then choose a kit or design package that matches. Our electric fireplaces for media walls are a good place to see what fits your width.
Sources
- Weekend DIY Media Wall with Electric Fireplace
- Entertainment Center Ideas: Media Wall Layouts, Materials and Planning
- DIY Media Wall Build Guide: Costs, Steps, Pitfalls
- Easy DIY Media Wall: How to Build Your Own on a Budget
- What Does a Media Wall Really Cost?
- Build Your Own TV Accent Wall
- How to Build a Media Wall and Desk
- Supplies to Build a Floating Media Console
- Budget-Friendly DIY Media Wall Ideas
- Appliance and Electrical Fire Safety (USFA)
- Home Electrical Safety Checklist (CPSC)
- CPSC Guide to Home Wiring Hazards
- Fireplace and Wood Stove Safety Card (USFA)