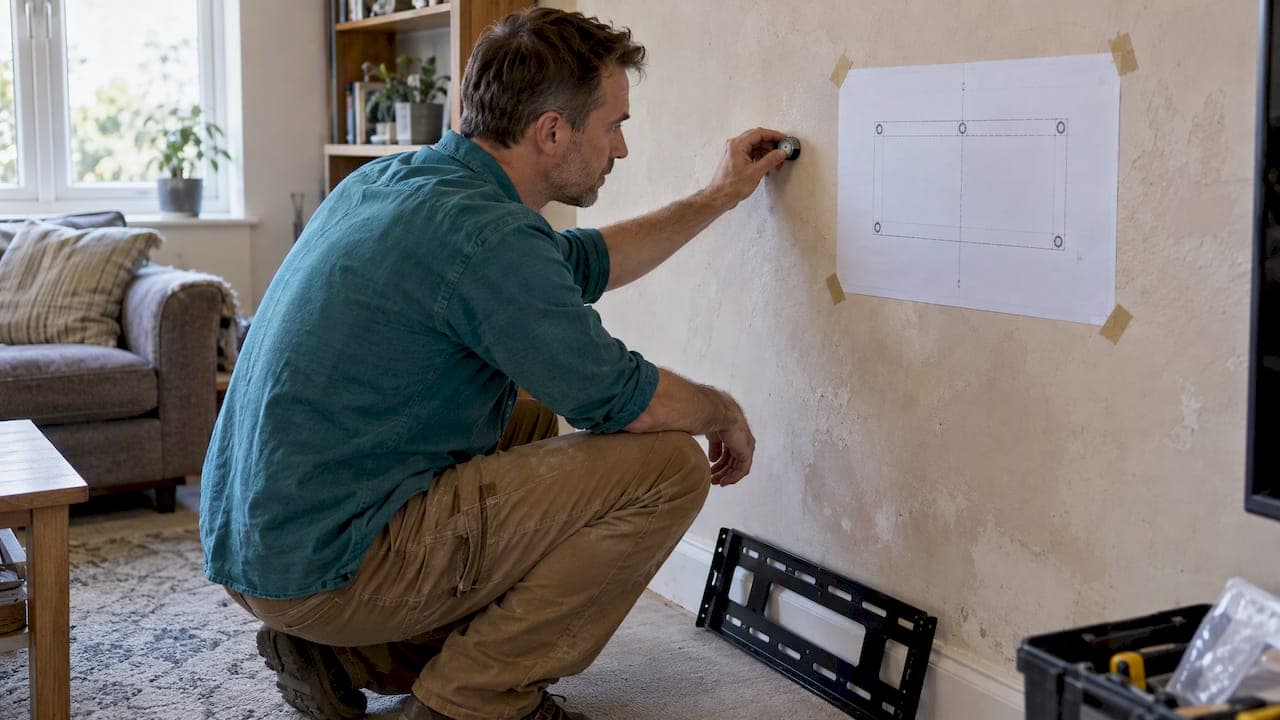
Mount into verified studs or confirmed masonry, never into plaster alone, because plaster is a finish layer with no structural rating of its own. Use lag bolts sized for your TV's weight and pre-drill every hole to avoid cracking the surface. If you cannot confirm a stud behind the plaster, stop drilling and switch to masonry anchors or a different mounting plan before you commit to a spot.
TL;DR:
- Using lag bolts into confirmed studs or masonry anchors is essential to safely support the weight of a mounted TV on plaster walls.
- Relying solely on electronic stud finders is unreliable due to plaster's inconsistent thickness and the presence of lath or repair patches.
- A rare-earth magnet is a highly effective tool for locating vertical lath nails, which indicate stud positions behind plaster.
- Installing the mount with multiple lag bolts across two adjacent studs improves load distribution and reduces stress on individual fasteners.
- If studs or masonry backing are unavailable or unsuitable, mounting on a plywood cleat or hiring professional installation is the safest alternative.
Table of Contents
- Identify your plaster wall type and gather the right tools
- Proven methods to find and verify studs in plaster walls
- Step-by-step: fasten the TV mount into studs
- Safe alternatives when studs are not found or are unsuitable
- How to drill and protect the plaster finish while installing
- Checklist of tests and inspections before you call the job done
- Publisher experience and helpful resources from The Media Wall Store
- Tips for cable management and minimizing wall damage during installation
- Post-installation care and maintenance to ensure long-term stability of the mount on plaster
- When to DIY vs. hire a pro
- How The Media Wall Store can help with kits and installation
- Sources
- FAQ
Identify your plaster wall type and gather the right tools
Plaster walls come in three common builds, and each one changes how you drill and what you fasten into. Older homes typically have plaster over wood lath, thin strips of wood nailed horizontally across studs that hold the plaster coat. Some mid-century homes used metal lath instead, a wire mesh that feels different under the drill and can dull standard bits faster. In brick or block homes, plaster is sometimes applied directly over masonry with no lath at all.
Before you touch a drill, assemble the right kit:
- A rare-earth magnet on a string or in a handheld case, for tracing nail lines
- A stud finder, useful as a secondary check but unreliable on its own with plaster
- A cordless drill with a full bit set, from 1/16 inch up to your final lag bolt size
- Small finish nails or a stiff wire for probing test holes
- A level, a tape measure, and safety glasses with a dust mask
Check your TV's weight against the mount's rated capacity before you buy hardware, and confirm the wall area is clear of pipes, wiring, and heat sources like a fireplace flue.
Pro Tip: Tape a printed VESA template to the wall before you mark anything. It saves you from a second round of test holes if your first stud guess is off by an inch.
Proven methods to find and verify studs in plaster walls
Electronic stud finders frequently misread plaster because the material has inconsistent thickness, old repairs, and a lath layer that confuses the sensor. Older plaster walls are also more likely to use irregular framing than modern homes built on strict 16 inch centers, so assuming even spacing can send you drilling into empty space.
Work through these methods in order:
- Run a rare-earth magnet slowly across the wall to catch the lath nails or screws, which line up vertically over each stud.
- Drill a small test hole (about 1/16 inch) at your suspected stud location and note the resistance and dust color; solid wood feels steady and produces light dust, while lath gaps feel like sudden give.
- Insert a stiff wire or finish nail into the test hole and probe sideways to feel for the stud's edge and estimate its width.
- Repeat two inches to either side to confirm you have found the center of the stud, not just a corner.
A rare-earth magnet is one of the most reliable low-tech ways to locate framing behind plaster, since it detects the metal fasteners holding the lath in place even when electronic sensors fail on plaster over lath.
Step-by-step: fasten the TV mount into studs
Once you've confirmed stud locations, the actual mounting sequence is where most damage happens if you rush it.
- Mark your preferred viewing height and transfer the bracket's hole pattern onto the wall using painter's tape or a printed template.
- Use a level to confirm the bracket will sit straight before you drill anything final.
- Check the bracket's VESA pattern and weight rating against your TV's specs, and follow the manufacturer's mounting instructions for wood-stud installations, since some manuals require the wall to support five times the combined TV-and-mount weight.
- Drill a 1/4 inch pilot hole into the stud center, going slowly through the plaster and lath before reaching solid wood.
- Drive 3/8 inch by 3 inch lag bolts through the bracket and into the stud, using washers under each bolt head to spread pressure across the plaster surface.
- Tighten until the bracket sits snug against the wall without gaps, but stop before the bolt strips the wood or the washer bites into the plaster.
- Aim for at least 1.5 to 2 inches of bolt penetration into solid stud material for a secure hold.
- Attach the TV-side bracket per the mount's instructions, then lift the TV with a second person and engage the hook-and-latch mechanism fully.
- Perform an immediate wiggle test to check for movement before you route any cables.
Pro Tip: Four lag bolts across two adjacent studs, rather than two bolts in one stud, spreads the cantilevered load and reduces stress on any single fastening point.
Safe alternatives when studs are not found or are unsuitable
Sometimes the stud spacing does not line up with your ideal TV position, or the wall behind the plaster turns out to be solid masonry instead of wood framing. In either case, don't force a stud-only solution.
- Confirm masonry backing first, then choose a wedge anchor or sleeve anchor sized for your mount, using a masonry bit matched to the anchor diameter.
- Avoid standard drywall anchors and most toggle bolts for TV mounts, since the cantilevered load from a wall-mounted screen exceeds what those anchors are rated to hold over time.
- Install a plywood cleat or spanning rail across multiple studs or masonry points, then mount the bracket to the cleat instead of the plaster directly.
- Consider a freestanding console or a professional installer when the backing is mixed, unclear, or the TV exceeds what a DIY anchor setup can safely support.
Pro Tip: A half-inch plywood cleat, screwed into at least three studs or masonry anchors, turns a shaky single-point mount into a load spread across a much wider area.
How to drill and protect the plaster finish while installing
Plaster cracks most often when a drill jumps or when someone forces a large bit through the surface too quickly. Start every hole with a small pilot bit, somewhere between 1/16 and 1/8 inch, and only step up to your final bit size once the pilot hole confirms solid backing.
- Skip hammer mode on your drill unless you've confirmed concrete or block behind the plaster; hammer action on fragile plaster tends to spiderweb cracks outward from the hole.
- Pay attention to how the drill feels: steady resistance with fine, pale dust usually means you've hit a wood stud, while a sudden drop in resistance means you've passed through lath into open cavity.
- If the dust turns gray and gritty rather than fine and light, you've likely reached masonry, and it's time to switch to a masonry bit.
- Seat washers flush before final tightening, and stop as soon as the bracket feels snug rather than continuing to crank the bolt, since over-tightening can crush the plaster around the hole even when the stud connection is fine.
Checklist of tests and inspections before you call the job done
A mount that looks secure on day one can still fail if a fastener was slightly off. Run through this sequence before you consider the installation finished.
- Pull and wiggle the TV firmly from multiple angles, checking that the bracket doesn't shift and that bolts remain snug.
- Come back 24 to 48 hours later and recheck the same points, looking for new hairline cracks or any give in the bracket.
- Route cables away from heat sources, and if the TV sits above a fireplace, confirm the manufacturer's clearance recommendations are met.
- If you notice ongoing movement, spreading cracks, or you're unsure whether you hit solid framing, stop and call a professional installer rather than trusting a shaky mount.
Publisher experience and helpful resources from The Media Wall Store
The Media Wall Store designs and installs media walls that regularly involve mounting TVs on plaster, drywall, brick, and slat panel surfaces, and the most common problem during white-glove installs is homeowners discovering mixed backing mid-project, plaster over brick in one spot and open stud bays two feet away.
- Our media wall mount guide covers planning fundamentals that apply across wall types.
- For homes with masonry behind the plaster, our guide to mounting on brick walks through anchor selection.
- Readers who find metal lath or metal studs often need the specifics in our metal stud mounting guide.
- Our stud finder comparison explains which tools work best and where they fall short on plaster.
Tips for cable management and minimizing wall damage during installation
Running cables through a plaster wall means cutting into a surface that's harder to patch invisibly than drywall, so plan your route before you start drilling. If you're routing cables inside the wall cavity, cut your access holes at the top and bottom of the run first, then use a fish tape to pull cables through rather than guessing at a straight path.

Keep your entry and exit holes as small as the cable bundle requires. A slightly oversized hole is easier to drill but harder to patch cleanly in plaster, since the material doesn't feather out the way drywall compound does.
If you'd rather avoid cutting into the wall at all, an external cord cover or a in-wall power kit rated for your local electrical code can hide cables along the surface instead. This is often the better call for rented spaces or plaster walls where you want to avoid any additional holes beyond the mounting points.
Before you drill any cable access hole, double-check it against your stud map from earlier. It's easy to forget where the studs are once you've moved on to the cable stage, and an errant hole in the wrong spot can hit wiring or plumbing you didn't account for.
Post-installation care and maintenance to ensure long-term stability of the mount on plaster
Once the TV is up and the 24 to 48 hour recheck is clear, the mount generally needs very little ongoing attention. Still, a quick inspection every few months catches problems early, before they become a safety issue.
Check bolt tightness twice a year, especially if the TV is on a full-motion arm that gets adjusted often, since repeated movement can gradually loosen fasteners. Look at the plaster around the bracket edges for any new hairline cracks, particularly after seasonal humidity swings, which can cause older plaster to shift slightly.

If you ever notice the bracket pulling away from the wall, even slightly, stop using the full range of motion on an articulating arm and address it immediately rather than waiting. A loose lag bolt in aging plaster can go from a minor wobble to a real hazard faster than the same issue would in solid drywall over studs, simply because the plaster around the hole has less give before it fails outright.
When to DIY vs. hire a pro
If you've confirmed solid studs and you're mounting a mid-size TV, this is a reasonable weekend project for most homeowners with basic tools. Once you're dealing with mixed backing, a heavier TV, or a spot above a fireplace, the margin for error shrinks and the cost of a mistake goes up. A professional installer costs more upfront, but it's cheaper than a cracked wall or a TV that comes down.
— Jake
How The Media Wall Store can help with kits and installation
If tracking down studs in old plaster sounds like more trouble than you want, a pre-built media wall kit sidesteps the guesswork entirely. The Media Wall Store's Media Wall Kits arrive pre-cut and pre-labeled with hidden wire management already planned into the panel layout, so you're following a fixed sequence instead of improvising around whatever is behind your plaster.
- Browse Media Wall Kits and design packages to see current styles and components.
- For plaster walls with tricky or mixed backing, White-Glove Installation puts the drilling and anchoring decisions in experienced hands.
- Pair your kit with fireplaces, lighting, or cabinetry to finish the look in one project.
If you'd rather have a design mapped out before you buy anything, a Full Design & Quote gets you a plan and pricing based on your actual wall.

Sources
- SANUS BLT2 installation manual (excerpt)
- How to Mount a TV on Drywall With Lag Bolts (2026)
- How to Find a Stud in Plaster Walls — The Craftsman Blog
FAQ
Is plaster strong enough to hold a TV?
Plaster alone cannot hold a TV mount safely because it's a finish layer, not a structural material. You need to fasten into the wood studs or masonry behind the plaster, following manufacturer guidance on required backing.
What are the best TV mounts for plaster walls?
The best choice is a full-motion or fixed mount rated for your TV's weight and VESA pattern, installed with lag bolts into studs rather than any anchor designed for drywall alone. Match the mount's weight rating to your TV before buying, since undersized hardware is the most common failure point.
How do you hang a TV on a plaster wall without studs?
If you can't locate a usable stud, confirm whether masonry sits behind the plaster and use a wedge or sleeve anchor rated for that material instead. Another option is installing a plywood cleat across multiple anchor points to spread the load, rather than relying on a single anchor.
How do I find studs in a plaster wall?
A rare-earth magnet dragged across the wall will catch the lath nails that run vertically over each stud, which is often more reliable than an electronic stud finder on plaster surfaces. Small test holes and a wire probe confirm the stud's exact center and width before you commit to final drilling.
Can The Media Wall Store install a TV mount on plaster for me?
Yes, White-Glove Installation covers TV mounting as part of a media wall project, including plaster walls with mixed or uncertain backing. Pricing depends on the scope of the project and is available through a Full Design & Quote.