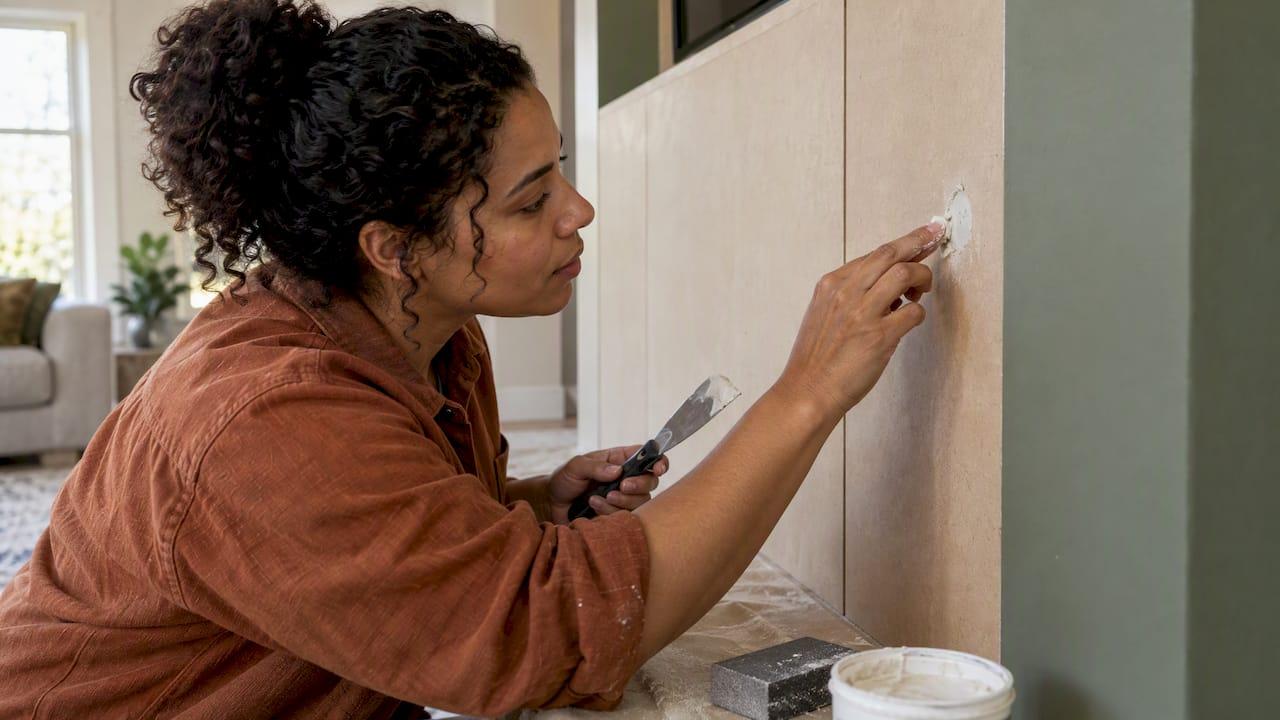
A dent in an MDF panel is usually an easy fix, as long as the board underneath is still solid. You clean the spot, fill the missing material with a paintable filler, sand it flush, seal it with primer and repaint. The one thing that decides everything is the condition of the core: if it is firm, you can repair it in an afternoon. If it is soft, spongy or flaking, no filler will save it and the panel needs to be replaced.
This guide walks through how to tell the difference, which products suit the job, how to fill and sand without leaving a halo, and how to paint so the patch vanishes. We make pre-cut MDF-based media wall kits, so we see dings, chipped corners and scuffed edges all the time, and the steps below are what we would tell a friend.
TL;DR
- Press a fingernail into the dent. If the surface resists, the damage is cosmetic and you can fill it. If it dents easily or crumbles, replace the panel.
- Use a paintable, non-shrinking two-part filler for dents and chips. Epoxy putty works for corners and edges.
- Sand the repair flush, finishing with 180 grit or finer, then spot-prime before you paint. Skipping primer is what makes patches show.
- Wet, swollen, layered MDF cannot be restored. Fix the moisture source and replace the panel.
Table of Contents
- First, decide whether the panel can be repaired
- Materials and tools for the job
- How to fill and sand a dent in MDF
- Prime and paint so the patch disappears
- When water is the problem
- Our perspective: repair the small stuff, replace the rest
- If the damage is bigger than a dent
- Preventing the next dent
- FAQ
- Sources
First, decide whether the panel can be repaired
MDF is wood fibers pressed together with resin. It has no grain, so it takes a repair well when the fibers are still bonded. It fails when those fibers are broken apart or waterlogged. Before you buy anything, spend five minutes on inspection.
Start by identifying the kind of damage. A dent, a chipped corner or a gouged edge is a missing-material problem, and filler solves missing-material problems. A large crack or break through a section that carries load is another matter. Furniture World Magazine's guidance is that large broken or cracked MDF sections that provide support are generally not repairable, while crushed corners can sometimes be rebuilt with bonding materials and color touch-up, once the piece has been inspected.
The fingernail test
The most useful check costs nothing. Dr. Cabinet's assessment guidance says to feel whether the damaged area is firm or soft. Solid MDF resists a fingernail. Warning signs of a deteriorating core include:
- the surface denting easily under light pressure
- a dull sound when you tap it
- fuzzy, lifted fibers
- powdering at the edge of the damage
- sponginess that persists after the panel has dried
If you see those signs, replacement is usually the safer choice once the core breaks apart. The same press test appears in other repair guidance: if the material crumbles or dents easily, the fibers have lost their bond and the panel should go.
Cosmetic versus structural
A simple rule works well for wall panels and cabinet faces:
| What you see | Likely cause | Repair or replace |
|---|---|---|
| Shallow dent, surface firm | Impact from a toy, chair or furniture | Repair with filler |
| Chipped corner or edge | Knock during moving or install | Repair with filler or epoxy putty |
| Scratch through the paint only | Surface wear | Touch-up, no filler needed |
| Soft, puffy, layered edge | Water exposure | Replace |
| Crack running through a supporting section | Overload or major impact | Replace |
Appearance alone does not settle the question. NC State Extension notes that the decision also depends on the extent of the damage, the value of the piece, restoration cost and the risk of further swelling or delamination. For a single wall panel, that usually means: if the repair is small and the core is sound, fix it. If you would be fighting the board, order a new one.
For scratches without a dent, our scratch repair guide for media wall panels covers how visible a flaw really is from normal viewing distance, which can save you from over-repairing.
Materials and tools for the job
You do not need much. The right filler matters more than the long tool list.
Filler. For larger, non-structural repairs, 3M's Bondo Wood Filler is a two-part, non-shrinking, paintable filler. Two-part fillers cure by chemical reaction, so they do not sink as they dry, which is what you want in a dent that will be painted.
Epoxy putty. For chipped corners and edge gouges, epoxy putty can be sanded, drilled and tapped, which makes it handy where a screw or hinge will sit near the damage.
Adhesive for loose pieces. If a veneer edge or a small flap has lifted rather than gone missing, Titebond says its Instant Bond two-part adhesive is designed for wood and wood products, sets in 5 to 15 seconds and reaches initial cure in 30 to 60 seconds. Follow the safety instructions on the label.
Everything else:
- 80, 180 and 220 grit sandpaper plus a sanding block
- a flexible plastic spreader or putty knife
- a clean, non-porous mixing surface such as a scrap of plastic or glass
- tack cloth or a barely damp rag, plus a vacuum
- wood primer, ideally a stain-blocking or solvent-based type for raw edges
- paint matched to your existing finish and a small foam roller or brush
- painter's tape and a drop cloth
One principle from the 3M guidance is worth remembering: filler can rebuild missing material only where a clean, solid substrate remains. Loose, rotten or weakened material has to be removed first.
How to fill and sand a dent in MDF
This is the core procedure. Work in a ventilated space, and wear a dust mask and eye protection while sanding. MDF dust is fine and gets everywhere.
Step 1: Clean and cut back the damage
Wipe the area to remove dust, grease and cleaner residue. Then sand the dent and a little of the surrounding surface with 80 grit. 3M's directions call for sanding away coatings and any loose or rotted material so the filler bonds to clean material, then removing the dust.
If you are repairing a corner, trim away any crushed, fuzzy fibers with a sharp knife until you reach firm board. Test with your fingernail again. If you keep finding soft material deeper down, stop and reconsider replacement.
Step 2: Mix and apply the filler
Mix the filler on a clean, non-porous surface, following the label ratio. Work quickly: 3M states the Bondo Wood Filler has a working time of about 3 to 4 minutes. Mix only what you can place in that window, especially on a warm day.
Spread a thin first layer with firm pressure so it presses into the dent and bites into the fibers. Add further layers as needed instead of one thick slab. Leave the filler slightly proud of the surface, because you will sand it back.
Step 3: Let it cure
The same product page says to allow about 20 minutes of cure before rough shaping, and the filler can be painted or stained in about 25 minutes under its stated conditions. Cool or humid rooms slow this down, so give it longer if the surface still feels tacky or cool. Other fillers and putties have their own times, so read the label.
Step 4: Sand flush and feather the edge
Rough-shape the patch with 80 grit on a sanding block. A block keeps the surface flat; sanding with only your fingers tends to carve a shallow bowl around the repair. Then move to 180 grit and finer, and feather the edges so the patch blends into the surrounding panel with no step you can feel.
A good check is the palm test. Close your eyes and run your hand across the repair. If you can feel the edge of the filler, keep sanding. If you can feel it with your eyes closed, you will see it once the paint is on, especially under side lighting from a window or LED strip.
Finish by vacuuming the dust and wiping with a tack cloth.
Step 5: Look for pinholes
Hold a light at a low angle across the surface. Tiny pinholes or low spots show up as dark specks. Skim them with a thin coat of filler, let it cure and sand again. This second pass takes ten minutes and is the difference between a repair you know about and one nobody sees.

Prime and paint so the patch disappears
Patches rarely show because of the filler itself. They show because of porosity. Filler and MDF soak up paint differently, so the repaired spot can look dull or glossy compared with the rest, a problem known as flashing. The fix is to spot-prime: after sanding, wipe off the dust and spot-prime so the difference in porosity does not show through. Use a wood primer that seals both the patch and the fibers around it.
Edges need extra care
If the dent is on a cut edge, be careful. Family Handyman's Alex Shoemaker points out that painting MDF depends heavily on edge preparation, and unsealed porous edges can end up looking like rough sandpaper unless you seal them with a solvent-based primer first. Apply the primer in a thin coat, let it dry, then sand lightly with 220 grit before the paint goes on.
Matching the finish
- Prime the repair and a margin around it, then let it dry fully.
- Lightly scuff the primer with fine sandpaper and wipe clean.
- Apply paint in thin coats, with the roller or brush strokes going the same direction as the existing finish.
- Feather each coat outward past the repair, a little farther each time, so there is no hard line.
- For a panel you can remove, painting the whole face usually gives a better match than spot painting, especially on aged paint that has shifted in color.
If your panel has a factory finish such as a wood-grain laminate or a textured color, a filler-and-paint repair will not reproduce the pattern. In that case, a color-matched touch-up marker or wax stick may hide a small chip better than paint. Before you apply any cleaner or touch-up product to a finished surface, try it on a hidden spot first, as we explain in our guide to cleaning wall panels.
When water is the problem
A dent from an impact and a swollen edge from moisture look similar at first, but they are different problems. MDF cores swell on contact with water. NC State Extension warns that MDF and particleboard cores swell and can make veneered seams come apart.
Soft, spongy or layered? Replace it. Water damage that leaves MDF soft, spongy or layered means the core is gone, and filler cannot restore its strength. Patching a wet or soft core is also a bad bet, because the repair can bubble, crack or sink.
Only damp, and still firm? Act quickly. EPA guidance says wood surfaces should have moisture removed immediately and be dried with dehumidifiers, gentle heat and fans. After the panel is fully dry, do the fingernail test again. If it passes and the swelling is minor, you can sand and fill. If the edge is still puffy or the fibers are fuzzy, replace the piece.
Find and fix the leak, spill zone or humidity source before you replace anything, or the new panel will fail the same way.
What about a bowed panel?
A bowed MDF board is rarely a cosmetic issue. Bowing usually points to uneven moisture or poor support, and filler does nothing for it. Check that the panel is fully supported along its length and that no damp wall is behind it. If it stays curved once it is dry and properly fastened, replace it.
Our perspective: repair the small stuff, replace the rest
We sell pre-cut, pre-labeled media wall kits, and our customers install them over a weekend. That means dents usually happen at one of two moments: during installation, when a panel gets knocked against a stud or a toolbox, and a few years later, when a vacuum, a toy or a TV mount leaves a ding.
Our view is simple. Repair is the right answer for any dent where the core is still hard, and it is often better than most people expect. A well-sanded, well-primed patch on a painted surface is invisible at normal viewing distance. The mistakes we see are almost always the same: filler piled on in a thick glob, sanding with a bare hand, and skipping primer.

The other half of our advice is knowing when to stop. Because our kits are modular and pre-cut, replacing a single damaged panel is far less dramatic than rebuilding a custom wall. If the board is soft, swollen or cracked through, put in a new one rather than stacking fixes on a bad core. A repair that fails in six months costs you more than a panel.
Finally, plan the install to avoid the problem. Keep panels dry and flat before hanging, seal cut edges, and handle corners carefully. Our guide to hiding seams in TV wall panels covers filling and finishing joints, which uses many of the same skills as the dent repair above.
— Jake
If the damage is bigger than a dent
Sometimes a dent is the visible part of a larger problem: a wall that was never designed around the TV, a corner that keeps getting hit, or a panel layout that no longer suits the room. If you are weighing a bigger fix, our design packages are available for a one-off fee: Single Concept Design at $99, 3 Concepts + Revision Design Package at $199, and Full Design & Quote at $299. If you would rather not do the work yourself in the SF Bay Area, ask about white-glove installation.
Preventing the next dent
Most wall panel damage is avoidable with a few habits:
- Pad the risk zones. Corners and the lower 3 feet of any wall take the knocks. Felt bumpers on furniture and a rug under a TV console help.
- Seal everything. Cut edges and screw holes are where moisture gets in. Prime and paint them, not only the face.
- Control humidity. Keep the room from staying damp, and wipe spills quickly.
- Choose your finish with use in mind. Durability depends on more than the paint. Our article on wall panel durability looks at what finishes protect against, and our comparison of wall panels versus paint helps if you are deciding between the two for a high-traffic room.
- Keep a touch-up kit. Save a small amount of your paint, a sanding block and a bit of filler in a labeled box. A ten-minute fix beats a visible blemish that you live with for a year.
FAQ
How do you fix chipped MDF?
Clean the chip, sand away any loose fibers with 80 grit, and fill it with a paintable wood filler or epoxy putty. Let it cure, sand it flush, then prime and paint. For corners and edges, epoxy putty gives a harder repair that can be sanded and even drilled.
Is MDF ruined if it gets wet?
Not always, but it often is. MDF cores swell when they absorb water, and the swelling does not reverse. If the panel dries quickly and the surface stays firm under a fingernail, you may be able to sand and refinish it. If it is soft, spongy or layered, replace it.
Can you repair a dent in MDF without filler?
Only very shallow marks in the paint can be hidden without it. A true dent is missing or compressed material, so filler is what rebuilds the surface. Unlike solid wood, MDF does not respond to steaming, so plan on filling, sanding and priming.
How long should I wait before sanding and painting?
It depends on the product. For 3M's Bondo Wood Filler, the manufacturer says to cure it about 20 minutes before shaping, and it can be painted in about 25 minutes under its stated conditions. Cool or humid rooms take longer, so check the label and make sure the surface is hard before sanding.
When should I replace a dented MDF panel instead of repairing it?
Replace it when the core is soft, crumbling, swollen or cracked through a supporting section. Also replace it if the dent keeps flaking away as you sand. If the material under the dent is firm, repairing is faster and cheaper.
Sources
- When To Repair Furniture, When To Move To Clearance (Furniture World Magazine)
- MDF Board Repair: Practical Fixes for Swelling (Dr. Cabinet)
- Can MDF Be Repaired? Swelling, Chips and Stripped Screw Holes
- Flood-Damaged Furniture (NC State Extension)
- Bondo Wood Filler (3M United States)
- Instant Bond two-part adhesive (Titebond)
- 10 Tips for Using MDF Wood (Family Handyman)
- MDF board repair guide
- EPA mold remediation guidance, Table 1