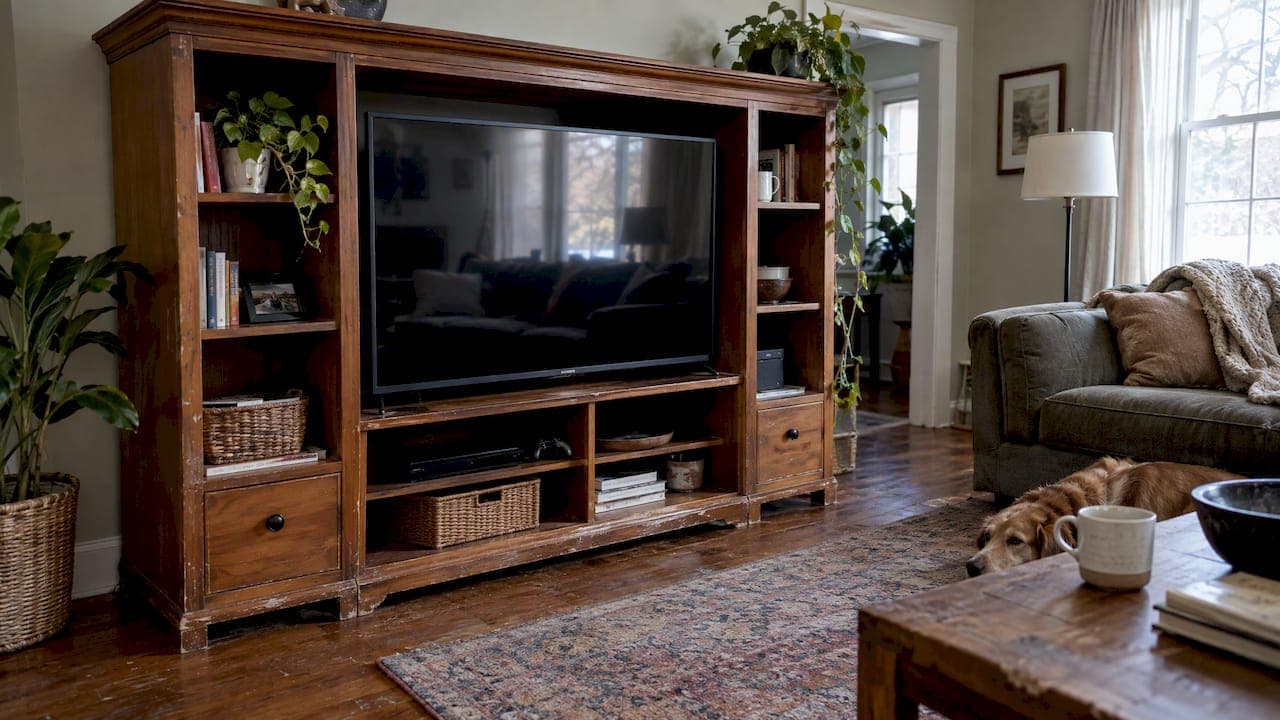
You can upgrade an old entertainment center in three ways: refresh it with paint, hardware and new openings, rework it to hold a flat screen, or replace it with a wall-mounted media wall. The right choice depends on how much of the unit is still solid, how big your TV is, and whether the piece still suits the room. Below we walk through each path, with costs, safety checks and the mistakes that cause the most regret.
TL;DR
- Solid wood or good laminate with a sturdy frame is worth refreshing. Sagging shelves, swollen particleboard or a deep CRT cavity usually are not.
- A paint-and-hardware makeover can run about $150 to $300, according to one published roundup of DIY projects.
- Anchor any unit that stays standing, and wall-mount the TV where you can. The CPSC's Anchor It campaign explains why.
- Plan screen height and cable routes before you touch a tool.
- If the old piece fights the room, a pre-cut media wall kit can be a faster route than a rebuild.
Table of Contents
- First, decide: keep it, rework it or replace it
- What a refresh really costs
- Step-by-step: refresh a sturdy unit
- Retrofitting the opening for a flat screen
- Safety first: anchoring and kids
- Hide the cables the right way
- If there's a fireplace
- Styling the finished wall
- Our perspective: when the old unit is the problem
- When a media wall kit makes more sense
- Not sure which way to go? Get a design first
- A simple weekend plan
- FAQ
- Sources
First, decide: keep it, rework it or replace it
Before you buy a gallon of paint, spend twenty minutes judging the piece honestly.
Keep and refresh if the cabinet is solid wood or well-made laminate, the shelves don't bow, the back panel is intact, and the proportions still fit your wall. Cosmetic work gives the best return here.
Rework if the structure is good but the layout is wrong. The classic example is a 1990s wall unit with a deep, boxy opening built for a CRT. A flat screen sits lost in that cavity, with dead space behind and around it.
Replace if you find any of these:
- Particleboard that has swelled at the edges or around the base
- Shelves that sag under books or a soundbar
- Doors that no longer hang square
- A bulky footprint that eats a quarter of the room
- A TV that is already larger than the unit was designed for
Here is a quick comparison.
| Path | Typical effort | Best for | Watch out for |
|---|---|---|---|
| Paint, hardware, new door fronts | A weekend or two | Sturdy units with good proportions | Hides wear, not weak structure |
| Rework the opening, add backing and lighting | Several weekends | Built-ins and wall units with a CRT cavity | Cutting without a plan for cables and ventilation |
| Replace with a wall-mounted media wall | A weekend with a pre-cut kit | Rooms where the old unit dominates | Planning stud locations and power first |
What a refresh really costs
A makeover does not need to be expensive. The Tennessean's roundup of reader projects points to DIY makeovers as low as $150 to $300 when the work relies on paint, new hardware and repurposed elements such as mirror or laminate sheeting. The same article describes a 2018 project that turned a massive wall unit into a modern cabinetry bank for $266. These are older figures, so expect paint and lumber to cost more today. Treat them as a sense of scale, not a quote.
There is also an environmental angle. EPA data cited by Architectural Digest shows roughly 12 million tons of furniture and furnishings were discarded in 2018, with wood the largest material. Keeping a sound piece out of the landfill is a fair reason to refresh rather than replace.
Step-by-step: refresh a sturdy unit

1. Empty it and inspect
Take everything out, including the back panel if it comes off. Check the joints, the base and every shelf. Press on the shelf centers. If you can feel flex, add a front stiffener or plan to replace that shelf.
2. Remove what dates it
Doors on the center section are the first thing to go in most successful makeovers. Removing them creates open shelving for books, baskets and art. Take off crown trim, valances and scalloped details that tie the piece to its decade.
3. Prep properly
Clean with a degreaser, since decades of kitchen air and hand oils will make paint peel. Sand lightly, fill holes, then prime. A bonding primer matters on laminate and glossy finishes. Skipping it is the most common reason a makeover looks tired within a year.
4. Paint the inside a different tone
A darker or richer interior color makes a bookcase look custom. A deep green, charcoal or warm greige against a lighter exterior gives depth, and it makes books and objects stand out.
5. Swap the hardware
New pulls are the cheapest upgrade you can make. Matte black, brushed brass and chrome all look current. Match the hole spacing to avoid drilling new holes.
6. Add light
Plug-in or low-voltage LED strips under shelves turn a flat cabinet into a feature. Keep wiring tidy, and keep strips away from heat sources. If you want to see how lighting is handled on purpose-built units, our media wall lighting selection shows the options.
Retrofitting the opening for a flat screen
This is where most old entertainment centers fail. The opening is too deep, too short or too narrow, and the TV ends up recessed and hard to see from the side.
You have three realistic options:
- Remove the shelf and back panel of the center bay, fit a plywood backing board, and wall-mount the TV flush. This works when the unit is a built-in against a wall.
- Turn the old TV bay into display or storage and mount the TV on the wall above or beside the unit. Many people find this the simplest fix for a 90s wall unit.
- Cut the unit down. Some owners remove side supports and reattach the top to lower the whole piece. It is more carpentry, so only do it if you trust your saw work.
Whichever you choose, avoid putting a heavy modern set on a cabinet shelf that was built for a lighter TV. The CPSC says televisions should only sit on furniture designed to hold a television, such as stands or media centers, and that sets which are not wall mounted should still be anchored to the wall.
Get the screen height right
The most common pitfall is not planning screen height relative to seating. The center of the screen should sit near seated eye level, typically around 42 inches from the floor, and the same guide suggests testing with painters' tape on the wall before drilling. That matters most over a fireplace, where the TV often ends up too high. Our guides on measuring eye height for a TV wall and the right TV mounting height walk through the formula and a paper template.

Mount into something solid
Drywall alone will not carry a TV. Installers warn that using the wrong hardware or missing the center of the stud can lead to failure, sometimes weeks after the job looked fine. For built-ins, plywood backing or wood blocking across the whole TV zone lets the mount lag into solid wood. That source also says heavy screens and full-motion mounts add leverage, so screens over 55 inches call for professional reinforcement. If you are unsure, hire a pro for this one step.
Safety first: anchoring and kids
Old entertainment centers are often top-heavy, especially once you remove the doors and load one side. The CPSC reports that tip-overs from 2000 to 2021 involved 482 fatalities, 81% of them children under 10. That is the reason to anchor every tall unit to a stud, whether or not the TV is on it.
If children live in or visit your home, wall-mounting the TV is the safer layout. Consumer Reports notes that a properly installed mount, lag-bolted to studs or a heavy crossbeam, keeps the TV secure and high enough that young children can't grab it. We cover the design side in our kid-safe TV wall guide.
Hide the cables the right way
Modern gear needs power, HDMI and often a streaming box. A tidy result is not about stuffing cords into the wall.
The National Electrical Code does not allow standard flexible power cords to be concealed inside wall cavities (NEC 400.12). The compliant routes are an in-wall power relocation kit using UL-rated cable, or a licensed electrician installing a recessed outlet behind the TV. When in-wall routing is impossible, as with brick, a surface raceway is a code-friendly alternative that typically costs $20 to $40, per the same source.
Inside the cabinet, give electronics room to breathe. Cable boxes and consoles run warm, and a closed cabinet traps heat. Two of our guides cover this directly: how to hide a cable box without blocking remotes or overheating and storage ideas that don't trap heat.
If there's a fireplace
A fireplace complicates everything. Manufacturers often specify minimum clearances, commonly 8 to 12 inches from the top of the firebox glass to the bottom of the TV, and an infrared thermometer test after 45 to 60 minutes of operation shows whether the wall above runs too hot. Check your fireplace manual before you finalize any mount, and follow the manufacturer's installation instructions for any electric insert.
Styling the finished wall
Once the structure works, style is what makes it feel intentional. Keep a clear ratio: one-third closed storage, one-third open display, one-third breathing space. Use lighting at two levels, a soft shelf wash plus a lamp in the room. For ideas on sculptural accents and lamps that match a modern look, this guide to modern interior decor examples is a useful reference, and our own decor ideas for a TV wall cover ten upgrades that work around a mounted screen.
Our perspective: when the old unit is the problem
We sell DIY media wall kits, so we see the same story often. Someone spends two weekends painting a unit they never loved, and the TV still looks stuck inside a box. Our view is simple.
If the piece is solid and the proportions work, refresh it. It is cheap, it is satisfying, and it keeps good furniture in use. But if you are cutting into the unit, adding backing boards, rerouting power and buying lighting anyway, you are already doing most of the work of a media wall, with less predictable results.
That is the point of a pre-cut, pre-labeled kit. Panels arrive sized and numbered, with floating cabinetry, slat accent panels and hidden wire management designed into the system, so a weekend install is realistic for a confident DIYer. The look is high-end because the engineering is done before the box ships. Whichever route you pick, anchor the structure and plan the cables first. Those two decisions matter more than any paint color.
— Jake
When a media wall kit makes more sense
A kit suits you if your old unit has no salvageable structure, if you want the TV mounted flush with hidden wiring, or if you want a fireplace in the plan. A few places to look:
- Floating console with slat wall and display tower: The Monaco Luxury Media Wall Kit is built as a complete system.
- Fireplace-ready stands: the Breckenridge 70" floating fireplace TV stand is wall mounted with an electric fireplace, and the 70" distressed white electric fireplace TV stand is a linear insert option with a walnut shelf.
- Accent panels: an acoustic slat wall panel in red walnut adds texture behind a screen.
- Finishing touches: hardware in brass, chrome or matte black lets you match the new look to what you already own.
For layouts and budgets, see our media wall ideas and home theater wall ideas.
Not sure which way to go? Get a design first
If you can't decide between refreshing and replacing, a design plan settles it before you spend on materials. We offer a Single Concept Design for $99, a 3 Concepts + Revision Design Package for $199, and a Full Design & Quote for $299, all one-off. In the SF Bay Area we also offer white-glove installation, and you can see how DIY kits and custom installs work on our How It Works page. Our kits ship nationwide and come with expert support and risk-free returns.
A simple weekend plan
- Friday evening: Measure the wall, mark stud locations, and tape the TV outline at seated eye level.
- Saturday morning: Decide keep, rework or replace. Order backing lumber, outlet kit or raceway, and anchors.
- Saturday afternoon: Empty, strip and prep the unit, or remove it if you're replacing it.
- Sunday: Install backing, mount the TV, route power and signal cables, then style the shelves.
Anchor everything before you load it.
FAQ
Can I put a flat-screen TV in an old entertainment center?
Yes, if the unit is sturdy and designed for a television, and the TV is anchored to the wall behind it. Many old units have a deep opening built for a CRT, so a flat screen often looks better wall-mounted above or in front of the opening. Check the shelf load rating before placing anything heavy on it.
How much does it cost to update an old entertainment center?
One published roundup of DIY projects cites makeovers from about $150 to $300, using paint, hardware and repurposed materials. Those figures date from 2018, so budget more for current materials. Adding backing, outlets and lighting raises the total.
Should I anchor an old entertainment center to the wall?
Yes. The CPSC advises anchoring furniture and TVs to prevent tip-overs, which are most dangerous for young children. Use a stud for the anchor, and wall-mount the TV where possible.
Can I hide the TV power cord inside the wall?
Not with a standard cord. The code prohibits concealing flexible power cords in wall cavities, so use a listed in-wall power relocation kit or have a licensed electrician add a recessed outlet. A surface raceway is the simple option where you can't open the wall.
When is replacing better than refreshing?
Replace when the structure is weak, the unit swallows the room, or you would need heavy rework to fit a modern TV. At that point a pre-cut media wall kit is often faster and cleaner than rebuilding the old piece.
Sources
- AnchorIt.gov, U.S. Consumer Product Safety Commission
- TV Tip-Overs Put Children in Danger, Consumer Reports
- 13 Clever New Uses for Old Entertainment Centers, The Tennessean
- Repurposed furniture ideas, Architectural Digest
- Home Media Wall Setup, Data Wire Solutions
- TV Mounting Tips: Professional Install Steps, Entertainment Pros
- The Complete Homeowner's Guide to TV Mounting, TV Mount Men
- How to Hide HDMI and Power Cables, Express Mounting