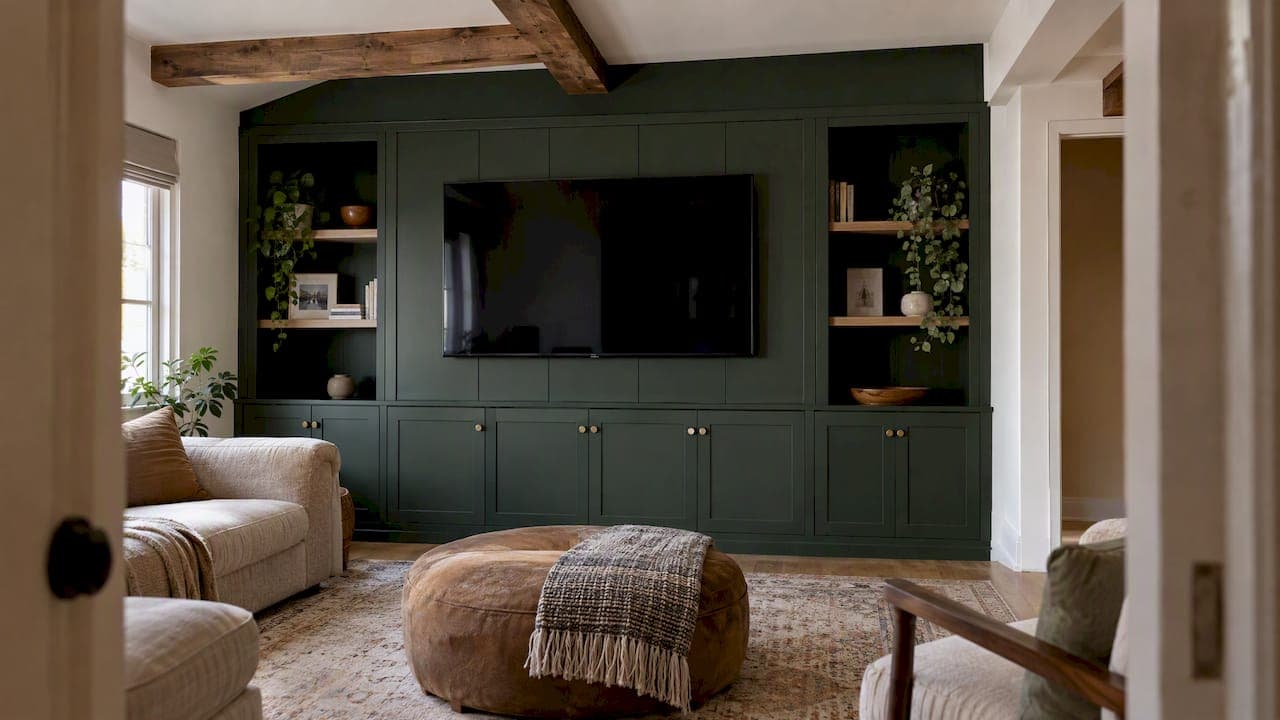
A plug and play TV wall is a TV setup you can put together yourself, without an electrician, and finish with the cords out of sight. In practice it combines two things: a pre-cut, labeled panel system that gives the wall its look, and a code-safe way to route power and signal cables. You can do the first in a weekend. The second has firm rules, and we cover them below so your wall looks great and stays safe.
TL;DR
- "Plug and play" means no hard-wiring and no electrician for the standard DIY path: pre-cut panels, labeled parts and a power-and-cable kit that hides cords in the wall.
- Never run a regular power cord or extension cord inside a wall. Use a purpose-made in-wall power kit, or have a licensed electrician add an outlet behind the TV.
- Before you buy, check the TV's size and VESA pattern, the stud layout, your viewing distance and where heat can escape.
- Professional TV mounting alone typically runs $100 to $300 in the US, so a kit you assemble yourself gives you the finished look and keeps the labor bill down.
- Not sure about your wall? Our design packages start at $99, and white-glove installation is available in the SF Bay Area.
Table of Contents
- What a plug and play TV wall actually is
- Plug and play wall vs. a TV mount vs. a custom build
- Step 1: Check your TV, room and wall
- Step 2: Plan power and cables the safe way
- Step 3: Install it in a weekend
- What it costs
- When to call a professional
- Our perspective
- Get the look without guessing
- FAQ
- Sources
What a plug and play TV wall actually is
The phrase gets used two ways, and it helps to separate them.
The first is the wiring meaning. A plug-and-play cable kit lets you conceal a TV's power and low-voltage cables, such as HDMI, inside the wall without hard-wiring anything. Legrand's in-wall TV power kit is a good example of the category. It comes with two power grommets on a 54-inch harness, a 6-foot power cord, a hole saw and fish tape, and the maker says no electrician is needed.
The second is the design meaning. A media wall is more than a place to hang a screen. It is a composed feature of the room that pairs the display with storage, cable management and often lighting. A plug-and-play media wall kit takes that look and turns it into parts that arrive cut to size and labeled, so you assemble rather than build from raw lumber.
A complete setup uses both: a finished wall treatment, and a clean power and cable path behind the TV.

Plug and play wall vs. a TV mount vs. a custom build
The three options solve different problems.
| TV mount only | Plug-and-play media wall kit | Custom-built media wall | |
|---|---|---|---|
| What you get | A bracket holding the TV | Panels, trim, lighting and storage options in a designed system | A one-off carpentry project |
| Cable handling | Cords visible unless you add a kit | Wire management planned into the design | Planned by the builder |
| Who installs | You or a mounting pro | You, over a weekend, or an installer | Contractors |
| Look | Functional | Finished, high-end | Fully bespoke |
| Typical trade-off | Wires and a bare wall | Pick from a curated range of designs and finishes | Long timelines and high customization costs |
A mount is the right answer when you only need the TV on the wall. When you want the room to look designed, a kit gets you the architectural result without the lead time of a custom build. That is the gap we built our kits to fill: premium materials and pre-engineered panels, so the job is assembly rather than carpentry.
If you are still deciding on hardware, our media wall mount guide walks through bracket types and when each one fits.
Step 1: Check your TV, room and wall
Do this before anything ships. Ten minutes with a tape measure prevents most returns and redo work.
Screen size and viewing distance
A common rule of thumb is to sit 1.5 to 2.5 times the screen diagonal from the TV, according to a home-improvement contractor's media wall guide. For a 65-inch TV, that is roughly 8 to 13.5 feet. If your sofa sits closer or farther than that, it affects which screen size and wall design makes sense.

Mount compatibility and the wall itself
Match the bracket to the TV's size, weight and VESA pattern. Then treat the wall as a separate question. A bracket can fit the TV perfectly and still be wrong if the wall and fasteners cannot carry the load.
Studs in most US homes are spaced 16 inches on center, but never assume. Find them with a stud finder, and see our pick in the best stud finder for TV mounting. Your wall type changes the method:
- Drywall: anchor into studs first. Our guide to mounting a TV on drywall covers stud-first and studless methods.
- Plaster: it needs a different approach, with test holes and care around the lath. See mounting a TV on plaster.
- Masonry, brick or concrete: this is where a professional is often the better call, as costs for difficult masonry installs run higher.
Ventilation
If you plan to tuck a streaming box, receiver or console into the wall, leave air space. Heat is the quiet enemy of built-in setups. Our guide to media wall storage that doesn't trap heat shows layouts that keep gear cool, and if you want a streamer out of sight, see how to hide an Apple TV in a media wall with enough slack and airflow.
Quick measurement checklist
- TV diagonal, weight and VESA pattern.
- Wall width and ceiling height, so the panel layout fits the space.
- Stud positions, marked with painter's tape.
- Distance from the TV location to the nearest outlet.
- Where each device (soundbar, console, streamer) will live.
- Any pipes or wires in the wall, checked with a detector before drilling.
Step 2: Plan power and cables the safe way
This is the part that decides whether your wall is truly plug and play or a hazard.
The one rule that matters
Do not run a standard power cord or extension cord inside a wall. Those cords are not built for a closed, uncooled cavity. The Electrical Safety Foundation International says extension cords are a temporary solution and should not be used long term or inside walls.
The safe options are:
- An in-wall power kit made for this purpose, which gives you a recessed outlet behind the TV and a short inlet near the floor, so no cord ever goes through the wall. This is the plug-and-play route.
- A new outlet installed by a licensed electrician behind the TV location. Anything that involves new outlets or routing line-voltage wiring inside the wall belongs to a licensed professional.
The National Electrical Code sets the minimum requirements for safe electrical installations, and it is revised every three years. Local rules can add to it, so check with your city or county building department if you are unsure whether a permit applies.
Low-voltage cables
HDMI, Ethernet and speaker wire carry little power, but cables that run inside walls should be rated for in-wall use. In-wall-rated cable is marked CL2 or CL3. Buy cable labeled that way rather than reusing the cable that came in the TV box.
For more on routing, see our guides on hiding TV wires in the wall safely and on hiding wires from a mounted TV without cutting walls. If you want a comparison of cable products, our wire management kit roundup covers what works behind a luxury wall.
Plan the slack
Leave a few inches of slack at the TV and at every device. You will want to pull a box out someday, and a taut cable is how a connector gets damaged. Label both ends of each cable before it goes behind the panel.
Step 3: Install it in a weekend
The time it takes depends on the wall and the design, so treat this as a realistic sequence rather than a promise. In-wall power kits themselves are quick: Legrand describes its kit as a DIY install of under 30 minutes, with the hole saw and fish tape included. The panel build is what fills the weekend.
Saturday: prep and structure
- Clear and mark. Remove furniture, mark studs, and mark the TV center height. A common starting point is the center of the screen at seated eye level.
- Rough in the cable path. Cut the openings for the power kit and cable passage using the included template or hole saw. Fish the low-voltage cable through. Install the kit according to its instructions.
- Install the backing and mount. Anchor the bracket into studs, and add blocking if the TV sits between studs. Confirm it is level before mounting the TV.
- Test everything. Hang the TV, plug in your devices and confirm picture and sound before panels cover anything.
Sunday: panels, lighting and finishing
- Dry-fit the panels. With pre-cut, pre-labeled panels, lay out the sections against the wall in order and check the reveals.
- Fasten and align. Work from a level starting line, one labeled section at a time.
- Add lighting and shelves. Integrated LED strips and floating shelves go on last, with the driver and power route planned in advance.
- Finish the edges. Add trim, caulk gaps and touch up paint or finish.
Tools you will probably need
- Stud finder and 4-foot level
- Drill/driver and a hole saw (often included with in-wall kits)
- Fish tape or a pull string
- Tape measure, pencil and painter's tape
- A helper for lifting the TV
What it costs
Here is what we can say with sources behind it. A professional TV mount installation typically costs $100 to $300 in the US, with a national average of about $200 according to Fixr's 2025 cost guide, and difficult masonry jobs run higher. That covers mounting only, with no panels, lighting or storage.
A full custom media wall adds carpentry, finishing and design time on top. Our kits are priced well below a custom build, and you can see current kit options in our shop. If you want help choosing, our design services are priced up front:
| Design service | Price |
|---|---|
| Single Concept Design | $99 |
| 3 Concepts + Revision Design Package | $199 |
| Full Design & Quote | $299 |
DIY savings come from your own labor. Set a small buffer for the extras: an in-wall power kit, in-wall-rated cable, paint or caulk, and a stud finder if you don't own one.
When to call a professional
DIY is a great fit for most drywall walls. Bring in help when:
- You need a new outlet or any change to the home's line-voltage wiring. That is a job for a licensed electrician.
- The wall is brick, concrete or other masonry.
- The TV is very large or heavy, and you don't have a second person to lift it.
- You find pipes or wiring where you planned to cut.
- You are unsure about stud location or the load the wall can carry.
A failed install can cost more than it saves: a dropped TV or a damaged wall is far more expensive than a mounting visit. If any of the points above applies to you, it is cheaper to ask first.
Our perspective
We built The Media Wall Store around a simple observation: most people don't want a construction project, they want the finished room. A TV on a bare wall with a cord hanging down is not what they pictured, and a fully custom build is slower and costs far more than it needs to.
That is why we pre-cut and pre-label every panel and design the wire management into the system from the start. When the cable path is planned before the first panel goes up, the wall looks intentional and stays serviceable. You can reach the hidden wiring, leave slack for new devices and keep air moving behind the gear.
Our advice is to treat the wall and the wiring as two separate jobs. Let the kit handle the look, and handle power the way the code expects: a purpose-made in-wall kit, or a licensed electrician for anything line-voltage. Do that, and a weekend project holds up for years.
Jake
Get the look without guessing
If you want the finished media wall but aren't sure which layout suits your room, start with a design package. We can work from your wall and TV size to produce concepts, revise them, and give you a quote you can build from. Browse the Custom Media Wall Designs or see how it works for both DIY kits and custom installs.

Prefer to have someone else do the work? We offer white-glove installation in the San Francisco Bay Area, and our kits ship nationwide with risk-free returns. Add finishing pieces like an electric fireplace or hardware in brass, chrome or matte black to complete the room.
FAQ
Is a plug and play TV wall really no-electrician?
For the standard path, yes. An in-wall power kit lets you conceal power and low-voltage cables without hard-wiring, and makers describe it as a DIY job. You still need an electrician for a new outlet or any change to the house's line-voltage wiring.
Can I just run the TV's power cord inside the wall?
No. Standard power cords and extension cords are not made for use inside walls, and electrical safety groups say extension cords should not be used inside walls. Use a purpose-made in-wall power kit or have a licensed electrician install an outlet behind the TV.
How long does installation take?
The cable kit itself can take under 30 minutes. The panel build is the larger part, and with pre-cut, labeled panels most homeowners plan for a weekend. A larger layout, lighting and shelves add time.
What's the difference between a plug-and-play media wall and a TV mount?
A mount only holds the TV. A media wall kit adds the surrounding design: panels, storage, lighting and planned cable management. You can combine them, since the kit's wall treatment goes around a properly anchored mount.
Sources
- Legrand: Flat Screen TV Cord and Cable Power Kit
- Applegate Property Improvement: How to Build a Sleek and Modern Media Wall
- ESFI: Holiday Gift Guide, Protecting Big Ticket Items
- ESFI: The National Electrical Code (NEC)
- Fixr: TV Mount Installation Cost